background image

ENDSS-R4D8 

93 

Setup DVR IP Address 

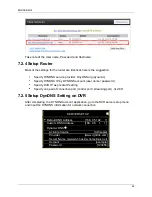
When you find a usable IP address, go back to DVR menu: 

“Network Setup” to enter IP 

address. 


IP ADDRESS: Enter the DVR‟s address [192.168.011.188] 


GATEWAY: Enter Router IP Address[192.168.011.001] 


Subnet MASK: 255.255.255.0 

NOTE 

You must plan on the network structure if the MIS or Network 
Administrator manages the network.  
 
You should consult with the MIS or Network Administrator for the IP 
address segment and port-forwarding rule for the DVR network setup. 

7.2 DynDNS Service Overview 

For  DVR  you  can  only  set  a  static  IP  address.  It  does  not  support  the  dynamic  IP.  If 
you  have  to  or  prefer  to  use  dynamic  IP,  then  it  is  recommended  to  use  a  DYNDNS 
service. 

DYNDNS is a service the maps internet domain names to IP address and works with 
dynamic IP address (assigned by ISP server). 

Remark:

 A router is needed as the interface between PC and DVR when DVR is under 

internal network environment. 

7.2.1 Register to the DynDNS Services 

NOTE 

The following screens are captured from the DYNDS web site at time 
of this writing. Changes might occur by the time you check their site. 

NOTE 

As of this writing, the DYNDS service is free. Contact the DYNDS 
company if the service is still free to make sure, before creating an 
account with them. 

There are three suggestions for DYNDNS service:  

www.no-ip.com

www.changeip.com

 and 

www.dyndns.com


The following will use DYNDNS website: http://www.dyndns.com as example. 

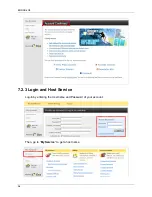
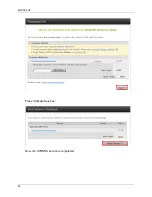
If you have no account, create one when you access DynDNS (DYNDNS service) 
website. 

Содержание ENDSS-R4D8

Страница 1: ...ENDSS R4D8 Digital Surveillance in a Box 8 Channel Digital Video Recorder and 4 CCD Security Cameras with Night Vision User s Manual ...

Страница 2: ...h the instruction manual may cause harmful interference to radio communications Operation of this equipment in a residential area is likely to cause harmful interference in which case the user will be required to correct the interference at his own expense CE This product is marked with the CE symbol and indicates compliance with all applicable directives WEEE DIRECTIVE PRODUCT DISPOSAL At the end...

Страница 3: ...product from the wall outlet before cleaning Do not use liquid cleaners or aerosol cleaners Use a damp cloth Power Cord Protection Power supply cords should not be routed so that they are likely to be walked on or pinched by items placed against them paying particular attention to cords at plugs receptacles and the point where they exit the product Overloading Do not overload wall outlets extensio...

Страница 4: ...adjustment of other controls may result in damage and will often require extensive work by a qualified technician to restore the unit to its normal operation If the unit has been dropped or the enclosure has been damaged When the unit exhibits a distinct change in performance this indicates a need for service Servicing Do not attempt to service this product Opening or removing covers may expose th...

Страница 5: ...e presence of important operating and maintenance servicing instruction in the literature accompanying the product USERS OF THE SYSTEM ARE RESPONSIBLE FOR CHECKING AND COMPLYING WITH ALL FEDERAL STATE AND LOCAL LAWS AND STATUTES COIPCERNING THE MONITORING AND RECORDING OF VIDEO AND AUDIO SIGNALS PANACOM SHALL NOT BE HELD RESPONSIBLE FOR THE USE OF THIS SYSTEM IN VIOLATION OF CURRENT LAWS AND STATU...

Страница 6: ... 1 Turning on the DVR Box 14 3 2 Home Screen 15 3 2 1 State Bar Information 15 3 2 2 Control Bar Information 16 3 2 3 Drag and Drop Channel Swap 17 3 3 Main Menu 18 3 4 Channel Setup 19 3 4 1 Channel Number 19 3 4 2 Basic Settings 20 3 4 3 Standard Color Adjustment 23 3 4 4 Special Color Adjustment 24 3 5 Record Setup 25 3 5 1 Auto Record 25 3 5 2 Activate Performance Gains 25 3 5 3 Record Schedul...

Страница 7: ...ools 64 3 10 1 Format USB Disk 64 3 10 2 Firmware Update 65 3 10 3 Environmental Setting 67 3 11 Exit Main Menu 69 3 11 1 Exit Save Changes 70 3 11 2 Exit Discard Changes 70 4 Playback and Data Backup 71 4 1 Calendar Menu 72 4 2 Play Menu 74 4 3 Event Search 77 4 4 Data Backup 79 5 PTZ Control 81 5 1 Pan Tilt Zoom Control 82 6 System Information 86 6 1 Record Information 87 6 2 Hard Drive Informat...

Страница 8: ...ing the Channel Displays 104 8 1 4 Pause the Viewing 106 8 1 5 Capture Still Image 107 8 1 6 PTZ Control 107 8 1 7 Remote Playback 109 8 1 8 Remote DVR Configuration 114 8 2 Web Browser Viewer 115 8 2 1 Switching the Channel Displays 118 8 2 2 Web Browser Viewer Operation 118 9 SecuViewer For iPhones 119 9 1 Install SecuViewer for iPhones 120 9 2 SecuViewer Interface Overview 121 9 3 Connecting to...

Страница 9: ...ENDSS R4D8 1 Chapter 1 1 Overview ...

Страница 10: ... PTZ control menu 6 REC Start or stop recording backup 7 Power LED green Indicates DVR is powered on 8 MODE Select screen display mode 9 MENU Enter the menu or go back to the previous menu 10 UP Moves up through list or changes selected values 11 DOWN Moves up through list or changes selected values 12 SELECT ENTER Changes values in the menu or enters into a function 13 Hard disk active red Indica...

Страница 11: ...t IR extender connector optional 4 VGA OUT VGA output DB 9 port for the LCD monitor 5 SENSOR Sensor ports marked 1 4 and a common ground marked G 6 ALARM Alarm port Alarm 1 and Alarm 1 7 AUDIO IN and OUT Connectors of audio input and output 8 LAN RJ45 port for the network cable 9 MOUSE Mouse port for USB compatible mouse only 10 DC IN 12V DC power port for the power adaptor 11 RS 485 RS 485 connec...

Страница 12: ...ng of playback 7 FF Fast forward through video 8 PLAY Start video playback 9 MENU Enter a menu or exit 10 UP DOWN LEFT RIGHT Move through lists or change the settings of choices 11 Enter Select Change and confirm values 12 AUTO Start automatic screen view rotation 13 MODE Changes to split screen mode 14 ZOOM OUT Not available in DVR mode 15 ZOOM IN Not available in DVR mode 16 1 2 8 Channels Selec...

Страница 13: ...ENDSS R4D8 5 Chapter 2 2 Installation ...

Страница 14: ...VR contains one internal hard drive bracket for installing one SATA hard drive Follow these steps to install a SATA hard disk drive Step 1 Unscrew the two top screws on both sides of the DVR box housing There are four screws to remove in this step Step 2 Slide the top cover slightly backwards and then lift the cover up Top Cover ...

Страница 15: ... 3 Remove 3 screws to take out the hard drive bracket Step 4 Install the hard drive to the bracket Four screw holes on both sides should lined up together then screw in four screws on both sides Hard Drive No Slot Side ...

Страница 16: ...tep 5 Attach the hard drive s SATA data cable from hard drive to the main board s J16 or J17 jumper connector Step 6 Screw the bracket back to its original position uwing three screws PJ2 connector J16 J17 connector ...

Страница 17: ...8 9 Step 7 Slide top cover back into place Secure with four screws on the both sides 2 2 Sensor and RS485 Connector Installation The images below show how to connect connectors guided by the red arrows Top Cover ...

Страница 18: ...tion Guide Make sure to connect all the peripheral devices properly before switching the DVR power on If you forgot to connect the mouse and the DVR is turned on already make sure to turn the power off connect the mouse before turning the DVR power back on 8 Channel CAT5 Cabling DVR Fix the screws on either side Fix the screws on either side Power Adaptor Network Cable Mouse Security Monitor Camer...

Страница 19: ... the USB mouse to the mouse port labeled as on the DVR This port supports a USB mouse ONLY no other USB devices will work in this port Connect the LCD Monitor Connect the LCD monitor to the VGA output labeled as VGA OUT on the DVR The DVR will transmit the video signal to the LCD monitor through this connection Connect the Sensors Connect the sensor wires to the sensor slots labeled as SENSOR and ...

Страница 20: ...ng through the audio jack on the video Balun Connect the IR Extender Optional Connect the IR extender cable to the port labeled as IR_ext on the DVR The cable is an optional device which serves as an IR controller extension Connect the Power Adaptor Connect the Power Adaptor to the DC jack labeled as DC IN 12V on the DVR Connect the power adaptor after all devices have been properly installed ...

Страница 21: ...13 Chapter 3 3 Getting Started ...

Страница 22: ...er to the conditions stated below to determine which course of action to take Format the hard drive when It is the initial installation of the hard drive 1st time to install the HDD in the DVR Do not format the hard drive when The hard drive has already been formatted by the DVR and not formatted by other devices The Home Screen is shown after the system is ready Release Date May 25 2010 17 33 16 ...

Страница 23: ...setup access and control the surveillance video data You may think of this screen as a vantage point to give you instant access to video information and DVR functions 3 2 1 State Bar Information The State Bar displays the status and notification icons of the surveillance system 1 2010 06 06 15 37 47 1 2010 06 06 15 37 47 ...

Страница 24: ...annel display rotation enabled XX Percentage of hard drive already used 2010 06 03 Current date 15 37 47 Current time Icon Function Icon Function Channel Views Load default channel display location 4 channel split view 1 7 Split View 9 channel split view Auto channel rotation Main Menu Enter main menu Recording Start recording Stop recording Start force recording Stop force recording Video Search ...

Страница 25: ...he cursor onto the channel square you would like to shift Press left button of the mouse a hand icon will appear and drag the channel square to the new position Release the mouse button to drop the channel square into new position System will keep the new channel display arrangement even if you reboot the DVR system Load Default Location Press the icon to reset channel displays to their default lo...

Страница 26: ...nction DVR Power Supply To reboot or shutdown the DVR system Channel Setup Set the channel display record channel name and video color adjustment Record Setup Set the record schedule video performance and quality Detector Setup Set the motion sensor and alarm mode Authentication Setup Set the login account password and the authentication System Setup Set the status icons display languages date tim...

Страница 27: ...he right button of your mouse to go back to the upper menu 3 4 Channel Setup Click the Channel Setup on the Main Menu The screen will display the menu shown in the following illustration CHANNEL SETUP Channel Number Basic Setting Standard Color Adjustment Special Color Adjustment 3 4 1 Channel Number The Channel Number is used to designate to which channel or channels the settings will apply Press...

Страница 28: ...channels on the screen The channel will continue to record regardless of it being hidden or not ON Hide the channel on screen The channel square turns to black and channel number icon turns to white OFF Unhide the channel or channel is visible 3 4 2 4 Channel Name Designate a name for each channel The channel name is limited to 24 characters Press the icon Default Name to select a channel name fro...

Страница 29: ...l screen display for each channel 3 4 2 6 Image Position Adjustment Adjusts the position of display on the monitor Select the icon for 4ch for 8ch or for 16Ch to adjust the display position of all channels in 4 8 split view at one time Select the icons for 4ch for 8ch to individually set the image position of each channel The following figure will show when enter the Image Position Adjustment Chan...

Страница 30: ...st the image position by mouse left click follow the direction change of cursor icon up down right left Press Default to load or to restore to the default location 1 2010 06 06 15 37 47 IMAGE POSITION ADJUSTMENT Default ...

Страница 31: ... 16 Saturation 16 Sharpness 8 Special Color Adjustment Brightness Default is 10 Press the button to adjust the brightness from 1 to 20 Contrast Default is 10 Press the button to adjust the contract from 1 to 20 Hue Default is 16 Press the button to adjust the hue from 1 to 32 Saturation Default is 16 Press the button to adjust the saturation from 1 to 32 Sharpness Default is 8 Press the button to ...

Страница 32: ...ation 16 Sharpness 8 Active Special Color Disable Default Inactive this function Enable Active this function Start Time The start time for the special color setting End Time The end time for the special color setting Brightness Default is 10 Press the button to adjust the brightness from 1 to 20 Contrast Default is 10 Press the button to adjust the contract from 1 to 20 Hue Default is 16 Press the...

Страница 33: ...uto increase the recording power to the heavy loading channel from the not triggered or not recording channels Enable this function makes Record Performance Gains at Channel Recording Setup is validated 3 5 3 Record Schedule Record Schedule is a menu charting the recording schedule of a particular channel or all channels for the whole day 24 hours and the entire week 7 days Default setting is Time...

Страница 34: ...hannel is set to not record during this duration Time Indicates that the channel is set to continuously record during this duration Motion Indicates that the channel is set to motion triggered recording during this duration Sensor Indicates that the channel is set to record when the sensor is triggered during this duration Motion Sensor Indicates that the channel is set to motion triggered and sen...

Страница 35: ...ing example shows that the entire week all 7 days and the whole day all 24 hours are set to the Motion recording mode Select Motion recording mode press the icon and press Press the icon located after the name of each day to set every hour of an entire day to operate in the same mode The following example shows that on Sunday the whole day is set to the Time recording mode Select Time recording mo...

Страница 36: ...from 19 00 to 24 00 7 00pm to 12 00mn and on Friday from 2 00 to 4 00 2 00am to 4 00am are set to the Time recording mode Select the recording mode first Move the cursor and click the icon or to change mode on the timetable Select Time recording mode move the cursor and click the period of icons change to and press RECORD SCHEDULE Channel Number None Time Motion Sensor Motion Sensor Day Hour Sunda...

Страница 37: ...dule Total Power 240 240 Power Sec Auto Settings Adjustment Channel Recording Setup Channel Number Record Resolution Middle Res Half D1 Video Quality Standard Record Frame Rate 15 Record Performance Gains YES To distribute the recording power into four channels by click the total power as upper red border RECORD SCHEDULE Channel Number None Time Motion Sensor Motion Sensor Day Hour Sunday Monday T...

Страница 38: ...solution When all the channels are set at the same resolution the Auto Settings Adjustment can automatically allocate the frame rate to every channel When the setting applies to a specific channel or to specific channels with a particular resolution video quality or frame rate the Auto Settings Adjustment feature automatically allocates the remaining frame rate among the other channels 3 5 6 Chann...

Страница 39: ...ize a much larger hard drive space with a larger file size 3 5 6 4 Record Frame Rate T he recording frame rate for each or all channels may be set from 0 30 fps If the frame rate is set to 0 it means that it will not be recording 3 5 6 5 Recording Performance Gains The Record Performance Gains enables the system to automatically increase the system power on the heavy loading channel taking power f...

Страница 40: ... all channels simultaneously DETECTOR SETUP Channel Number Alarm Setup Light Detect Mode Sensitivity OFF Light Detect Alarm Mode Mute Blind Detect Mode Sensitivity OFF Blind Detect Alarm Mode Buzzer Short Video Loss Mode Disable Video Loss Alarm Mode Buzzer Short Motion Setup Sensor Setup DETECTOR SETUP Channel Number Alarm Setup Light Detect Mode Sensitivity OFF Light Detect Alarm Mode Mute Blind...

Страница 41: ...ard Alarm Short Short sound coming from the alarm Alarm Long Prolonged sound coming from the alarm 3 6 2 3 Blind Detect Mode This mode will be triggered when there is no video input in total darkness whether the security camera is purposefully covered or it is directly exposed to intense light This detects if there is a deliberate attempt to hide the view of the camera The light intensity settings...

Страница 42: ...oming from the alarm Alarm Long Prolonged sound coming from the alarm 3 6 3 Motion Setup Motion Setup is accessed to configure the motion mode for each channel or all channels NOTE Remember to setup the motion mode period on Record Schedule at the main menu of Record Setup after completing Motion Setup Otherwise the system will be recording in the default schedule recording mode DETECTOR SETUP Cha...

Страница 43: ...Sensitive OFF No sensitivity Sensitive Low Low sensitivity level Sensitive Normal Normal sensitivity level Sensitive High High sensitivity level Sensitive Highest The highest sensitivity level 3 6 3 3 Record Time Set the recording time when the Motion Mode is triggered The recording time as 5sec 10sec 15sec 20sec 25sec 30sec 45sec 60sec 90sec 120sec 150sec or 180sec 3 6 3 4 Alarm Mode Select the a...

Страница 44: ...nnel will ignore any other triggering events Continuous Trigger When channel has been triggered the triggering event will be displayed on full screen for the duration of the setting period The channel is however still actively monitoring during that period Should there be a new triggering event this channel will display the more recent event and restart the display period 3 6 3 8 Motion Area Setup...

Страница 45: ...or triggered event even the DVR under the Time Recording mode Enable Activates the whole setting of sensor setup Disable Deactivates the whole setting of sensor setup 3 6 4 2 Sensor Mode This parameter enables or disables sensor mode detection Enable Activates sensor mode Disable Deactivates sensor mode 3 6 4 3 Sensor Mapping This feature is to easily mapping a sensor port to a particular channel ...

Страница 46: ...time as 5sec 10sec 15sec 20sec 25sec 30sec 45sec 60sec 90sec 120sec 150sec or 180sec 3 6 4 5 Alarm Mode Select the alarm mode when Sensor Mode is triggered Mute No beep whatever motion is detected or not Buzzer Short Beep shortly by buzzer on main board Buzzer Long Beep long by buzzer on main board Alarm Short Short sound coming from the alarm Alarm Long Prolonged sound coming from the alarm 3 6 4...

Страница 47: ... sensor will ignore any other triggering events Continuous Trigger When the sensor has been triggered the triggering event will be displayed on full screen for the duration of the setting period The sensor is however still actively monitoring during that period Should there be a new triggering event the display will revert to the more recent event and restart the display period 3 7 Authentication ...

Страница 48: ...est 2010 6 12 17 04 08 Option Create Delete Click the icons for setting No expiration date Sets the expiration date Click Option for channel monitoring setup Click the icons for setting for 4Ch for 8Ch Enables the account to monitor all channels The icon turns orange when enabled Enables the account to monitor the specific channels The icon turns green when enabled Disabled accounts are indicated ...

Страница 49: ...ess is available to all users without a password NOTE Disabling all users to access the specific function means that all users can access only specific functions 3 8 System Setup System Setup sets the Language Viewing Date Time Sequence Button Beep Input Device and other relevant parameters Click on the System Setup icon or System Setup on the Main Menu AUTHENTICATION SETUP Account ID Passd Audio ...

Страница 50: ...UP Language Selection English View Setup Date Time Setup Sequence Setup Full Screen Sequence OFF 4 Split Sequence OFF 1 7 Split Sequence OFF 9 Split Sequence OFF 1 12 Split Sequence OFF 1 14 Split Sequence OFF 16 Split Sequence OFF Button Beep Setup Input Device Setup Auto Exit Menu OFF VIEW SETUP System Display Setup Main Menu Graphics Mode ON Channel Dynamic Effects ON Icons Help ON Error Messag...

Страница 51: ...dware Setup Utility Tools Exit Main Menu Exit Save Changes Exit Discard Changes 3 8 2 2 Channel Dynamic Effect Enables or disables the channel moving effects during channel dynamic drag and drop 3 8 2 3 Icon Help Enables or disables the help icon text description to appear when the mouse hovers over the icons 3 8 2 4 Error Message Enables or disables system to show the log when an error occurs Def...

Страница 52: ...ion is set and shown VIEW SETUP System Display Setup State Bar Information All State Bar Information ON Record Light ON Network Information ON Hard Drive Information ON Date Time Information ON Rotation Information ON Channel Information 1 2010 06 06 15 37 47 State Bar Information ...

Страница 53: ...ber Icon Recording Light Video Loss Flashing Record Mode Not Flashing Detection Mode Flashing VIEW SETUP System Display Setup State Bar Information Channel Information All Channels Information ON Channel Number ON Channel Name ON Record Light ON Video Loss ON Record Mode ON Detector Mode ON Alarm Display ON 1 2010 06 06 15 37 47 Channel Information ...

Страница 54: ...d time Time Set 2010 06 14 11 28 22 Up Down Change the number Move left right to the character that needs to be changed Exit after confirmed setting 3 8 3 3 Time Zone Time Zone is for adjusting time zone and location DAY TIME SETUP Date Display Mode YYYY MM DD Time Set 2010 06 14 11 18 19 Time Zone GMT 08 00 Taipei Daylight Saving Time Activate Daylight Saving Disable Time Starts No definition Tim...

Страница 55: ...bles the daylight saving mode 3 8 3 4 2 Time Starts Time Starts indicates the start date of daylight saving time The user can set the month week number day and hour Time Starts Month October Week First Week Day Sunday Hour 0 3 8 3 4 3 Time Ends Time Ends indicates the end date of daylight saving time The user can set the month week number day and hour Time Ends Month October Week First Week Day Su...

Страница 56: ...imum in 24 characters Interval Days The frequency number of days of when the server is synchronized Synchronize Now Start synchronizing with NTP server now DAY TIME SETUP Date Display Mode YYYY MM DD Time Set 2010 06 14 11 18 19 Time Zone GMT 08 00 Taipei Daylight Saving Time Active Daylight Saving Disable Time Starts Not definition Time Ends Not definition NTP Server Activate Service Enable Serve...

Страница 57: ...eriod 1 7 Split Sequence Enables or disables the 1 7 split display rotation period 9 Split Sequence Enables or disables the 9 split display rotation period SYSTEM SETUP Language Selection English View Setup Date Time Setup Sequence Setup Full Screen Sequence ON 4 Split Sequence OFF 1 7 Split Sequence OFF 9 Split Sequence OFF 1 12 Split Sequence OFF 1 14 Split Sequence OFF 16 Split Sequence OFF But...

Страница 58: ...e assigned the following settings SYSTEM SETUP Language Selection English View Setup Date Time Setup Sequence Setup Button Beep Setup Input Device Setup Mouse Moving Speed Normal Mouse Repeat Speed Normal Keypad Repeat Speed Normal IR Repeat Speed Normal Auto Exit Menu OFF Mouse Moving Speed Slow Normal Fast Mouse Repeat Speed OFF Slow Normal Fast Keypad Repeat Speed OFF Slow Normal Fast SYSTEM SE...

Страница 59: ...ll exit after 10 20 30 40 50 or 60 seconds depending on the set time 3 9 Hardware Setup Hardware Setup is the menu for configuring hardware parameters including error message hard drive network keyboard PTZ screen display and audio function Click the Hardware Setup on the Main Menu HARDWARE SETUP Query Error Messages Hard Drive Setup Network Setup Keyboard PTZ Setup Screen Setup NTSC PAL Auto Dete...

Страница 60: ...able YES The hard drive automatically writes over the oldest video on the hard drive when it runs out of space for recording NO Recording will stop when the hard drive is full QUERY ERROR MESSAGES View Time Clear Message HARD DRIVE SETUP Overwrite Enable YES Max Recording Days None First Hard Disk Model WDC WD7500AYPS 01ZKB HDD Size 715403MB Max Recording Days 1 Day Record Start Time 2006 06 11 15...

Страница 61: ...st Hard Disk Model Automatically displays the hard drive model number HDD Size Automatically displays the hard drive size Max Recording Days Displays the current setting for the maximum number of days recorded videos are retained Record Start Time Displays the day and time when the hard drive starts storing recorded data Record End Time Displays the day and time of the last recording on the hard d...

Страница 62: ... set through IP Address Setup to ensure proper network communication NETWORK SETUP Network Enable Enable IP Address Setup IP Type DHCP IP Address 0 0 0 0 Gateway 0 0 0 0 Subnet Mask 0 0 0 0 MAC Address 00 B2 95 DF 96 B7 PPPoE Account ID No Definition PPPoE Password No Definition Management Monitoring Setup Server Setup NETWORK SETUP Network Enable Enable IP Address Setup IP Type DHCP IP Address 0 ...

Страница 63: ...work or subnet is a logically visible distinctly addressed part of a single Internet Protocol network Contact the network administrator for this information MAC Address MAC address is a unique identifier assigned to most network adapters or network interface cards NICs by the manufacturer for identification It has been set at dedicated address even reset the DVR NOTE You must plan on the network s...

Страница 64: ... the network structure if the MIS or Network Administrator manages the network You should consult with the MIS or Network Administrator for the IP address segment and port forwarding rule for the DVR network setup 3 9 3 4 Server Setup Configure the DNS server SERVER SETUP Default DNS Address 168 95 192 1 Custom DNS Address 168 95 1 1 Dynamic DNS Activate Service Disable Provider www dyndns com Ser...

Страница 65: ...ters Account The account name of Dynamic DNS Maximum in 20 characters Password Password for Dynamic DNS Please refer to DYNDNS Service Maximum in 12 characters 3 9 4 Keyboard PTZ Setup NOTE The ENDSS 4C8 comes with 4 non PTZ cameras You may add a PTZ type camera and use this control Configures the communication protocols between the DVR and the PTZ capable cameras and the keyboard connected to it ...

Страница 66: ... channel Select the icons for 4Ch for 8Ch to individually setup of each channel PTZ Protocol Provides options for the PTZ camera protocol Pelco P Pelco D Teleview Pelco P Teleview Pelco D Merit LILIN 3B Merit LILIN 7B HiSharp Nicecam and Elitar Camera ID Adjusts the identification number based on the local settings of your camera This value may be any number from 1 to 255 Use the arrows and to sel...

Страница 67: ... focus and iris adjustment settings of your camera Zoom Speed can be set between 0 to 3 Focus Speed can be set between 0 to 3 Iris Speed can be set between 0 to 3 Auto Focus can be Enabled or Disabled Auto Iris can be Enabled or Disabled PAN TILT ZOOM SETUP Channel Number PTZ Protocol None Camera ID 1 Camera Reset Speed Adjustment Zoom Focus Iris Cruise Speed 1 Focus Speed 1 Iris Speed 1 Auto Focu...

Страница 68: ...guration 1 Stopbit or 2 Stopbit NOTE Pan Tilt Zoom and RS 485 Settings may vary for each camera Be sure to match local camera settings to those you input on the DVR 3 9 4 3 Keyboard Keyboard Model Select the keyboard model you are using OFF if there is no keyboard CK101 CK201 KB KT301 Keyboard ID Adjusts the identification number based on the local settings of your keyboard This value may be any n...

Страница 69: ...in Display Screen VGA VGA Resolution 1024x768 Video Adjustment Audio Setup NTSC PAL Auto Detection The system will automatically detect the video format NTSC PAL from the video source i e security cameras Video Output Format The selection of video output format NTSC or PAL is available while the NTSC PAL Auto Detection function is disabled Screen Border ON To show the border OFF Not to show the sc...

Страница 70: ...o Adjustment Adjusts the position of main display on the monitor when connect the main display screen to BNC port Labeled as VIDEO OUT The following figure will show when enter the Video Adjustment Adjust the image position by using the mouse right click button to follow the direction change of cursor icon up down right left Press Default to load the default location 1 2010 06 06 15 37 47 VIDEO AD...

Страница 71: ...ge Hard Drive Setup Network Setup Screen Setup Audio Setup Audio Record ON Audio Mute OFF Input Volume 1 Output Volume 16 Audio Record ON Enables audio recording OFF Disables audio recording Audio Mute ON Mutes the sound OFF Allows for sound to be heard Input Volume Adjusts the input volume from 1 to 16 Output Volume Adjusts the output volume from 1 to 16 ...

Страница 72: ...rom USB Restore Default Setting 3 10 1 Format USB Disk The system supports USB pen drives and USB card readers with the FAT32 device file format Please format the drive using the file format function if it is not in FAT32 otherwise an error will occur during backup The file format function helps you format USB device to improve its compatibility with the DVR for storing video data into your USB de...

Страница 73: ...rrent Language English Current Checksum 0x0332E245 File Name File Revision File Date Time File Language File Checksum Plug USB Stick After the USB disk is attached to the port the message Read file Information will appear on the bottom line FIRMWARE UPDATE Current Revision V15 0 0 Current Date Time Jun 14 2010 05 22 38 Current Language English Current Checksum 0x0332E245 File Name FWVX4TWNFWI File...

Страница 74: ... English Current Checksum 0x0332E245 File Name FWVX4TWNFWI File Revision V15 0 1 File Date Time Jan 15 2010 16 45 52 File Language English File Checksum 0x02E165B5 Update Process When DVR is updating the firmware it shows Firmware is updating please wait FIRMWARE UPDATE Current Revision V15 0 0 Current Date Time Jun 14 2010 05 22 38 Current Language English Current Checksum 0x0332E245 File Name FW...

Страница 75: ...5B5 Update Process 3 10 3 Environmental Setting Save Settings to USB This tool can help you duplicate the system environment configuration and store it on the USB device You can use this to swiftly deploy your other DVR systems which will be using the same configuration It will show the following message after file is duplicated successfully SAVE SETTINGS TO USB File Env2010 07 14_0503 env Written...

Страница 76: ...nt configuration from the USB device Click File select to select the file you would like to load LOAD SETTINGS FROM USB FILE SELECT Env2010 07 14_0531 env Generic Env2010 07 11_0526 env Generic Env2010 07 09_0525 env Generic Env2010 07 08_0504 env Generic Click Load File to load the selected file from USB device It will show the following message LOAD SETTINGS FROM USB File Env2010 07 14_0503 env ...

Страница 77: ...tem will restart 3 11 Exit Main Menu The Exit Main Menu window provides options to save or discard changes before exiting MAIN MENU Channel Setup Record Setup Detector Setup Authentication Setup System Setup Hardware Setup Utility Tools Exit Main Menu Exit Save Changes Exit Discard Changes UTILITY TOOLS Format USB Drive Firmware Update Export Event Log Environment Setting Save Setting to USB Load ...

Страница 78: ...m Save Discard Cancel Otherwise in the regular Main Menu mode you are presented with the following window 3 11 1 Exit Save Changes All changes are saved before exiting from the menu Data Saving Please Wait 3 11 2 Exit Discard Changes All changes are ignored The changes will not be saved and will take no effect before exiting from the menu Confirm with Yes or go back to the menu by choosing No Exit...

Страница 79: ...71 Chapter 4 4 Playback and Data Backup ...

Страница 80: ...ctor will start blinking when your mouse is hovering over it Click on the year or the arrows beside the year or to choose Choosing the month of the video to play back The Month Selector will start blinking when your mouse is hovering over it Click on the month or the arrows beside the month or to choose Choosing the day of the video to play back The dates with recorded videos will be in a vivid wh...

Страница 81: ...ed Thu Fri Sat 1 2 3 4 5 6 7 8 9 10 11 12 13 14 15 16 17 18 19 20 21 22 23 24 25 27 28 29 30 31 0 1 2 3 4 5 6 7 8 9 10 11 12 13 14 15 16 18 19 20 21 22 23 Play Backup In the example above the date selected is July 26 2010 Monday and the time is 17 00 The illustration also shows that recorded videos of that day are available from 09 00 to 18 00 Play Starts to play the event that has been selected B...

Страница 82: ...elect the channel to playback Play Begin Time specify the beginning of the playback Play End Time specify the end time of the playback The information below it shows the available recorded events To click Option to switching the window as follows PLAY MENU 2121 2010 07 14 06 18 31 2120 2010 07 14 06 17 12 2119 2010 07 14 05 57 38 2118 2010 07 14 04 20 11 2117 2010 07 14 02 18 42 Option Play Backup...

Страница 83: ...Number of recorded data provide by system Recording Status o Shows the begin or end of recording data in the hard drive o Shows the recording mode o The data can be played This icon doesn t show if no video recording is available o The recorded video data has been played o Power ON OFF event occur Recording Time The date time of recorded data Searching The vertical scroll bar for search the record...

Страница 84: ...ays playback video in 9 split view Previous Segment Plays back the recorded video by one hour Rewind Plays backward faster Stop Stops the video playback Pause Pauses the video playback Play Starts the video playback Fast Forward Plays forward faster Next Segment Plays forward the recorded video by one hour Calendar Menu Goes back to Calendar Menu Play Menu Goes back to Play Menu Event Search Goes ...

Страница 85: ...er End Time 2010 07 14 07 06 22 Time Reset Range Active Filter Time Enables disables filter time of event Filter Begin Time Specifies the beginning time of event filter Filter End Time Specifies the end time of event filter Time Reset Range Resets the event search time period according to all effective events as recorded SEARCH MENU Channel Number Filter Type All Events Filter Time Setup Disable 2...

Страница 86: ... that has been selected Option Switches the top frame of the Search Menu into an event content display The display depends on the type of event being referenced SEARCH MENU Event Type Time Record Trigger Channel Record End Time 2010 07 14 06 20 31 2121 2010 07 14 06 18 31 2120 2010 07 14 06 17 12 2119 2010 07 14 05 57 38 2118 2010 07 14 04 20 11 2117 2010 07 14 02 18 42 Option Play Backup Event Ty...

Страница 87: ...2010 07 14 05 57 38 2118 2010 07 14 04 20 11 2117 2010 07 14 02 18 42 Option Play Backup Use the buttons to select which data to backup Press Backup Start to enter the Backup Menu BACKUP MENU Backup Device Generic Flash Disk Free Capacity 1029352 1029380 KB Backup Channel Estimate Time 30Sec Start Time 2010 07 14 06 18 31 End Time 2010 07 14 06 17 25 Backup Period 00Min 06Sec Backup Size 1152KB Ba...

Страница 88: ...ckup Period 00Min 06Sec Backup Size 1152KB Backup Start BACKUP MENU Backup Device Generic Flash Disk Free Capacity 1029352 1029380 KB Backup Channel Estimate Time 30Sec End Time 2010 07 14 06 18 31 Backup Period 00Min 06Sec Backup Size 1152KB Backup Start The Free Capacity Estimate Time Backup Period and Backup Size will be changed automatically The Start Time and End Time of the selected video re...

Страница 89: ...ENDSS R4D8 81 Chapter 5 5 PTZ Control ...

Страница 90: ...erts back to DVR viewing PTZ Channel Menu This menu appears when you move your mouse to the right hand side of the screen It shows the channels on your DVR The channel number will be vivid yellow if the channel has a PTZ capable camera connected to it green if it has a non PTZ camera and faint white if it has no camera PTZ Control Menu This menu appears when you move your mouse to the lower portio...

Страница 91: ...tton Mouse Click Programs a preset position Right Button Hold for 2 seconds Clears the stored preset position Buttons with stored presets are displayed in a vivid green color Cruise Start Left click this icon to begin linear and lateral panning Cruise Stop This icon appears after Cruise has been activated Left click this icon to stop linear and lateral panning Auto Pan Start Left click this icon t...

Страница 92: ...your camera to a certain location using your mouse Arrows will appear when you move your mouse around the screen refer to the figure below CRUISE Right click on the directional arrows to activate and direct your camera The outer arrows allow you quickly cruise through the desired direction The inner arrows allow you to cruise more slowly PAN Right click on the inverted U arrow to laterally pan you...

Страница 93: ...ENDSS R4D8 85 1 2010 06 06 15 37 47 ...

Страница 94: ...ENDSS 4C8 86 Chapter 6 6 System Information ...

Страница 95: ...st bar Channel Number Video Loss Recording Resolution Recording Mode Recording Mode Buzzer Alarm Latest Recording Frame Rate External Alarm Possible corresponding values for the parameters Channel Number Video Loss CIF Recording Resolution Half D1 Recording Resolution D1 Recording Resolution Not Recording Motion Record Mode Time Record Mode Motion Record Mode Time Record Mode 10 Record Time Count ...

Страница 96: ...d Size 2438 715351 MB 35 Standard number of event 396 357376 20 Model Displays the hard drive model number HDD Size Displays the hard drive size Record Start Time Displays the day and time when the hard drive starts storing recorded data Record End Time Displays the day and time of the last recording on the hard drive Standard Record Size Displays the total hard drive capacity in megabyte MB and t...

Страница 97: ...Dynamic DNS X Disable Network Information IP Type shows the network connection type IP Address shows the current IP address IP Status shows the network is connected or not connected Login Count shows how many connections from remote site Management Service shows enable or disable the management service for allowing remote control from IE or PC Viewer Monitoring Service shows enable or disable the ...

Страница 98: ...ENDSS 4C8 90 Chapter 7 7 LAN Online Viewing Setup ...

Страница 99: ...nd the basic network information from the local area network hub Search Router IP Address Please click Start and then Run option under Windows Please enter CMD and then OK Please enter ipconfig on DOS prompt and then record the Address Number of Default Gateway as shown It is the Router s IP Address ...

Страница 100: ... out the available IP address Please enter ping 192 168 11 189 on DOS prompt as shown in the following figure When Reply from 192 168 11 189 bytes 32 time 10ms TTL 128 appears as in the following illustration that means this IP Address 192 168 11 189 is occupied by another network device Please try to find another available IP address Enter ping 192 168 11 188 on DOS prompt If Request timed out ap...

Страница 101: ...recommended to use a DYNDNS service DYNDNS is a service the maps internet domain names to IP address and works with dynamic IP address assigned by ISP server Remark A router is needed as the interface between PC and DVR when DVR is under internal network environment 7 2 1 Register to the DynDNS Services NOTE The following screens are captured from the DYNDS web site at time of this writing Changes...

Страница 102: ...to create your own DynDNS Account and fill out all the blanks for account s application as following Please refer below for the maximum number of characters acceptable for the DVR Server Name Maximum of 24 characters Account Maximum of 20 characters Password Maximum of 12 characters ...

Страница 103: ...ing the account DynDNS will create a new account for you and send you an e mail to the address you provided It needs to confirm your account within 48 hours after receiving the e mail or it will automatically delete your account Just click the first link to confirm the account ...

Страница 104: ...ENDSS 4C8 96 7 2 3 Login and Host Service Log in by entering the Username and Password of your account Then go to My Service to get a host name ...

Страница 105: ...s following Specify the Hostname for DYNDNS IP which will be applied to the DVR s DYNDNS setting We take dvr host tw homelinux net as an example and click Add to Cart The Dynamic DNS Hosts service is sufficient and is provided for free Press Next ...

Страница 106: ...ENDSS 4C8 98 Press Activate Services Now the DYNDNS service is completed ...

Страница 107: ...s private IP setting Specify one pair of connection port control port streaming port like 80 7 2 5 Setup DynDNS Setting on DVR After completing the DYNDNS account application go to the DVR server setup menu and input the DYNDNS information for network connection SERVER SETUP x Default DNS Address 168 95 192 1 Custom DNS Address 168 95 1 1 Dynamic DNS Activate Service X Disable Provider www dyndns ...

Страница 108: ...100 Chapter 8 8 PC Viewer Web Browser Viewer ...

Страница 109: ...icture below will automatically pops up Click the PCViewer Utility Software icon and follow the easy step by step installation instructions Windows OS platform requires that the application be run as the administrator user NOTE The product picture at the main menu above may be different from what you may see on your installation disc Please ignore the product picture NOTE Encore strongly suggests ...

Страница 110: ...e the DVR connection window Step 1 Click the button to open the DVR connection window Step 2 Click the button to add modify delete the DVR connection or close the DVR connection window No Function 1 DVR connection window 2 Delete the DVR connection 3 Modify the DVR connection 4 Add new DVR connection 5 Close the connections window 6 Open the DVR connection window 7 DVR connection status and switch...

Страница 111: ... the Add button to create a DVR connection Step 4 Input or modify the DVR name DVR IP address Port No Default port number is 80 or 8000 Password and number of DVR channels Step 5 The DVR list will show the new DVR connections after setup New Connections ...

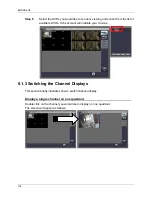
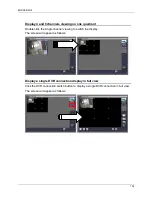
Страница 112: ... available DVRs A check mark will indicate your choices 8 1 3 Switching the Channel Displays This section briefly illustrates how to switch channel display Display a single channel on one quadrant Double click on the channel you would like to display on one quadrant The screen will appear as follows ...

Страница 113: ...uble click the single channel viewing to switch the display The screen will appear as follows Display a single DVR connection display in full view Click the DVR connection switch button to display a single DVR connection in full view The screen will appear as follows ...

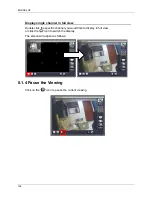
Страница 114: ...nel in full view Double click the specific channel you would like to display in full view or click the icon to switch the display The screen will appear as follows 8 1 4 Pause the Viewing Click on the icon to pause the current viewing ...

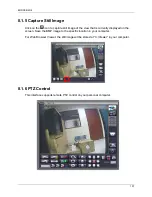
Страница 115: ...of the view that is currently displayed on the screen Save the BMP image to the specific location in your computer For Web Browser Viewer the still image will be stored at C Viewer in your computer 8 1 6 PTZ Control This interface supports remote PTZ control on your personal computer ...

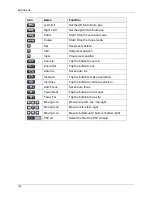
Страница 116: ...ion Zoom In Tap the button to zoom in Zoom Out Tap the button to out Auto Iris Set as auto iris Iris Open Tap the button to make a selection Iris Close Tap the button to cancel a selection Auto Focus Set as auto focus Focus Near Tap the button to focus near Focus Far Tap the button to focus far Moving Icon Move to top left top top right Moving Icon Move to left stop right Moving Icon Move to botto...

Страница 117: ... normal speed 2 Fast Backward 1x Plays backward faster by 1x the normal speed 3 Playback Starts the video playback 4 Fast Forward 1x Plays forward faster by 1x the normal speed 5 Fast Forward 2x Plays forward faster by twice the normal speed 6 Pause Pauses the video playback 7 Stop Stops the video playback 8 Time Bar Adjust the playback time 9 Volume Volume switch 1 2 3 4 5 6 7 8 9 Control bar Pla...

Страница 118: ...arch playback mode supports playback by the specific time Select the Begin Date and Begin Time then press the button Play to start video playback You will see the search result table as following figure Click on the icon back to Time Search control window ...

Страница 119: ...8 111 Press the button Backup start to backup the video data Select the start date and time and end of date and time the file size will show on the file size column Then press start to start backup to a PVF file ...

Страница 120: ... the specific event Select the Event Begin Date Event Begin Time Event End Date Event End Time and Event Event Type then press the button Search You will see the search result table as following figure Playbacks the event by mouse double clicks You will see the video playback as following figure ...

Страница 121: ...8 113 Click on the icon back to Event Search control window Select the start date and time and end of date and time the file size will show on the file size column Then press start to start backup to a PVF file ...

Страница 122: ...ntication process Please login by using the designated user name and password If you did not change any of these settings on your DVR please use the default settings below Default User admin Default Password 123456 You can change the DVR configuration after successfully logging in The operation method of the remote configuration interface is consistent with the DVR interface Please refer to the DV...

Страница 123: ...IE Explorer and enter the DVR IP address to IE address bar Please refer to DVR Network Information of DVR IP Address Step 2 An alert message occurring Install ActiveX control on the tool bar Please refer directly to step 9 if ActiveX has already been installed Step 3 Click on this alert message and select Install ActiveX Control Step 4 If the message Your security Settings do not allow web sites t...

Страница 124: ...16 Step 6 Select Security Trusted Sites Sites Step 7 Enter the DVR address into the blanks shown in picture and click add This address is only for demonstration Please use the IP address linked to your on site DVR ...

Страница 125: ...k to the internet browser IE window press refresh button or F5 You will enter the Web Browser Viewer login page Enter the designated user name and password Enter the default user name admin and password 123456 if you did not change the DVR Authentication settings Then press the icon to connect to the DVR from the remote site ...

Страница 126: ...ick the channel to display single channel in full view Display four channels in full view Double click the full view display to switch into four channels display 8 2 2 Web Browser Viewer Operation The Web Browser interface is consistent with PC Viewer Please refer to the PC Viewer operation guide ...

Страница 127: ...119 Chapter 9 9 SecuViewer 10 For iPhones iPad and iPod Touch ...

Страница 128: ... for iPhone iPad and iPod touch users to remotely connect to the ENDSS 4C8 DVR Please search the SecuViewer on iPhone App Store Enter SecuViewer to search the SecuViewer software on the iPhone APP Store search page Tap on the icon Free It will change to the icon Install Tap on the Install icon to install SecuViewer ...

Страница 129: ... the DVR Stop the DVR connection Switch the channel button CH1 CH4 CH5 CH8 CH9 CH12 CH13 CH16 Setup the DVR connection SecuViewer simple operation guide Display channel one Display channel two Display channel three Display channel four Display channel five Display channel six Display channel seven Display channel eight ...

Страница 130: ...lay channel eleven Display channel twelve Display channel thirteen Display channel fourteen Display channel fifteen Display channel sixteen 10 3 Connecting to the Surveillance System Select the SecuViewer icon on iPhone main screen to start the remote monitoring ...

Страница 131: ...ion to connect to the DVR Network IP Address Enter the DVR IP Address Network Port Enter the network port default is 8000 User Name Enter the user name default is admin Password Enter the password default is 123456 When you are done with the setup tap on the Ok icon 59 124 68 61 admin 123456 ...

Страница 132: ...on the Play icon to connect to the DVR SecuViewer can display only one channel on the iPhone screen at a time The default viewing channel is channel one Tap on the corresponding channel numbers to view the other channels ...

Отзывы: