4 |
ENGLISH
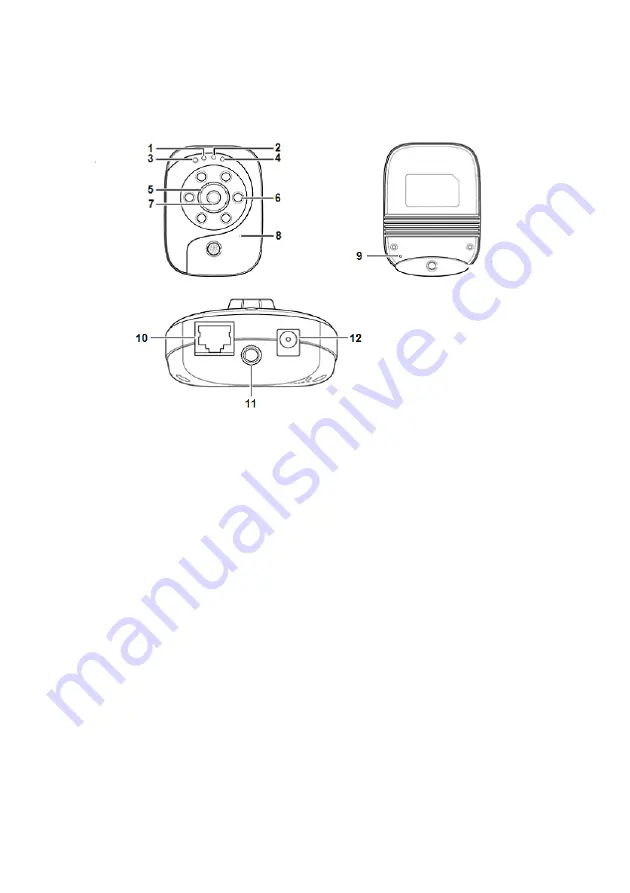
2.3 Explanation of the camera
(1) Power LED
This LED will be on when the camera is powered.
(2) LAN LED
This LED will be on when the camera is connected to a
switch, router or modem using a network cable.
(3) Light Sensor
This sensor measures the light intensity around the camera.
(4) WLAN LED
This LED will be on when the wireless connection is active.
(5) Adjust Focus
By turning the lens you can adjust the focus of the camera
image.
(6) Infrared LED
These 6 LED lights make sure you can also view the camera
image when it is dark.
(7) Lens
This is the lens of the camera.
(8) Microphone
This is the microphone of the camera.
(9) Reset button
By pushing this button the camera will be reset to factory
defaults.
(10) Network port
This port allows you to connect the camera to your modem
or router using a network cable.
(11) Screw hole
Use this screw hole to connect the mounting stand to the
camera.
(12) Power
Here you can connect the power adapter to the camer
3.0 Preparing the camera
Before you can start using the EM4483 IP camera, you will need to set it up for your
Содержание EM4483
Страница 1: ...E EM4483 MPEG4 Network IP Camera ...


