Chapter 1
7
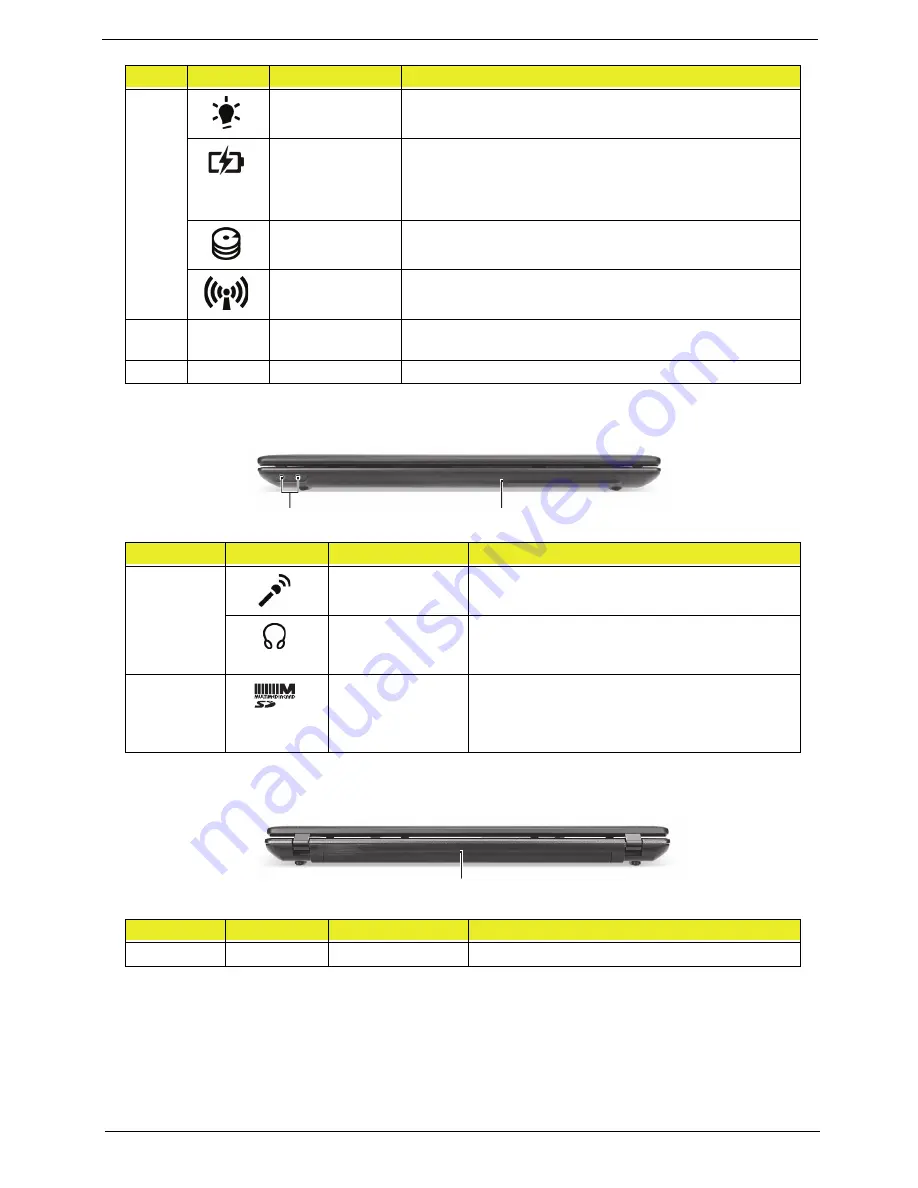
Closed Front View
Rear view
8
Power indicator
Indicates the computer's power status.
Battery indicator
Indicates the computer's battery status.
1. Charging: The light shows amber when the battery is
charging.
2. Fully charged: The light shows blue when in AC mode.
HDD indicator
Indicates when the hard disk drive is active.
Communication
indicator
Indicates the computer’s wireless connectivity device status.
9
Palmrest
Comfortable support area for your hands when you use the
computer.
10
Speaker
Delivers audio output.
No.
Icon
Item
Description
1
Microphone jack
Accepts inputs from external microphones.
Headphone/
speaker/line-out
jack
Connects to audio line-out devices (e.g.,
speakers, headphones).
2
2-in-1 card reader
Accepts Secure Digital (SD), MultiMediaCard
(MMC).
Note: Push to remove/install the card. Only one
card can operate at any given time.
No.
Icon
Item
Description
1
Battery bay
Houses the computer's battery pack.
#
Icon
Item
Description
1
2
1
Содержание E732
Страница 6: ...VI ...
Страница 10: ...4 Table of Contents ...
Страница 15: ...Chapter 1 5 System Block Diagram ...
Страница 38: ...28 Chapter 1 ...
Страница 52: ...42 Chapter 2 ...
Страница 102: ...92 Chapter 3 7 Replace the two 2 bezel screws Step Size Quantity Screw Type LCD Bezel Assembly M2 5 4 0 2 ...
Страница 104: ...94 Chapter 3 3 Connect the Bluetooth cable to the Bluetooth module 4 Adhere the Bluetooth cable to the mainboard ...
Страница 106: ...96 Chapter 3 2 Connect the Bluetooth cable to the mainboard 3 Connect the speaker cable to the mainboard ...
Страница 114: ...104 Chapter 3 4 Using the pull tab slide the HDD module in the direction of the arrow to connect the interface ...
Страница 124: ...114 Chapter 3 4 Press down as indicated to secure the keyboard in place ...
Страница 126: ...116 Chapter 3 ...
Страница 163: ...Chapter 6 153 ...
Страница 182: ...Appendix A 172 ...
Страница 188: ...178 Appendix B ...
Страница 190: ...180 Appendix C ...


