11
CKB1901S
GB
AUTOMATIC START
If you want the coffee maker to start at a specific time (for instance if the time
is currently 17:10 and you want the coffee to start brewing automatically at
20:15), follow the instructions in steps 1 to 5. After that, set the unit to start
automatically as follows:
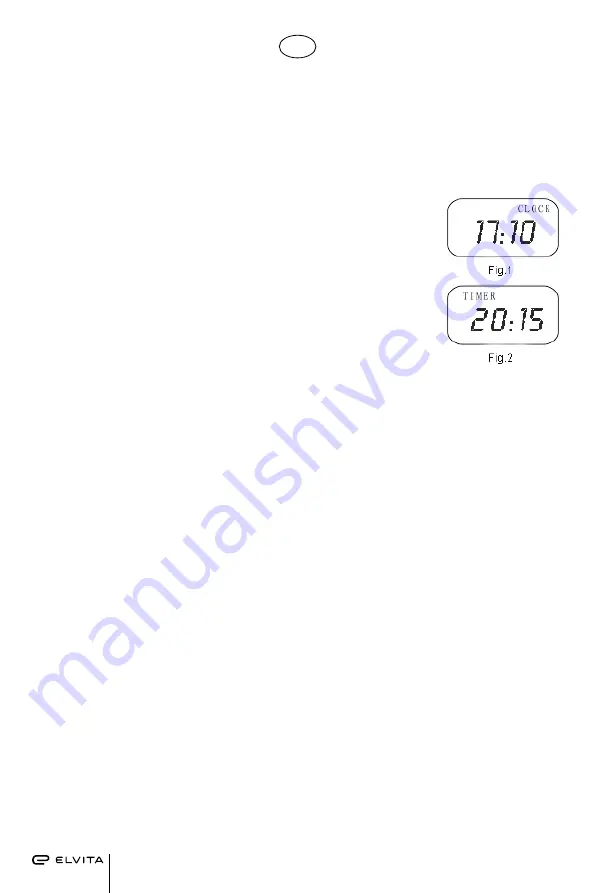
1. Press the PROG button once (the word CLOCK will appear in
the upper right corner of the display window).
2. Press the HOUR and MIN button to set the current time (i.e.
17:10 in the example above, see fig. 1).
Note:
The display has a 24-hour clock.
3. Press the PROG button again (the word TIMER will appear in
the upper right corner of the display window).
4. Set the automatic start time by pressing the HOUR and MIN
button (i.e. 20:15 in this example, see fig. 2).
5. Press the start button (ON/OFF) twice (the AUTO indicator
will light up). After about 10 seconds, the display window will
show the current time. Press PROG to see the automatic start
time.
Note:
Press the start button (ON/OFF) to cancel the automatic start. To
change the automatic start time, follow steps 1–4 above.
At the automatic start time, the AUTO light will turn off, the RUN light will turn
on and the coffee maker will start running.
MEMORY
If the power supply cuts out or the mains lead is accidentally disconnected
during operation, the unit will resume the cycle from the point when the power
cut out (provided the power is reactivated within 15 seconds) without the need
to press any buttons. If the power is interrupted for more than 15 seconds, the
display window will show the standard setting, which means the unit must be
restarted.
CLEANING AND MAINTENANCE
CAUTION! Ensure that the unit is disconnected at the mains before cleaning.
Do not immerse the lead or plug in water or any other liquid (risk of electric
shock).
• Clean all removable parts with warm water and dishwashing liquid after
every use.
• Wipe the outside of the unit clean with a soft, damp cloth.
• Drops of water may form around the funnel and drip onto the unit’s casing
during brewing. Wipe this water off the unit with a clean, dry cloth after
every use.
• The filter basket and reusable coffee filter are dishwasher-proof up to 60 °C
• Gently wipe the warming plate clean with a damp cloth (do not use abrasive
cleaners or cleaning accessories).
• Replace all the parts and store the unit until the next use.
3
INNAN FÖRSTA ANVÄNDNING
Kontrollera att alla tillbehör är medskickade och att inget är skadat. Fyll på vatten upp till max.-nivån i vattentanken
och brygg flera bryggningar utan kaffepulver. Häll ut vattnet och rengör därefter alla avtagbara komponenter med
varmt vatten.
ANVÄNDA KAFFEBRYGGAREN
1. Öppna det vattenbehållarlocket och fyll vattentanken med rent dricksvatten (vattennivån får inte överstiga
max.-nivån som finns markerad på insidan av tanken).
2. Placera medföljande återanvändningsbara kaffefiltret (eller ett traditionellt pappfilter) i filterhållaren, försäkra dig
om att den sitter korrekt på plats.
3. Fyll på kaffepulver i filtret (en struken sked kaffepulver per kopp kaffe brukar vara lagom dosering). Stäng det
vattenbehållarlocket.
4. Placera kannan på varmhållningsplattan.
5. Sätt i nätsladdens stickkontakt i vägguttaget. Teckenfönstret visar 12:00 och (
:
) blinkar.
6. Tryck på startknappen (ON/OFF) (bryggindikatorn lyser röd). Enheten börjar brygga.
7. Du kan avbryta bryggprocessen genom att trycka på startknappen (ON/OFF) två gånger, när som helst under
bryggningen (bryggindikatorn slocknar och texten RUN visas i teckenfönstret). Tryck på startknappen (ON/OFF) för
att starta om bryggningen.
OBS! Du kan när som helst under bryggningen ta ur kannan och servera kaffe (enheten slutar brygga automatiskt).
Du måste sätta tillbaka kannan inom 30 sekunder.
8. När bryggningen är färdig kan du ta ur kannan och servera kaffet.
OBS! Mängden färdigbryggt kaffe är lite mindre än den mängd vatten du fyllde på, eftersom kaffepulvret absorberar
lite vatten).
9. Du kan låta kaffet stå kvar på varmhållningsplattan i upp till 40 minuter (längre än så rekommenderas inte).
Servera kaffet när det är nybryggt – då smakar det som bäst.
10. Stäng av kaffebryggaren och koppla ur nätsladden från vägguttaget när du inte använder kaffebryggaren under
längre perioder.
AUTOMATISK START
Om du vill starta kaffebryggaren vid en speciell tid (i exemplet antar vi att klockan är 17.10 och att du vill starta
kaffebryggaren automatiskt klockan 20.15) följer du anvisningarna i steg 1 till 5. Därefter
ställer du in automatisk start enligt nedan:
1. Tryck en gång på knappen PROG (texten CLOCK visas i det övre högre hörnet i
teckenfönstret).
2. Tryck på knappen HOUR och MIN för att ställa in aktuell tid (dvs. 17:10 i det här
exemplet, se fig. 1).
OBS!
Klockan visar 24 timmar.
Содержание CKB1901S
Страница 7: ...7 CKB1901S ...
Страница 13: ...13 CKB1901S ...
Страница 19: ...19 CKB1901S ...
Страница 25: ...25 CKB1901S ...
Страница 31: ...31 CKB1901S ...
Страница 37: ...37 CKB1901S ...


