Wave Signal Receive Operation
The main unit automatically receives time signal everyday at 02:00am and makes any
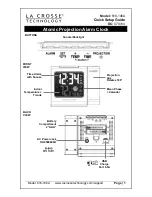
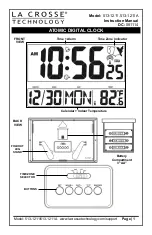
required adjustment to the time setting, indicated by the flashing tower icon .
If the time signal is successfully received, the tower icon will stop flashing and will display
steadily. A WAVE OK indicator will appear on display.
Important : Do not perform any button or switch operation while a signal receive operation is
in progress.
Triggering a Wave Receive Operation manually
You can trigger a signal receive operation at any time by pressing the WAVE button, which
cause the main unit to perform an immediate signal receive operation.
Unsuccessful Wave Signal Reception
If the automatic updates at 2:00am are unsuccessful, the wave on top of the antenna tower
and the WAVE OK icon will disappear.
If unsuccessful signal reception after battery installation or after reset, the main unit will keep
trying for 10 minutes every hour until time signal reception is successful.
Manually Set the Clock
To Set DST
• Press and hold the “DST/TIME ZONE” button until On or Off display on LCD.
• Press “+” or “-” button to toggle between DST ON and DST OFF.
• Press “DST/TIME ZONE” button to confirm and leave setting mode.
To Set TIME ZONE
• Press “DST/TIME ZONE” sequentially to select your local time zone
To Set the Calendar
1. Press and hold SET button to active calendar set mode.
2. Press + or – button sequentially to set year.
3. Holding down or – button to change the year at high speed.
4. Press SET button to confirm year set and go to date set.
5. Press + or – button sequentially to set date.
6. Holding down or – button to change the date at high speed.
To Set the Time
1. Press SET button after calendar set mode.
2. Press + or – button sequentially to set minutes, when you press the + or – button once,
the seconds count reset to 00.
3. Holding down or – button to change the time at high speed.
4. Press SET button after desired time set and go to time format set mode.
5. Press + or – button to toggle between 12hr and 24 hr time display format.
6. Press SET button to confirm and quit the set mode.


