La Crosse Technology VA1, Setup Manual
Introducing the TLV VA1, a groundbreaking device that revolutionizes your user experience. Unlock its full potential with our comprehensive Instruction Manual, available for free download at manualshive.com. This manual provides step-by-step guidance, allowing you to max out the product's capabilities and enjoy a seamless user journey.
Share
Download


Reviews:
No comments
Related manuals for VA1

Giraffe
Brand: Hama Pages: 2

K9
Brand: Icoco Pages: 10

Sunshine
Brand: Accenda Pages: 16

BeoTime
Brand: Bang & Olufsen Pages: 20

A30
Brand: Hama Pages: 7

A20
Brand: Hama Pages: 10
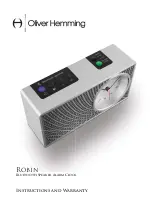
Robin
Brand: Oliver Hemming Pages: 9

Time
Brand: LaMetric Pages: 18

RC 150
Brand: Hama Pages: 3

Fishfinder 140
Brand: Garmin Pages: 6

A40
Brand: Hama Pages: 10

Rainbow
Brand: Hama Pages: 12

TC650
Brand: Hama Pages: 12

iA5
Brand: iHome Pages: 18

616-146A
Brand: La Crosse Technology Pages: 6

Soluna C79141
Brand: La Crosse Technology Pages: 8

513-1417BS
Brand: La Crosse Technology Pages: 12

WT-5120
Brand: La Crosse Technology Pages: 11


