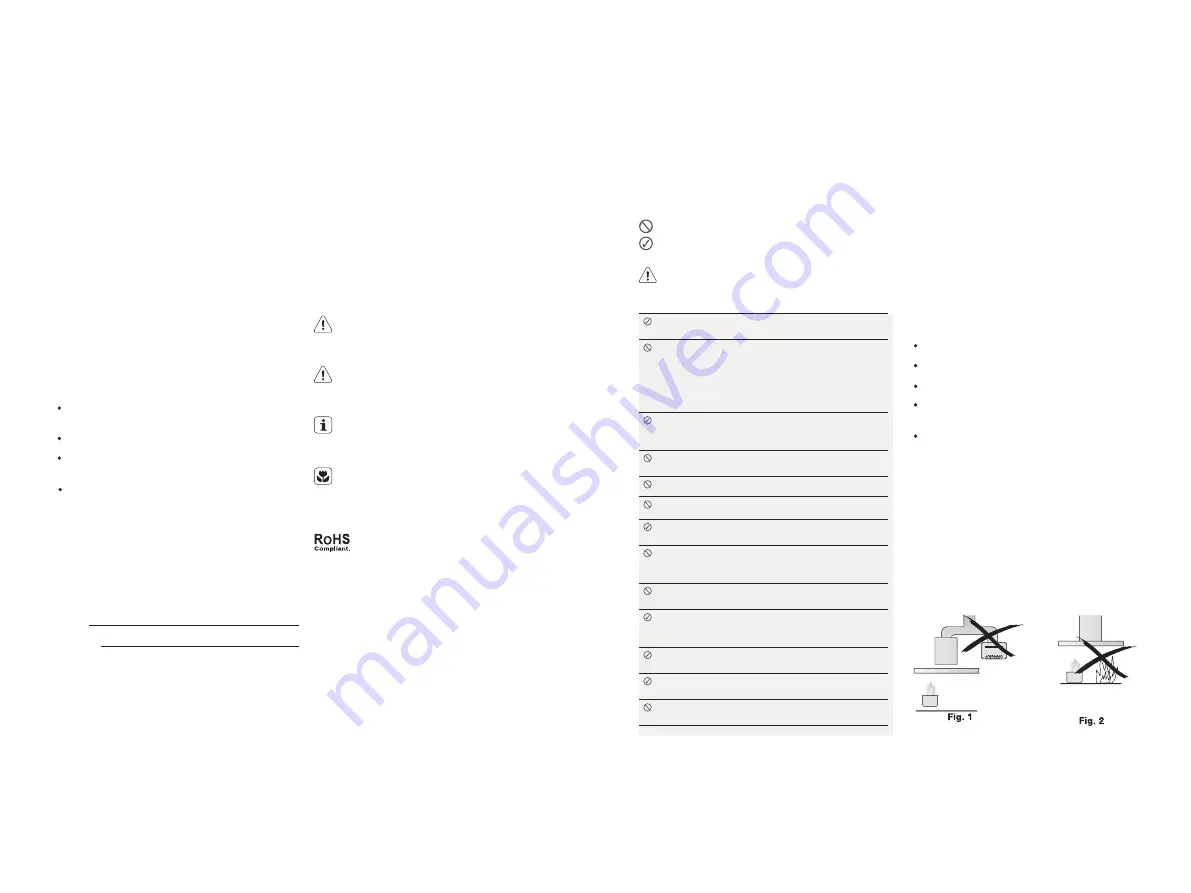
background image

WE’RE THINKING OF YOU

Thank you for purchasing an Electrolux appliance.
You’ve chosen a product that brings with it decades
of professional experience and innovation. Ingenious
and stylish, it has been designed with you in mind.
So whenever you use it, you can be safe in the 
knowledge that you’ll get great results every time.
Welcome to Electrolux. 

BEFORE USING YOUR APPLIANCE

Before you use the rangehood, we recommend that you
read through the whole user manual which provides
the description of the rangehood and its functions. To
avoid the risks that are always present when you use an 
electrical appliance, it is important that the rangehood is
installed correctly and that you read the safety instructions
carefully to avoid misuse and hazards.

For future reference, please store this booklet in a 
safe place.

CONDITIONS OF USE

This appliance is intended to be used in household and
similar applications such as

       Staff kitchen areas in shops, offices and
       other working environments

       Farm houses

       By clients in hotels, motels and other residential 
       type environments

       Bed and breakfast type environments
 .

BEFORE YOU CALL

Please ensure you read the instruction manual fully before
you call for service, or a full service fee could be applicable.
 .

RECORD MODEL AND SERIAL 
NUMBER HERE:

Model:

Serial NO:

CONTENTS

3    

Safety information

4    

Product description

5    

Dimensions

6    

Rangehood installation

9    

Using the rangehood

10  

Maintenance and cleaning


11  

Troubleshooting

12   

Customer Care Center

LEGEND

WARNING!

CAUTIONS!

IMPORTANT!

ENVIRONMENT!

This symbol indicates information concerning your 
personal safety

This symbol indicates information on how to avoid
damaging the rangehood.

This symbol indicates tips and information about use of
the rangehood.

This symbol indicates tips and information about
economical and ecological use of the rangehood.

SAFETY INFORMATION

This manual explains the proper use of your new Electrolux
canopy rangehood. Please read this manual carefully
before using the product. This manual should be kept in a 
safe place for handy reference.

This rangehood is a domestic appliance which has been 
manufactured and tested to comply with International
Standard IEC 60335.2.31.

Read the following carefully to avoid damage or injury.

This symbol indicates never to do this

This symbol indicates always do this

WARNING!

Follow these instructions carefully to avoid an electric
shock or fire.

Young children should be supervised to ensure 
they do not play with the rangehood.

This appliance is not intended for use by persons
(including children) with reduced physical, 
sensory or mental capabilities, or lack of 
experience and knowledge, unless they have been
 given supervision or instruction concerning the 
use of the appliance bya person responsible for 
their safety.

Ensure the rangehood is switched off before 
carrying out maintenance, to avoid any possibility 
of electric shock.

Never carry out flambe  cooking under the 
rangehood.

This rangehood is not recommended for bar

b

ecues.

This rangehood cannot be installed for external use.

Grease filters must be removed every four weeks
(maximum) for cleaning to reduce the risk of fire.

The exhaust from the rangehood must not be 
discharged into any heating flue, which may carry
combustion products from other sources.(Fig.1)

The exhaust air must not be discharged into a wall


cavity, unless the cavity if desig

n

ed for the purpose.

There must be adequate ventilation of the room
when the rangehood is used at the same time
as appliances burning gas or other fuels.

Always cover lit gas burners with pots or pans when
rangehood is in use.

Always switch off gas burners before you remove 
pots or pans.

Do not leave lit gas burners exposed due to the risk
of fire.(Fig.2)

Check that the mains voltage matches with the voltage
 on the data plate inside the rangehood. Check that 
the installation complies with standards of local 
building, gas and electrical authorities. Before 
connecting to the mains supply ensure that the mains
voltage corresponds to the voltage on the rating plate
inside the rangehood.If the supply cord is damaged,
it must be replaced by the manufacturer or its service 
agent or similarly qualified person in order to avoid a 
hazard.

Electrical connection

Safety warnings  For the installer

When installing the rangehood, make sure you 
adhere to the minimum and maximum distances 
from the rangehood base to the hob surface
(as per table on page 6). 

Exhaust flue installation: 

The following rules must 

be strictly followed to obtain optimal air extraction.


Keep exhaust flue short and straight

      Do not reduce the size or restrict exhaust flue.

      Keep bends in the exhaust flue to a minimum.

      When using flexible flue always install duct with 
      helix pulled taut to minimise pressure loss.

      Failure to observe these basic instructions will
      drastically reduce the performance and increase 
      the noise levels of the range hood.

Exhaust air must not be discharged into a wall cavity,
unless the cavity is designed for the purpose. The 
exhaust from the cooker hood must not be discharged
into any heating flue, which may carry combustion
products from other sources.
 .

NOTE: Some installations may require the telescopic
exhaust cover to be cut to length. Cut with sharp tin
snips or a fine-tooth hack saw blade, taking are not
to distort or dent the exhaust cover.

2

3

If at any time in future you need to dispose of this 
product please do Not dispose of this product with 
household waste, please send this product to collecting
points where available

This product is RoHS compliant.

Содержание EFC635SAR

Страница 1: ...2 14 EFC635SAR EFC935SAR EFC936GAR EN Cooker hood CN 抽油烟机 IN Tudung asap TH เครื องดูดควัน VN Hướng dẫn sử dụng User Manual 用户手册 Manual bagi pengguna คู มือการใช งาน 26 38 Máy hút mùi 50 ...

Страница 2: ...en given supervision or instruction concerning the use of the appliance bya person responsible for their safety Ensure the rangehood is switched off before carrying out maintenance to avoid any possibility of electric shock Never carry out flambe cooking under the rangehood This rangehood is not recommended for barbecues This rangehood cannot be installed for external use Grease filters must be re...

Страница 3: ...minum Exhaust Transition Duct 4 1pc Charcoal filter optional 5 1 1pc F lue Cover Mounting Bracket 5 2 1pc Hood Mounting Bracket 6 1set Damper flaps 7 2 3 pcs Aluminium mesh filter 8 a 7pcs Mounting Screws ST 5 X 50MM 8 b 2pcs Flue cover Mounting Bracket Screws M 4 X 10 MM 8 c 3pcs Flue cover bottom Fixing Screws ST 4 X10 MM 8 d 4pcs Recirculating T pieces screws 9 7pcs Drywall Anchors 10 2pcs Duct...

Страница 4: ...ion below from the rating plate The rating plate is on the bottom of the appliance casing Model PNC Serial number DIM A Cooktop type minimum maximum Gas 650mm 800mm Electric 650mm 800mm Top of hob WARNING Failure to install the screws or fixing device in accordance with these instructions may result in electrical hazards Fit the flexible flue to the duct transition Fig 10 Use fixing rings to secur...

Страница 5: ...s compulsory Do not remove the ground prong of the plug 7 Installation of telescopic flue covers NOTE Carefully remove the plastic protective coating if present from the flue covers Pay particular attention when removing protective plastic coating from decals USING THE RANGEHOOD Standby mode When connecting the rangehood to the power supply for the first time or after power is returned after power...

Страница 6: ...rculating mode Charcoal filter Changing the lamps Lamps are long life LED lamps and should not require service If there is an issue with lamp please contact the Service Center Service contact details shown on page 12 Place grease filters in the dishwasher Select the most powerful washing grogram and highest temperature at least 65 Refit the grease filters when they are dry When washing the metal g...

Страница 7: ...12 13 ...

Страница 8: ...断开电源 不要在烟机底下明火直接烧 本烟机不推荐在烧烤环境下使用 本烟机不能安装在室外使用 为降低起火危险 最多每隔4周必须把油脂过滤网换 下来清洁 由烟机排放的废气不能够排放到取暖烟管中 这会 导致烟机起火燃烧 Fig 1 废气不能直接排放到墙身空腔中 除非空腔专门设计 用来收集废气 与其他燃气或燃料产品一起使用时 必须保证房间内 有足够的空气流通 烟机使用时 必须用平锅或水壶放在燃气炉上 在移开平锅或水壶前 请必须先关掉燃气炉 为避免起火危险 不要把点燃燃气炉裸露在外 Fig 2 检查主电源电压是否匹配贴在烟机里面铭牌电压参数 确认安装要符合当地建筑 燃气 和电气等机构的规定 接通主电源前确认供电电源电压跟烟机铭牌上电压参数 一致 如果电源线损坏了 为避免危险 必须由生产厂 家或厂家售后服务代理和相关专业人员来更换 电源连接 安装人员安全警告 安装抽油烟机时 确保安装高度符合第6页中表...

Страница 9: ...1set 2 1 1pc 2 2 1pc 3 1pc 4 1pc 5 1 1pc 5 2 1pc 6 1set 7 2 3 pcs 8 a 7pcs 8 b 2pcs 8 c 3pcs 8 d 4pcs 9 7pcs 10 2pcs 11 1set 12 2pcs 13 1pc 序号 数量 零件 装饰风管罩 内装饰风管罩 外装饰风管罩 铝伸缩风管 活性炭过滤网 装饰风柜罩挂架 烟机挂架 挡风片 铝合金过滤网 安装螺丝 ST 5 X 50MM 风管罩固定螺丝 M 4 X 10 MM 膨胀胶粒 伸缩风管固紧圈 T 内循环装置 风管罩底部固定螺丝 ST 4 X10 MM 11 13 12 8 d EFC936GAR 13 8 d 12 11 T内循环装置密封条 用户手册 T内循环装置安装螺钉 ...

Страница 10: ...m 到最 大800mm 如果灶具的安装说明中明确说明安装高度比以上说明的还要大得话 请按照灶具的 安装说明的高度来安装 根据图6指示 标记下装饰风管罩和烟机挂孔的位置 烟机安装 继续 按图7所示 把装饰风管罩挂架和烟机挂架固定在墙上 如果使用内循序模式 请按图9所示 把T内循环装置和 装饰风管挂架也一起安装到墙上 去掉烟机上面的保护膜 并把烟机挂上烟机挂架中 根据以下5a和5b的步骤 选择想要的安装方法和排气模式 5a 内循环模式 图9 使用中心线 把风管挂架和T装置固定到墙上 按图11 所示 用伸缩风管连接T装置和出风口 并用固定圈锁 紧连接处 注意 使用内循环模式时 建议使用活性炭过滤网来净 化空气 防止有味气体排放到室内 5b 外排模式 图10 按图10所示 安装伸缩风管到出风口上 并用固定圈 锁紧连接处 注意 为保证烟机最佳性能 推荐使用刚性的风管 尽量避免弯曲 所有的风管必须防火...

Страница 11: ...强制接地要求 不要拆除插头上接地极 7 安装装饰风管罩 分开上下风管罩 小心地把内风管罩慢慢插入外风管中重新装起来 图12所示 把下风管罩用螺丝固定在箱体上 根据实际调节两节风 管罩 最后把上风管罩固定在风管罩挂架上 确保的是 上风管罩可以延长 注意 当风管罩有保护膜时 请小心移除保护膜 当移除在贴花纸上 的保护膜时 请格外小心注意 图11 你的伊莱克斯烟机现在可以使用了 烟机使用 待机模式 当第一次接通电源时 控制面板上的丝印图标会全部点亮 并且会有 哔 的一声 这样烟机就已经在待机状态下 代表可以随时使用 打开烟机 当烟机在待机状态时 用户可以按下 或 键来单独打开 照明灯或电机 烟机默认档位为2档 用户可以设置相应的档 位并且烟机有记忆功能 在下一次启动时会自动以用户上一 次使用时设置的档位启动 20 21 度沸腾 ...

Страница 12: ...用干抹布来在拭擦一次来 降低表面生锈可能 控制面板表面 控制面板可以使用温和的肥皂水来清洁 清洁前请确保抹布拧干 清洁完后 使用柔软的干抹布抹干多余的水分 取金属油脂过滤网 用手按下滤网的扣手后把滤网往下拉 这样就可以把滤网取下来 手洗 这金属过滤网可以用温肥皂水来手洗 过滤网浸泡在温肥皂水 中 对于顽固的油污可以使用尼龙刷子来刷掉 清洁完毕后确 保过滤网完全干了后才装回到烟机上 洗碗机 把滤网放进洗碗机中 选择最强力和最高温度 至小65度 的模式 重复一次整个过程 滤网干后重新装回 使用洗碗机洗滤网可能会 有轻微的变色发生 但这不会影响滤网的性能 LED灯 照明灯是寿命很长的LED灯 应该不需要维修 如果LED灯 有任何问题 请联系售后维护中心 售后维护联系信息在 第24页 更换 活性炭过滤网 活性炭过滤网只用在内循环模式上 活性炭过滤网是可以清洗并且可以重复使用 活性碳过滤 网应该每两...

Страница 13: ...24 25 ...

Страница 14: ...main dengan tudung asap Alat ini tidak ditujukan untuk digunakan oleh orang orang termasuk anak anak yang memiliki kekurangan kemampuan fisik sensorik atau mental atau kurang pengalaman dan pengetahuan kecuali kepada mereka telah diberikan pengawasan atau petunjuk mengenai penggunaan alat oleh orang yang bertanggung jawab atas keselamatan mereka Pastikan tudung asap ini telah dimatikan sebelum mel...

Страница 15: ...Tutup Saluran Gas Asap 1 buah Braket Dudukan Tudung Asap 1 buah Katup Sirip Penutup 2 3 buah Penyaring kasa aluminium 7 buah Sekrup Pengunci ST 5 x 50 mm 2 buah Sekrup Braket Dudukan Tutup Saluran Gas Asap M4 x 10 mm 3 buah Sekrup Pengunci Bagian Bawah Tutup Saluran Gas Asap ST4 x 10 mm 7 buah Selongsong Sekrup untuk Dinding 2 buah Cincin Pengunci Saluran 1 set Cabang T Resirkulasi 2 buah Busa Spo...

Страница 16: ...k tudung asap dengan sekrup pada dinding sebagaimana ditandai Gambar 7 Pasang cabang T untuk resirkulasi bersama braket tutup saluran gas asap bila menggunakan mode resirkulasi Gambar 9 4 Lepaskan lapisan plastik pelindung bila ada dari badan tudung asap dan gantungkan braket dinding Tergantung pada mode instalasi pengaliran gas yang diinginkan ikuti langkah 5a atau 5b di bawah ini 5a Mode resirku...

Страница 17: ... yang tersedia Pastikan bagian atas telah diulur sesuai keperluan CATATAN Dengan hati hati lepaskan lapisan plastik pelindung bila ada dari tutup saluran gas asap Secara khusus berhati hatilah saat melepaskan lapisan plastik pelindung dari bagian label nama Tudung asap Electrolux anda siap untuk digunakan PENGGUNAAN TUDUNG ASAP Mode siaga Saat menyambungkan tudung asap ke catu daya listrik untuk p...

Страница 18: ... kontak servis ditunjukkan di halaman 36 Penyaring arang Penyaring arang karbon hendaknya hanya digunakan bila anda ingin menggunakan tudung asap dalam fungsi resirkulasi Penyaring ini tidak dapat dibersihkan atau digunakan kembali dan sebagai aturan umum penyaring karbon aktif harus diganti setiap empat bulan Untuk memasang penyaring kunci hingga terdengar suara klik tanda terkunci Tarik keluar m...

Страница 19: ...atu hadiah yang menyebabkan anda berkata Oh Bagaimana anda tahu Memang ini yang saya inginkan Perasaan seperti itulah yang dicari oleh kami di Electrolux untuk dibangkitkan pada setiap orang yang memilih atau menggunakan salah satu produk kami Kami mendedikasikan waktu pengetahuan dan sejumlah besar pemikiran untuk mengantisipasi dan menciptakan jenis peralatan yang benar benar diperlukan dan diin...

Страница 20: ... 5 9 č MD đ D L5 G ĊH ą 2 3 9 G ĊG Ċ L E 8 25 2 ıĭī f cceŴbŴca F 5ĉ Ċ5E 8 5 ĉ 8D5 D L5 ą5 9 59 ĉ5 AĊG ĊE 8 D2 3 ĉ5D L5 E2 2 L LH ĉ E2 2 L L D 5 ŧ F 9 Ċ5E 8 5 ĉ D ĉ 9 D L5 ą5 9 H ą ċ5 3 5H H3 Ċ D K D K 8 Ċ5 AĊ AE H ĉG3ĊD ĉ 9 D L5 D L5 MH ĉH Ċ 9 55 E 2 3 9 G Ċ 5 D K E 8 AĊG3 ĉ L ĉ5 ĉ 82 9 AĊ 3 5 G AĊ L 82 čE 8 AĊ 3 D L G ĊD L5 F H ĉ AĊ AE 3 5G3Ċ E 8 5 ĉ G Ċ D L5 5 9 G G Ċ Ā 2 č ĉ5 AE 9 1 D L5 D L5 ą...

Страница 21: ...ŵc M g M b M c M g M b M a a M 9 D L5 Ċ5 E 3 5 H D L5 D Ą 5 ĉ5 8 9 5 ĉ5 8 9 Ċ G 5 ĉ5 8 9 Ċ 5 9 E ĉ5 5 A D L 5 č 5 9 5 ĉ5 8 9 9 D L5 D Ċ 9 9 D Ā Ā ĉ5 8 5 0 ŮE 9 ů L 5 ĉ 5 A D 2 A 9 ŮĻļ e Š e Ŵů 2 A2 3 9 9 5 ĉ5 8 9 Ůĵd Š a Ŵů 2 A2 3 9 9 5 2ĉ ĉ ŮĻļd Š a Ŵů 9 9 ĉ5 5 č3 D 5 0 A 9 ļ ŮļųŘőōŋō ů Aĉ 5 G Ċ EFC635SAR EFC935SAR 11 13 12 8 d EFC936GAR 13 8 d 12 11 3 8 d 4 M 12 2 M ฟองน ําท ีใช กับ 2 A2 3 9 9 5...

Страница 22: ...ą fe Ŵ h Ŵ fe Ŵ h Ŵ D 5 ŧ 3 H ĉG2ĉ2 A3 5 D L5 Ċ5E 8 5 G3ĊD 59 H ą H Ċ 9M Ů ĉ5ů cŴ 9M 9 5 ĉ5 8 9 E 8 9 D L5 D Ċ 9 9 Ċ 2 A 9 E3 ĉ L D L5 3 H Ċ Ů gů 5 č 3 D 5 0 A 9 ļ ŮļųŘőōŋō ů H Ċ 9 9 5 ĉ5 8 9 3 G ĊD đ D L5 3 D 5 0 Ů iů dŴ E 8E ĉ Ā č 9 5 55 D L5 G3Ċ3 E Ċ 9 D L5 9 9 G3ĊE ĉ 9M 5 eʼn 3 5 eŊ 8 9M ŵ A 9 L Ċ5 5 č3 D 5 0 A 9 ļ ŮļųŘőōŋō ů E 8 9 5 ĉ5 8 9 D Ċ 9 9 G3Ċ5 Aĉ 0A č E Ċ G2ĉ ĉ55ĉ5 83 ĉ ļųŘőōŋō 9 9 E ...

Страница 23: ...8 9 8 9 F D L5 5 Ċ G H L Ċ 5 5 Ċ 5 Ċ 2 A Ů abů 3 9 9M 5 5 H L2ĉ 5 9 D L5 A 9 5 Ċ Ċ 2 A LG3Ċ E Ċ A ĉ 2ĉ 2 H Ċ 3 D3 Ģ E 8E ĉ Ā č 9 5 55 5 Ċ 8 9 8 9 F D 8 D 2 D 5 č D L5 A 9 5 D F 9 č 5 ĉ Ċ5 G Ċ E Ċ G Ċ F3 2E D L5D Ā 8 ĉ H D Ċ D L5 D đ 9M E 3 5D Ā 8 ĉ H 5 9M 3 9 D 8E2H ą 9 Ċ5 H 29 5 Ą ĉ J E 82 ĉ M E 8 D2 29 a 9M 3 9 9M D L5 8 D Ċ 2AĉF3 2E E 8D L5 8 Ċ5 G Ċ D Ā D L5 G 8 LD L5 5 AĉG F3 2E 2 Ą 3 5 D L5D ...

Страница 24: ...Ċ5 D ĉ 9M ä H ĉ2 285 3 5G Ċ M H Ċ F 9L H E Ċ D L b D 5 G2ĉ L 5 č 5 H Ċ D2 M E2 ĉ K5 D Ċ L D L5 Ċ5 5 55 G3Ċ 2 9 D5 L 5 E Ċ 5 55 ä 8 3 D 392 5 ĉ E 83 D D L5 9M G 29L M5 L 5 č 5 F A 8D5 H Ċ E ĉ ą L 5 Aĉ L 9 D L5 ä L 5 č 5 2 29L M5H Ċ 0A č 5 D F 9 čG Ċ Ċ ĉ A Ċ5 A H Ċ 3 Ċ 48 E ĊH ď 3 D M5 Ċ ď 3 E ĊH D Ā D L5 H ĉH Ċ D L5 H ĉ D L5 Ā 8 25 ĉ ĉ52 H 3 5 9 ĉ D 5 D K 9 3 5 9 25 ĉ 9M D K 9 2A 52 3 9 3 5 9 L 5 M...

Страница 25: ... M 3 L D ĉ 9M E ĉ 55 E M 5 55 E D L5 AĊ F 2 3 9 5 D F 9 č 55 E L AĊ F 3 55 E 9 č L ĉ ĉ5 G Ċ G3Ċ 2 2 8G ĊD L5 E 8 9 G3Ċ AĊ F D D3 5E 85 2 8H 9 3 A3 G 0 1 L ba 5 D F 9 čH Ċ 5 28 2 G 5 ĉ L G3Ċ 9 AĊ F G3Ċ ĉ 9L L 8 5 28 2 L L ĉ G3Ċ 9 AĊ F L M G J ĉ D 5 D G J 9 E 8G3Ċ 9 AĊ F G 9L F ßļŐőŖœőŖŏ ŗŎ Łŗŝà 5 29 5 D F 9 č LD đ ĉ 2 Ċ 2 č 9 č L G AĊ F G ď 9 E ĉ 9 3 ĉ 5 D F 9 čG3Ċ 9L L 82 Ċ 2 č 9 č LD đ ĉ52 L E Ċ5...

Страница 26: ...Qj Ҧ1 È2 Ҧ1 È2 Hình 1 Hình 2 9XL OzQJ OjP WKHR QKӳQJ FKӍ GүQ GѭӟL ÿk ÿӇ WUiQK Jk FKұS ÿLӋQ KRһF FKi Qә ҫQ WU QJ FKӯQJ WUҿ QKӓ ÿӇ FiF Ep NK QJ ÿ D QJKӏFK YӟL Pi K W P L 7KLӃW Eӏ Qj Ð1 ÿѭӧF WKLӃW NӃ FKR QKӳQJ QJѭӡL NӇ Fҧ WUҿ HP Eӏ KҥQ FKӃ YӅ NKҧ QăQJ WKӇ FKҩW FҧP JLiF KRһF WUt yF KRһF tW NLQK QJKLӋP Yj NLӃQ WKӭF WUӯ NKL Kӑ ÿѭӧF WU QJ QRP KRһF KѭӟQJ GүQ FiFK Vӱ GөQJ VҧQ SKҭP EӣL QJѭӡL FKӏX WUiFK QKLӋ...

Страница 27: ...KRiW NKt FKX ӇQ WLӃS EҵQJ QK P 7ҩP OӑF WKDQ KRҥW WtQK 7 FKӑQ Li ÿӥ JҳQ WѭӡQJ EDR ӕQJ WKRiW NKt Li ÿӥ JҳQ WѭӡQJ Pi K W P L ӝ SKұQ JLҧP kP Eӝ SKұQ FKӕQJ UXQJ 7ҩP OӑF QK P ĈLQK YtW JҳQ WѭӡQJ 67 00 ĈLQK YtW JҳQ WѭӡQJ FӫD JLi ÿӥ EDR ӕQJ WKRiW NKt 0 00 ĈLQK YtW Fӕ ÿӏQK ÿi FӫD ӕQJ WKRiW NKt 67 00 0yF WUHR WѭӡQJ k U W ӕQJ WK QJ NKyL ӝ SKұQ WK QJ NKt WXҫQ KRjQ FKӳ 7 Miếng ốp chữ T 2 1 2 2 3 5 1 5 2 6 7 8 D...

Страница 28: ...ѭ ÿm ÿiQK GҩX uQK 9XL OzQJ WUHR Eӝ SKұQ WK QJ NKt WXҫQ KRjQ FKӳ 7 F QJ JLi ÿӥ QҳS ӕQJ WKRiW NKt QӃX Vӱ GөQJ FKӃ ÿӝ WK QJ NKt WXҫQ KRjQ uQK ӥ Eӓ PjQJ EӑF QKӵD EҧR YӋ QӃX Fy ӣ WKkQ Pi K W P L Yj WUHR WKkQ Pi OrQ JLi ÿӥ JҳQ WѭӡQJ ӵD FKӑQ FiFK OҳS ÿһW GүQ ӕQJ SK KӧS LQ TXê NKiFK YXL OzQJ OjP WKHR EѭӟF D KRһF E ErQ GѭӟL D KӃ ÿӝ WK QJ NKt WXҫQ KRjQ uQK E KӃ ÿӝ Vӱ GөQJ ӕQJ WK QJ NKyL uQK 6ӱ GөQJ Gk FKtQK...

Страница 29: ...ұQ Kҥ WKҩS SKҫQ EDR ӕQJ WKRiW NKt YӯD JKpS XӕQJ WKkQ Pi K W P L Yj JjL EDR ӕQJ WKRiW NKt YjR WKkQ Pi K W P L ҳQ SKҫQ ErQ WUrQ EDR ӕQJ WKRiW NKt YjR JLi ÿӥ JҳQ WѭӡQJ EҵQJ ÿLQK YtW NqP WKHR ĈҧP EҧR UҵQJ SKҫQ ErQ WUrQ ÿm ÿѭӧF NpR GjL UD Ѭ8 é ҭQ WKұQ Jӥ Eӓ OӟS EӑF QKӵD EҧR YӋ EDR ӕQJ WKRiW NKt QӃX Fy ĈһF ELӋW FK ê NKL Jӥ Eӓ OӟS EӑF QKӵD EҧR YӋ Wӯ ÿӅ FDQ 6Ӱ Ө1 0È Ò7 0Ô ұW 7ҳW TXҥW 5iQ OXӝF NKӕL OѭӧQJ t...

Страница 30: ... U ӣ WUDQJ 60 Ӆ PһW WKpS NK QJ JӍ 7ҩP OӑF WKDQ KRҥW WtQK FKӍ FҫQ Vӱ GөQJ NKL TXê NKiFK OӵD FKӑQ FKӃ ÿӝ WK QJ NKt WXҫQ KRjQ FKR Pi K W P L FӫD PuQK 7K QJ WKѭӡQJ WҩP OӑF Qj NK QJ WKӇ OjP VҥFK KRһF Vӱ GөQJ OҥL ҫQ WKD WҩP OӑF WKDQ KRҥW WtQK VDX WKiQJ Vӱ GөQJ iFK WKiR UӡL KRһF OҳS WҩP OӑF WKDQ KRҥW WtQK ÿѭӧF WUuQK Ej ӣ GѭӟL ÿk X Q QrX U PүX Pi K W P L Yj Vӕ VHUL NKL rX FҫQ WҩP OӑF WKD WKӃ 1KӳQJ WK QJ W...

Страница 31: ...LQJ WK YHQXH RUQHU QG 6WUHHW Bonifacio Global City Taguig Philippines 1634 Trunkline 63 2 737 4756 Website www electrolux com ph Email wecare electrolux com 6LQJDSRUH CONSUMER CARE HOTLINE 65 6727 3699 Electrolux S E A Pte Ltd 1 Fusionopolis Place 07 10 Galaxis West Lobby Singapore 138522 Office Fax 65 67273611 Email customer care sin electrolux com The Thoughtful Design Innovator ҥQ Fy QKӟ OҫQ Jҫ...

Отзывы: