background image

15

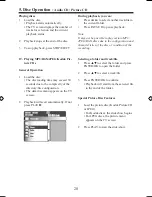
Using the disc menu

Depending on the disc, a menu may appear on 

the TV screen once you load the disc.

To select a playback feature or item

•  Use ◄►▲▼  or the numeric keypad 


(0-9) on the remote control, then press  


ENTER/OK to start playback.

To access or clear the menu

•  Press MENU on the remote control.

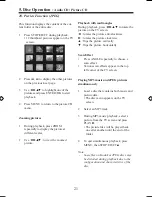
Zooming in


This function allows you to enlarge the  


picture on the TV screen and pan through  


the enlarged picture.

1  During playback, press ZOOM 


repeatedly to display the picture at 


different scales.


• Use ◄►▲▼  to pan through the  


  enlarged picture. 


• Playback will continue.

2  Press ZOOM repeatedly to return to the  


original size.

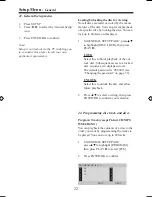
Resuming playback from the last stopped 
point

You can resume playback of the last 10 discs, 

even if the disc was ejected or this player’s 

power switched off.

1  Load one of the last 10 discs.


• LOADING appears.


2  Press PLAY► and the disc will be


played back from the last stopping point

To cancel resume mode


In stop mode, press STOP/EJECT ■


again.


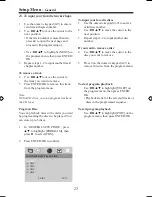
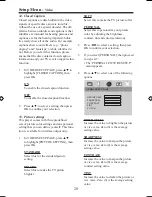
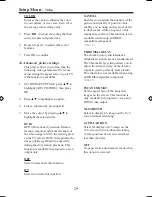
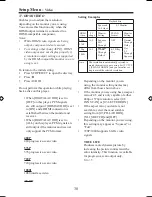
On-Screen Display (OSD)

The OSD menu shows disc playback informa

-

tion (e.g., the ride or chapter number, elapsed 

playing time or audio/ subtitle language). A 

number of operations are possible without 

interrupting disc playback.

1  During playback, press ON SCR. 


• A list of available disc information  


  appears on the TV screen.

DVD

VCD/SVCD

2  Press  ▲▼ to view the information and  


press ENTER/OK to access the selected  


item.

3  Use the numeric keypad (0-9) to input  


the number/time or press ▲▼ to make  


the selection, then press ENTER/OK to  


confirm.


• Playback will change to the chosen time  


  or to the selected title/chapter/track.

Title/Chapter/Track selection (DVD/VCD)

1  Press ▲▼ to select [TITLE] or 


[CHAPTER](DVD) or [TRACK](VCD)

2  Press ENTER/OK.

3  Select a title, chapter or track number  


using the numeric keypad (0-9).

Disc Operation - 

Video Playback

MENU

TITLE 


02/14

CHAPTER   

02/14


AUDIO 


5.1CH


SUBTITLE   

ENG

BITRATE 16       TOTAL ELAPSED 0:02/25

MENU

TRACK 


02/14

DISC TIME  

0:49:17


TRACK TIME 

0:03:43


REPEAT   

OFF

BITRATE 16       TOTAL ELAPSED 0:02/25

Содержание EMP

Страница 1: ...E MP1 B a l a n c e dMu l t i f o r ma t P l a y e r Ow n e r sMa n u a l E NG ...

Страница 2: ...ot expose this appliance to rain or moisture Verify line voltage before use Do not remove cover No user serviceable parts inside Refer servicing to qualified service personal The warranty is void if non authorized personnel tamper with the product Use only authorized Electrocompaniet service center ...

Страница 3: ...he amplifier s success We consider our audio designers from that time to have been the first in what may be called the new TIM free school The next 3 years went to further research and design improvement During this time we had to develop a new language to translate what we were hearing into practical design param eters distortion frequency response etc A new mathematical equation was developed to...

Страница 4: ...CD mechanics are removed As long as the first stage of the process has a perfect copy of the information on the CD there is a basis for the next stage The next stage is to sample rate the informa tion This process removes possible jitter and also makes sure that all parts of the DAC get the correct information at correct time The last step is to convert the digital signal into an analog signal Thi...

Страница 5: ...0format Maximum 30 character display DivX disc on CD R W DVD R W DVD R W CD R and CD RW cannot be played unless finalized Some discs cannot be played depending on the recording conditions such as the PC environment and application software The characteristics and condition of some discs materials scratches curvature etc may result in playback failure Be sure to use only CD R and CD RW discs made b...

Страница 6: ... If possible the television should be connected to a separate power outlet with filter to the rest of your high end equipment Television often have a lot of magnetic stray fields that can be picked up by cables in your system The unit should not be placed near main transformers TV sets etc Care should also be taken regarding placement of the interconnect cables Do not run interconnect cables in pa...

Страница 7: ...evision Use the switch to select progres sive or inter latched signal After changing of this switch the system need to be reset Mains Check that the mains voltage printed on the rear panel corresponds with the line voltage in the territory you intend to use the EMP 1 After this is checked out connect the AC main cord to the power inlet on the rear side Front panel controls The power on off button ...

Страница 8: ...ayback short Eject disck long PLAY Starts playback PLAY 4 Pauses playback tempo rarily frame by frame playback O l Turns this player into the standby mode 0 9 numeric keypad Selects numbered items in the currently displayed menu ON SCR Accesses or clears the player s On Screen Display menu SETUP Accesses or clears the player s setup menu SUBTITLE Selects the language for subtitles ZOOM Enlarges th...

Страница 9: ...mponent for details 4 Turn on this player 5 Set the TV to the correct Video IN channel e g EXT1 EXT2 AV1 AVZ AUDIO VIDEO ecc Refer to the owner s manual for your TV for details The front display lights up and the default screen appears on the TV 10 Selecting a color system for your TV This player it compatible with both NTSC and PAL video formats Select the color system that matches your TV 1 Pres...

Страница 10: ...tput format Note When Scan mode is set to PROGRESSIVE CVBS S video output will depend on the format of disc 11 Setting Language Preference You can select your own preferred language settings This player will automatically switch to your preferred language for you whenever you load a disc If the language selected is not available on the disc the disc s default language will be used instead The OSD ...

Страница 11: ...akers These adjustment let you optimize the sound of your system to best suit your surroundings and setup IMPORTANT Speaker settings are only available for multi channel audio output 1 Press SETUP 2 Press repeatedly to select AUDIO SETUP PAGE 3 Press to highlight SPEAKER SETUP then press 4 Enter a submenu by pressing 5 Press to highlight one of the options then press OK Note If you have EC4 9 in y...

Страница 12: ... sub woofer is connected SPEAKERS VOLUME Volume level setting for individual speakers 6dB 6dB Note If you have EC4 9 in your system use the more advanced speaker volume and balance setting included in that system SPEAKERS DELAY Delay time settings in relation to the listen ing position distance for center and surround speakers 0 MS 1S MS Press to adjust the setting that best suits your surround so...

Страница 13: ... so may cause the disc player to malfunction 15 General Operation Unless otherwise stated all operations described here are carried out using the remote control for this player Pausing playback 1 During playback press PAUSE Playback will pause and the sound will be muted 2 Press PAUSE again to select the next picture frame 3 To resume normal playback press PLAY Selecting a track chapter Press 9 or...

Страница 14: ...s A B again at your chosen end point A and B can be set only within the same chapter track The section will now repeat continue continuously 3 To exit the sequence press A B Shuffle Except DVD VCD SVCD With the Shuffle function you can play tracks in random order Each time you press SHUF FLE the front display changes is follows SHF repeats the current chapter SHF RPT repeats the current title SHF ...

Страница 15: ...st stopping point To cancel resume mode In stop mode press STOP EJECT again On Screen Display OSD The OSD menu shows disc playback informa tion e g the ride or chapter number elapsed playing time or audio subtitle language A number of operations are possible without interrupting disc playback 1 During playback press ON SCR A list of available disc information appears on the TV screen DVD VCD SVCD ...

Страница 16: ...roup selection and time search DVD Audio Each time you press ON SCREEN the front display changes as follows Display Example GROUP 01 05 TRACK 01 15 0 10 00 GROUP 01 O5 TRACK x 15 GROUP 01 05 TIME xx xx TRACK 01 15 TIME xx xx Displays the current group number total number the current track number total number and elapsed playing time To select a track group 1 Use to highlight GROUP or TRACK 2 Enter...

Страница 17: ...eypad 0 9 to select a play option 3 Press ENTER OK to confirm Camera angle Press ANGLE repeatedly to select the desired angle Audio Changing the audio language and or format Press AUDIO repeatedly to select an audio language Subtitles Press SUBTITLE repeatedly to select a subtitle language Disc Operation Special DVD Features ...

Страница 18: ... function minimizes the picture for every track and displays six at a time on the screen to help you view the tracks on the disc DISC INTERVAL This function is used to divide a disc into six parts at regular intervals and display them on one page to help you preview the entire disc Example of 6 thumbnails in the display 1 Use to select a track or use the numeric keypad 0 9 to input the selected tr...

Страница 19: ...or High Quality DSD Multi channel Playing discs 1 Load the disc Playback starts automatically The TV screen displays the current playing status and track list for the current playback area 2 Playback stops at the end of the disc 3 To stop playback press STOP EJECT Changing the SA CD playback area and layer You can change the SA CD playback area by pressing S MODE and then change the playback layer...

Страница 20: ...ou can Press 9 to select another track file in the current folder Press PAUSE II to pause playback Note It may not be possible to play certain MP3 JPEG DivX discs due to the configuration and characteristics of the disc or condition of the recording Selecting a folder and track file 1 Press to select the folder and press ENTER OK to open the folder 2 Press to select a track file 3 Press ENTER OK t...

Страница 21: ...es the picture anti clockwise rotates the picture clockwise flips the picture vertically flips the picture horizontally Scan Effect Press ANGLE repeatedly to choose a scan effect Various scan effects appear in the top left corner of the TV screen Playing MP3 music and JPEG pictures simultaneously 1 Load a disc that contains both music and picture data The disc menu appears on the TV screen 2 Selec...

Страница 22: ...ct this to block playback of the cur rent disc Subsequent access to a locked disc requires a six digit password The default password is 000 000 see Changing the password on page 35 UNLOCK Select this to unlock the disc and allow future playback 2 Press to select a setting then press ENTER OK to confirm your selection 22 Programming disc track and discs Program Track except Picture CD MP3 WMA DivX ...

Страница 23: ...the discs to be played You can store up to 5 discs 1 In GENERAL SETUP PAGE press to highlight PROGRAM then press to select FDS 2 Press ENTER OK to confirm To input your favorite discs 1 Use the numeric keypad 0 9 to enter a valid disc number 2 Use to move the cursor to the next position 3 Repeat steps 1 2 to input another disc number If you want to remove a disc 4 Use to move the cursor to the dis...

Страница 24: ...ress to select a setting You can select from 15 30 45 and 60 minutes Select OFF to cancel the sleep timer function 3 Press ENTER OK to confirm your selecttion 26 DivX VOD registration code Yamaha provides you with the DivX VOD Video On Demand registration code that allows you to rent and purchase videos using the DivX VOD service For more informa tion visit at www divx com vod 1 In GENERAL SETUP P...

Страница 25: ...ress to highlight DIGITAL AUDIO then press 2 Press to highlight an option 3 Enter a submenu by pressing 4 Move the cursor by pressing to high light the selected item DIGITAL OUTPUT Set the digital output according to your optional audio component connections OFF Select to turn off the digital output ALL Select if you have connected your DIGITAL AUDIO OUT to a multi channel decoder receiver PCM ONL...

Страница 26: ...cated digital signal processing for better sound quality If you have activated the upsampling function the player will automatically switch to stereo mode CD Upsampling 1 In AUDIO SETUPPAGE press to highlight CD UPSAMPLING then press OK OFF Select this to disable CD upsampling 88 2 kHz X2 Select this to convert the sampling rate of CDs to twice that of the original 176 4 kHz X4 Select this to conv...

Страница 27: ...rimmed or formatted to fit your TV screen 4 3 LETTER BOX Select this if you have a normal TV In this case a wide picture with black binds on the upper and lower portions of the TV screen will be displayed 16 9 Select this if you have a wide screen TV 3 Select an item and press OK 33 Selecting the black level If you set the TV type to NTSC set Black level shift to ON This will improve the color con...

Страница 28: ...n define yourself This func tion is available for interlace output only 1 In VIDEO SETUP PAGE press to highlight PICTURE SETTING then press OK STANDARD Select this for the standard picture setting BRIGHT Select this to make the TV picture brighter SOFT Select this to make the TV picture softer PERSONAL Select this to personalize your picture color by adjusting the brightness contrast tint and colo...

Страница 29: ...essive scan output only OFF Select to deactivate this function ON Select to activate this function GAMMA Enables you to adjust the intensity of the picture non linearly A positive value enables you to bring out low level detail in dark scenes while a negative value emphasizes contrast This function is not available when using an HDMI compatible component 7 to 7 CHROMMA DELAY The chroma color and l...

Страница 30: ...eo 720P 720 progressive scan video 1080I 1080 interlace video AUTO Setting Examples Playback disc Squeezed 16 9 video 4 3 Monitor HDMI video TV shape Monitor Setting PSCAN format Monitor Setting 480p 16 9 Squeeze Full Through Squeeze OFF Normal Through Dolby Dot 4 3 Through Squeeze 576P 720p 16 9 Normal Through Dolby d 4 3 Pillar Box 1080i Auto The resolution is automatically selected to match the...

Страница 31: ...ted and press ENTER OK To disable parental controls and have all discs play select 8 ADULT 3 Use the numeric keypad 0 9 to enter the six digit password see Changing the password on page 35 DVDs that are rated above the level you selected will not play unless you enter the six digit password Notes VCD SVCD CD SA CD have no level indication so the parental control func tion has no effect with these ...

Страница 32: ... press OK to select CHANGE 2 Press OK to enter the password change page 3 Use the numeric keypad 0 9 to enter your old six digit password When doing this for the first time enter 000 000 If you forget your old six digit password enter 000 000 4 Enter the new six digit password 5 Enter the new six digit password a second time to confirm The new six digit password is now valid 6 Press OK to confirm ...

Страница 33: ...igital Analog Conversion 24 bit 192 kHz Compatible formats CD HDCD SACD DVD MP3 SVCD VCD WMA DIVX Picture CD JPEG Dynamic Range Dimensions W x D x H 483 x 410 x 75 mm 19 x 16 1 x 3 inches Weight 14 kg Power consumption No Load or signal 60W Audio Outputs 6 ch balanced line out XLR Digital Outputs 75 ohm S PDIF RCA Specifications are subject to change without further notice Technical data ...

Страница 34: ...P3 is the abbreviation of Motion Picture Experts Group1 or MPEG 1 Audio Layer 3 By using MP3 format one CD R or CD RW can contain about 10 times as much data volume as a regular CD can Multichannel DVD is specified to have each sound track constitute one sound field Multichannel refers to a structure of sound tracks having three or more channels Parental Control A function of the DVD to limit play...

Страница 35: ...D and SVCD Features 18 18 SA CDs Super Audio CDs 19 20 Preview Function JPEG 21 21 General Setup menu 22 22 Programming disc track and discs 22 23 To input your favorite tracks chapt 23 25 Sleep Timer 24 26 DivX VOD registration code 24 27 Audio Setup Menu 25 28 Setting the analog output 25 29 Setting the digital output 25 31 Video Setup Menu 27 32 Setting the TV display 27 33 Selecting the black ...

Страница 36: ...Ma d ei nNo r w a y W W W EL ECT ROCOM P ANI ET NO ...

Отзывы: