background image

CONNECTING  THE  CAMERA  TO  YOUR  WIRELESS 
NETWORK 

Ensure your camera and mobile are situated close to the router 
so they both recieve a good WIFI signal. 
 
Connect  your  phone  to  your  2.4ghz  wireless  network.  (To 
ensure  your  phone  is  connected  to  your  router  correctly  it  is 
advisable  to  disable  mobile  data,  and  check  access  to  the 
internet using your phones browser) 
 
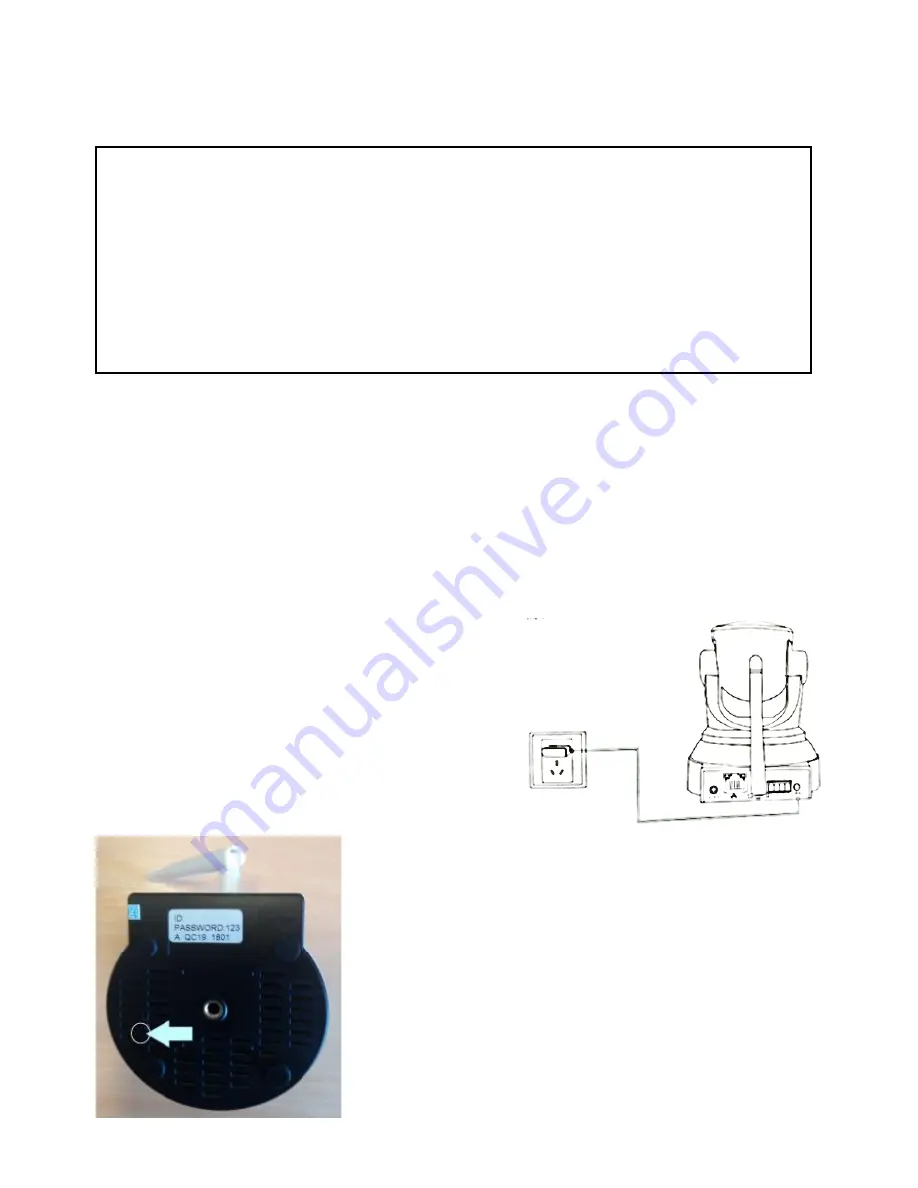
Plug  the  camera  into  the  mains 
(ensuring  it  is  still  close  to  the 
router). 
 
Wait for around 30 seconds until the 
camera starts to bleep (single bleep 
at 10 second intervals) 


If  after  30  seconds  the  camera  does 
not start to bleep

:  Reset the camera by 

inserting  a  pin  into  the  RESET  hole  on 
the  underside  of  the  camera  for  5 
seconds  until  the  unit  makes  a  noise.  
Then  leave  for  30  seconds  until  the 
camera bleeps. 
 

Please note the camera can only be connected to a 2.4ghz 
network.    If  your  router  is  also  able  to  operate  at  5ghz 
(Dualband),  the  2.4ghz  MUST  be  given  a  different  name 
(SSID) to the 5ghz network and the connection made to the 
2.4ghz network only.  Fursther details on changing the SSID 
of  your  router    are  available  from  your  ISP  /  Router 
manufacturer. 


Содержание DOGCAM720

Страница 1: ...A SETUP AND USER MANUAL Thank you for choosing electriQ Please read this user manual before using this item and keep it safe for future reference V isit our page www electriQ co uk for our entire rang...

Страница 2: ...tions for further use For indoor use only Do not position the unit where it would be subjected to extreme moisture temperature or dust Do not use in bathrooms or other humid places There are no user m...

Страница 3: ...ifi controlled device INSTALLATION OF APP Before installation download the YOOSEE app either using the QR codes below or searching in your chosen app store ANDROID IOS REGISTER WITH THE APP Once the a...

Страница 4: ...n The password must be at least 8 characters and contain letters and numbers Once your password and verification number have been entered press Confirm Please note When registering logging in using yo...

Страница 5: ...econds until the camera starts to bleep single bleep at 10 second intervals If after 30 seconds the camera does not start to bleep Reset the camera by inserting a pin into the RESET hole on the unders...

Страница 6: ...top right hand corner Press the option to Add new device Press the option for Fast Networking Select your 2 4ghz WIFI network from the drop down list and enter the password for your network This is us...

Страница 7: ...to swap the internet connection manually To do this exit the app disconnect from your wifi network and connect to the hotspot created by the camera which will be labelled GM_AP_ before going back to...

Страница 8: ...n camera 7 Camera Settings 8 List devices paired with App 9 Alarm Push Information 10 Access images and videos saved to phone 11 App Settings 12 View Camera See Below CAMERA VIEW SCREEN 1 Return to Al...

Страница 9: ...While on the camera view screen you can pan and tilt the image by sliding your finger across the image A pinch action can also be used to zoom in and out on the image...

Страница 10: ...e CMS app To scan the code they must log into the app under their own user account and then press the buttd n labelled as 1 on the All Devices screen to scan the QR code you have create PLAYBACK FROM...

Страница 11: ...a RTSP password to be set to prevent unauthorised access to the camera Network settings Allows the connection type of the camera to be changed between wireless and wired Alarm Settings Allows the cam...

Страница 12: ...t settings for monitoring via the app and changing the response of the phone when the alarm is triggered Help and Feedback List common issues information on their causes and how to resolve them ALARM...

Страница 13: ...you through the installation process Once the software is installed open the program CMSClient which will load to the login screen Leave the password blank and press OK to load the monitoring softwar...

Страница 14: ...and change the settings for the CMS software including adding modifying and removing users Lock Lock and Unlock the app to leave it open running while still preventing unauthorised access PREVIEW SCR...

Страница 15: ...rmal view and full screen mode Windows Select the number of windows that are visible on the screen Right clicking on the video stream brings up a menu allowing recording of footage directly to the PC...

Страница 16: ...lable recordings Tick the box next to the camera s you want to view and left click on the green bar around the time you require to view The video will start to playback PLAYBACK OF RECORDINGS ON THE C...

Страница 17: ...st Yorkshire HX5 9DA Disposal Do not dispose this product as unsorted municipal waste Collection of such waste must be handled separately as special treatment is necessary Recycling facilities are now...

Отзывы: