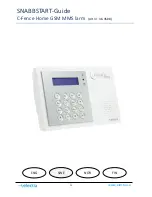


4
www.electia.se
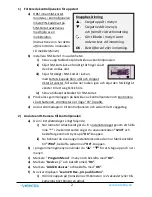
g)
Note: Once you have changed your MMS settings, you MUST exit the menu
by pressing ” ” 4 times and then restart the alarm in order for the
settings to take effect. This is done by disconnecting the power supply and
turning off the power switch (under the rubber plug) for 10 seconds.
4)
Add MMS and email recipients to camera pictures.
a)
Go to installer mode. Proceed as follows:
i)
With the alarm disabled, go to installer mode by pressing and
holding
”*”
for 2 seconds. Then enter the user code
”1234”
and
confirm by pressing the
”OK”
button.
ii)
Now you have to key in the installation code as well, which is preset
to
”7982”
. After that confirm by presing the
”OK”
button.
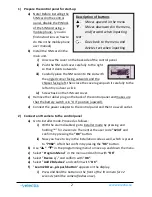
b)
Use
“
” “
”
in the programming menu to move up and down the menu.
c)
Select ”
Reporting
” and confirm with the
”OK”
button.
d)
Select ”
MMS TEL/E-MAIL”
and press
”OK”
.
e)
Select an email using
“
” “
”
and press ”
OK”.
f)
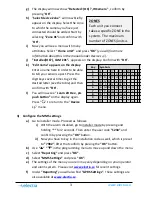
Enter a mobile number or an email here
(see the table of symbols on the
previous page)
.
g)
Then confirm with the
”OK”
button.
h)
Press ” ” to return to the main menu.
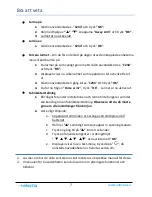
5)
Add telephone numbers for SMS alarms –
In case of an alarm, these will be
contacted by SMS.
a)
Go to installer mode. Proceed as follows:
i)
With the alarm disabled, go to installer mode by pressing and
holding ”
*”
for 2 seconds. Then enter the user code
”1234”
and
confirm by pressing the
”OK”
button.
ii)
Now you have to key in the installation code as well, which is preset
to
”7982”
. After that confirm by presing the
”OK”
button.
b)
Use
“
” “
”
in the programming menu to move up and down the menu.
c)
Select ”
Reporting
” and confirm with the
”OK”
button.
d)
Select ”
Tel Settings
” and press ”
OK
”.
e)
Select ”
Tel.Number
” and press ”
OK
”.
f)
Select an item from ”
1
” to ”
5”
and then press ”
OK”.
g)
Enter a telephone number, for example ”
0701234567
” and press ”
OK”.
h)
If you want to add more numbers, repeat the steps from 5f.
i)
To return to the main menu, press ” ”.
Содержание C-Fence
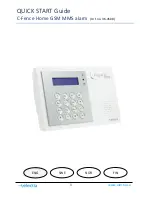
Страница 1: ...1 www electia se QUICK START Guide C Fence Home GSM MMS alarm Art no 36 4508 ENG SWE NOR FIN...
Страница 9: ...1 www electia se SNABBSTART Guide C Fence Home GSM MMS larm Art nr 36 4508 SWE NOR FIN ENG...
Страница 17: ...1 www electia se Hurtigstartveiledning C Fence Home GSM MMS alarm Art no 36 4508 NOR SWE ENG FIN...
Страница 25: ...1 www electia se PIKA ALOITUSOPAS C Fence Home GSM MMS alarm Art no 36 4508 FIN SWE NOR ENG...


