Page 7 of 25
4. Taking the Vario Engraver VE 600 into operation
4.1 Setting up the engraver
The engraver is best set up a dry area, as free of dust as possible. Do not expose the
device to direct sunlight. Make sure that the connections are accessible at all times.
Set the
VE 600
up in such a way that it stands securely and firmly on the surface
used.
Ensure that the engraving arm can move freely and is not blocked by any objects.
4.2 Connection
Connect the device by means of the mains power cable provided to a socket which
has been installed in the regulation manner. The
VE 600
has a variable input AC
voltage of 100-240V~ 50-60Hz. The mains cable is exchangeable and can be adapted
to various different countries with different mains plugs.
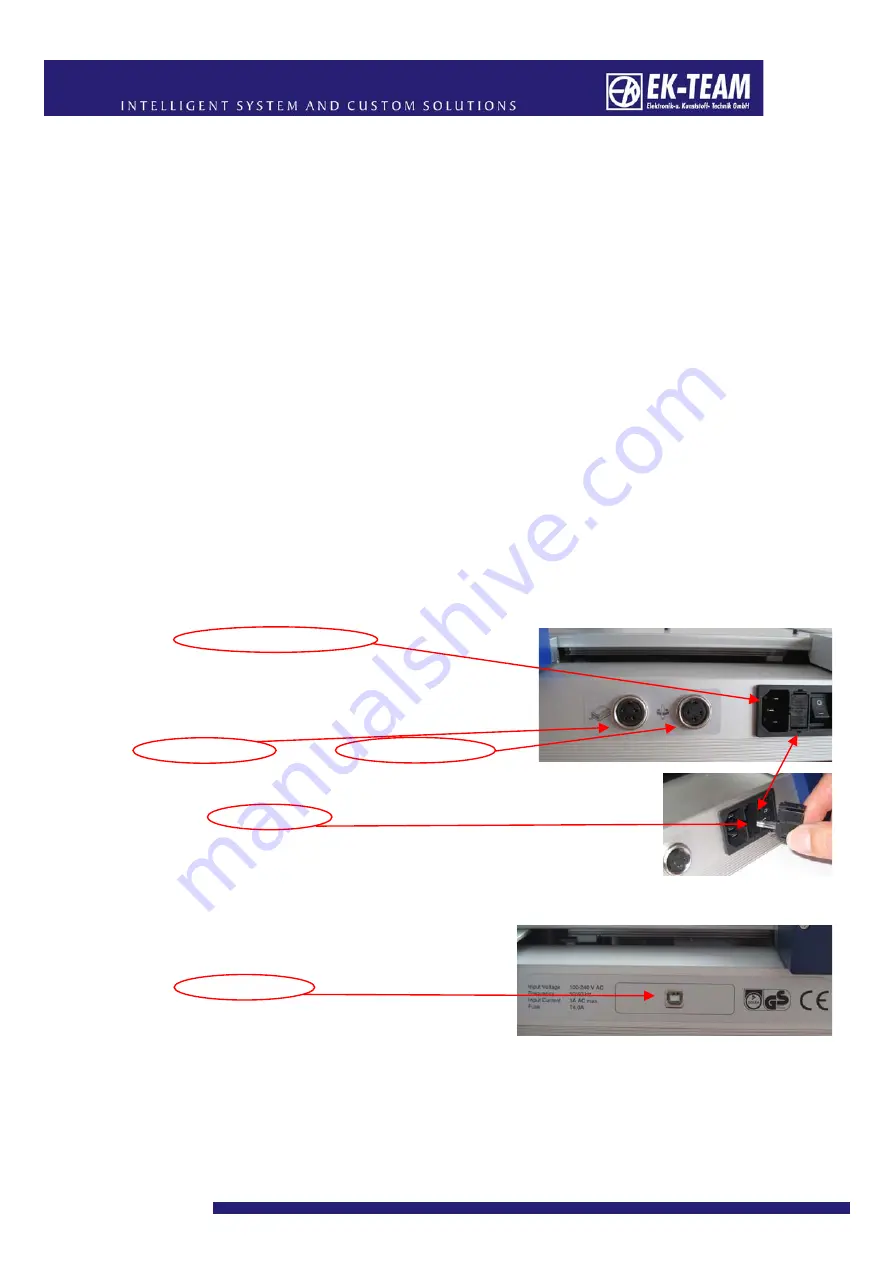
The mains power connection is located on the
top left-hand side of the
VE 600
, which is where
you insert the mains cable provided.
Next to are the connections for the
vacuum cleaner and the engraving spindle.
Located at the connection point, as well as the On/Off switch, is
also the miniature fuse (4A).
Next, connect the device by means of the
USB data cable provided.
The connection point is located on the top
right-hand side of the
VE 600
.


