6
ASSEMBLY INSTRUCTIONS
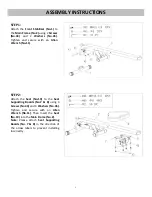
STEP 1:
Attach the
Front Stabilizer (No.1)
to
the
Main Frame (No.2)
using 2
Screws
(No.43)
and 2
Washers (No.45)
.
Tighten and secure with an
Allen
Wrench (No.11)
.
STEP 2:
Attach the
Seat (No.19)
to the
Seat
Supporting Boards (No.7 & 8)
using 4
Screws (No.43)
and 4
Washers (No.45)
.
Tighten and secure with an
Allen
Wrench (No.11)
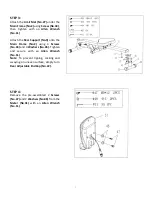
. Then Insert the
Seat
(No.19)
into the
Main Frame (No.2)
.
Note:
Please attach
Seat Supporting
Boards (No. 7 & 8)
in the direction of
the arrow labels to prevent installing
incorrectly.
Содержание RW032
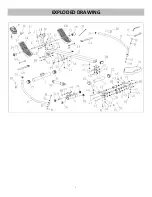
Страница 3: ...3 EXPLODED DRAWING...
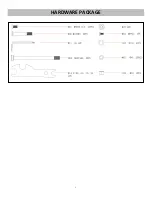
Страница 4: ...4 HARDWARE PACKAGE...


