7
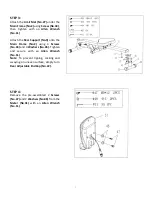
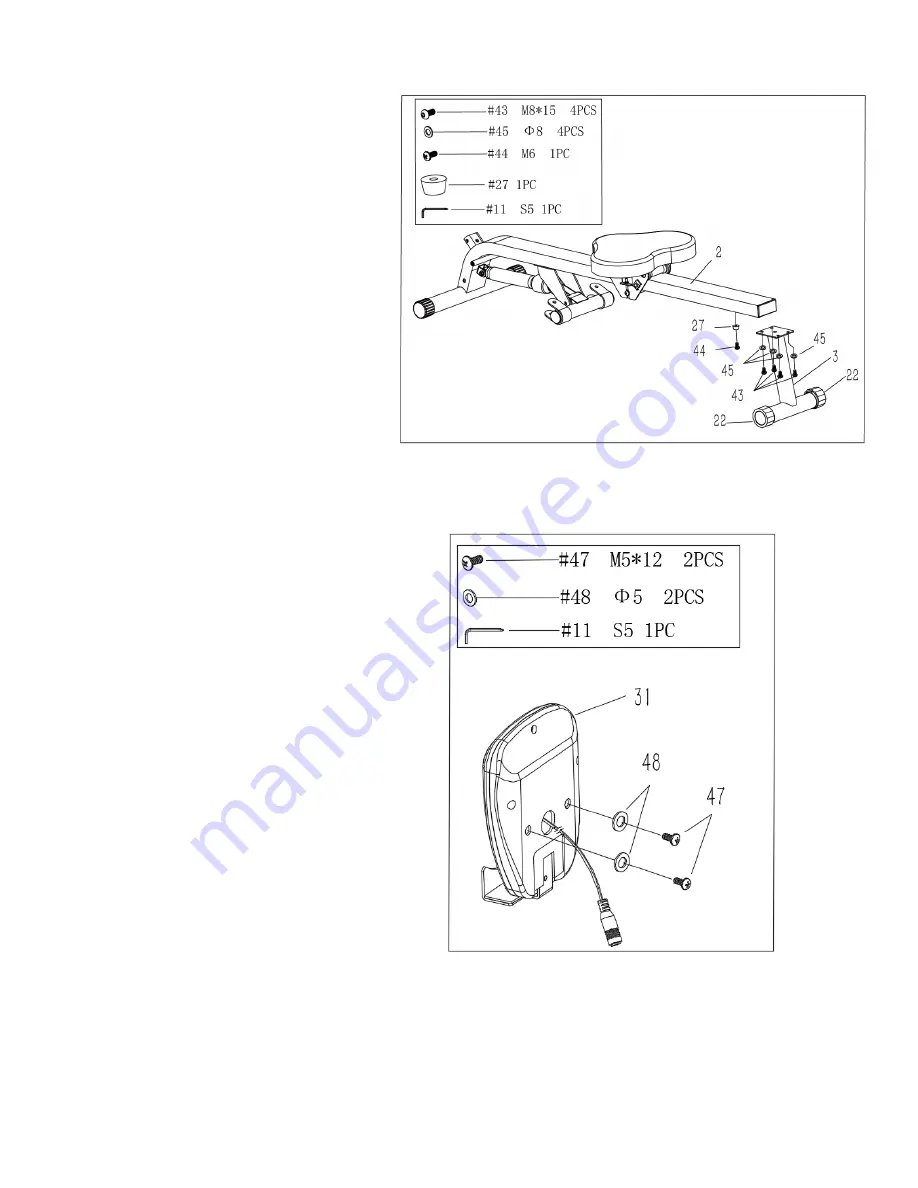
STEP 3:
Attach the
Limit Mat (No.27)
under the
Main Frame (No.2)
using
Screw (No.44)
,
then tighten with an
Allen Wrench
(No.11)
.
Attach the
Rear Support (No.3)
onto the
Main Frame (No.2)
using 4
Screws
(No.43)
and 4
Washers (No.45)
. Tighten
and secure with an
Allen Wrench
(No.11)
.
Note
: To prevent tipping, rocking and
swaying on uneven surface, simply turn
Rear Adjustable End Cap (No.22).
STEP 4:
Remove the pre-assembled 2
Screws
(No.47)
and 2
Washers (No.48)
from the
Meter (No.31)
with an
Allen Wrench
(No.11)
.
Содержание RW032
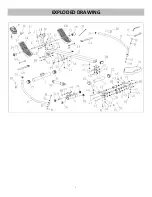
Страница 3: ...3 EXPLODED DRAWING...
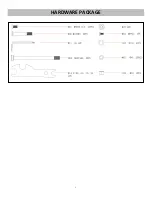
Страница 4: ...4 HARDWARE PACKAGE...


