


Eela Audio D3 manual, October 2009
18
Setup examples:
Setting up a CONTROL ROOM MICROPHONE:
Connect the control room microphone to one of the MIC inputs.
Briefly pushing the grey “select” button that opens the channel settings window in the display.
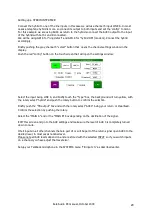
Push the red “config” button on the touch screen that will open the settings window:
Select the input being microphone, and briefly touch the “Type” box, the background will turn yellow,
with the rotary select “CR micr” and push the rotary button to confirm the selection.
If you are using a condenser microphone select the box “PHANTOM”, please note that if you select
“PHANTOM” in one channel the 48 Volts will be switched on in all microphone channels.
Briefly push the “TB-output” box and with the rotary select “off” as in most cases you do not need a
TB channel assigned to a CR microphone. Confirm the selection by pushing the rotary.
Select the “MAIN A” and or the “MAIN B” box depending on the destination of the signal.
NB. The “Config” button mono/stereo has no effect in MIC mode.
Briefly touch the grey “select” button again to return to the main screen with meters.
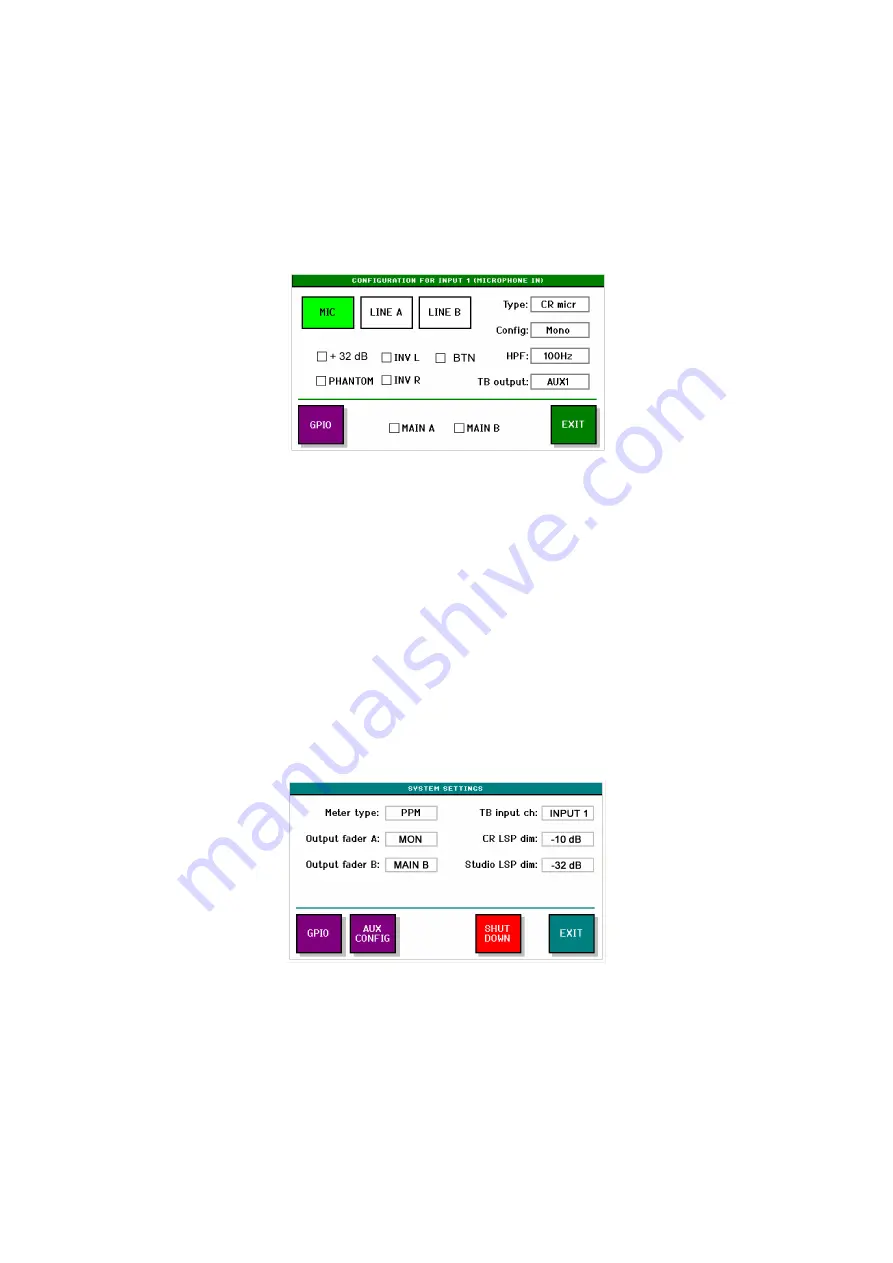
In the main screen select “SYSTEM”.
Select the box “CR LSP dim” and with the help of the rotary select amount the monitor speakers will
dim upon opening the CR microphone fader in order to prevent feedback. Same for the “Studio LSP
dim”.
In case you will need to setup a TalkBack system to other sources you can use your CR microphone
as a TB microphone:
Select the box “TB input ch” and with the help of the rotary select the channel on witch the CR
microphone is connected. This will than be your TB microphone.
Содержание D3
Страница 5: ...Eela Audio D3 manual October 2009 4 ...


