

1. Main Menu
•
Make sure that you have properly installed and connected the cables of the receiver.
If the receiver has still it’s factory default values there is no program list.
On activation, the Main Menu window will display on screen.
You can also enter
Main Menu
, by pressing the
MENU
button on the remote control.
•
This menu consists of 6 major sub-menus as follow
- Edit Channel
- Installation
- System Setup
- Tools
- Game
- REC
•
During the installation the
OK
key confirms a selection.
Use the
PR+, PR-
key to move upwards and downwards from one line to another line and
use key
to move from main menu to sub menu and move from left side
to right side or vice versa.
You can exit the Menu display at any time, by pressing the
MENU
or
EXIT
button on the
RCU
4. Software update
USB Upgrade
Press OK to upgrade through USB Device.
5. Factory set User passwords:
Press OK to upgrade through USB Device.
5.1 Factory set User passwords:
Edit Channel:
The default password is
“000000”.
Parental Lock:
The default password is
“000000”.
Set Password:
The default password is
“000000”.
Load Factory Setting:
The default password is
“000000”.
RCU
MENU INFORMATION
GENERAL INFORMATION
MENU INFORMATION
MENU INFORMATION
TROUBLE SHOOTING
7
6
9
10
11
8
MENU INFORMATION
2. Channel Search
2.1 Auto Search
When you enter
Auto Scan menu
, the screen will display as below.
In FTA Only, press
[Left/Right]
key to choose
Yes
or
No
.
Move the highlight on the search option, and press
[OK]
key to start scanning.
Press
[EXIT]
key to exit this menu.
2.2 Channel Scan
When you enter
Channel Scan
, the screen will display as below.
There are two scan modes available. You can choose to scan by channel or by frequency.
When scan band is UHF and region is “China”, the range of Ch Number is from 13 to 61.
When scan band is VHF and region is “China”, the range of Ch Number is from 1 to 12.
(Ch bandwidth is according to region.)
When you complete your configuration, move highlight to search option,
and press
[OK]
key to start scanning.
Press
[EXIT]
key to exit the scanning and save the current parameters.
3. Load Factory Setting
When you complete your configuration, move highlight to
search
option,
and press
[OK]
key to start scanning.
If you choose Yes, all the parameters of your receiver will reset
to the factory default values.
NOTE:
Please use this function with caution as ALL user configured
menus will be changed to factory default ones.
•
Note:
If you have tried all of the actions suggested above, without solving the
problem, please contact your dealer or service provider.
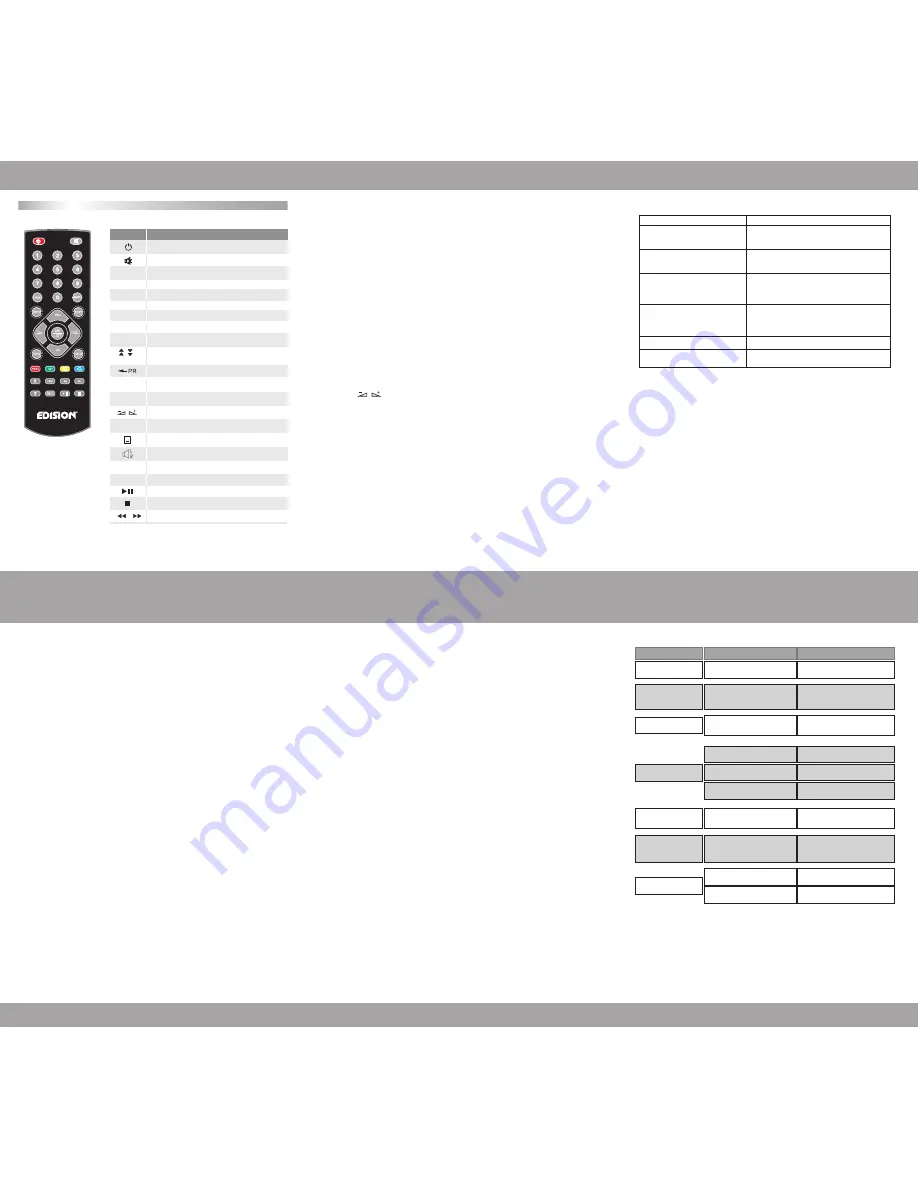
Key
0~9
TV/RADIO
EPG
FAV
FIND
INFO
MENU
OK/LIST
PR+, PR-
EXIT
TXT
REC
Function
•
The above diagram is only for reference, please make sure it applies to your device.
Standby On/Off
Sound Mute
Switches between TV and Radio mode
EPG (Electronic Program Guide) function selection
Displays the favorite grouplist
Display the Find window
Show information of the current channel
Press this key one time to run menu onscreen
Switches back to previous channel
Switch to subtitle mode
Display the Audio window
Switch to teletext mode
Start Recording
Play and pause
Stop playing
Press to fast forward or fast backward
Moves up / down a page in the list
Previous and next in media player list
Executes the selected item in the menu screen
or enters the desired value in any input mode
When watching a channel, change channels or
move to the next higher or lower item in the menu
When watching a channel, adjust the volume or
move to the left or right item in the menu
Return to the previous menu on the menu
screen or escape from the menu
Channel number selection
and menu number entry
Main-menu
Sub-menu
Problem
Possible causes
What to do
Edit Channel
TV Channel List
Radio Channel List
Delete All
Auto Search
Channel Scan
Aerial Adjustment
LCN
Information
Load Factory Setting
S/W Upgrade by OTA
Upgrade By USB
USB Device
Remove USB
Device Safely
Othello
Sudoku
Record Manager
Disk Information
DVR Configuration
Jump
Language
TV System
Local Time Setting
Timer Setting
Parental Lock
OSD Setting
Favorite
Auto Standby
Installation
System Setup
Tools
Game
REC
The display on the front
panel does not light up.
Front panel red light is on,
but there is no Audio/Video
although turned ‘ON’ with
IR remote control
No sound or picture.
Bad picture / blocking error.
The RCU is not working.
There is interference on
your terrestrial program or
video signal.
The picture is not
displayed on the screen,
when switching on.
Main cable is not connected.
Signal cable not connected or
improperly connected
No signal or weak signal.
Signal is too strong.
Battery exhausted.
Antenna noise factor too high.
RCU is incorrectly aimed.
The system is connected by RF
leads and the output program of the
receiver interferes with an existing
terrestrial programs or Video signal.
The system is connected by RF
leads
The antenna is faulty
Check that the main cable is plugged
into the power socket.
Please check that the antenna signal
plug is properly commected to the right
plug on the receiver.
Connect a signal attenuator to the
antenna input.
Change the batteries.
Change to an antenna with lower
noise factor.
Aim RCU at the receiver, or check that
nothing blocks the front panel.
Change the receiver output channel
number to a channel number away from
adjacent operating ones or connect the
receiver to TV using scart cable.
Check the UHF channel number output
programmed and tune the TV
on this channel.
Change the antenna.
Check the cable connections, antenna
and other equipment connected
between the antenna and the receiver.


