


28
Getting connected and installing drivers (Windows)
7
Connect the SD-20.
1.
Set the
computer switch
of the SD-20 to
USB
.
2.
With the
SD-20’s power switch turned off
, connect it to the
AC
adaptor
.
3.
Plug the
AC adaptor
into an AC power outlet.
4.
Use the
USB cable
to connect the
SD-20
to your
computer
.
5
Set the SD-20’s power switch to the
ON
position.
fig.2-20_30
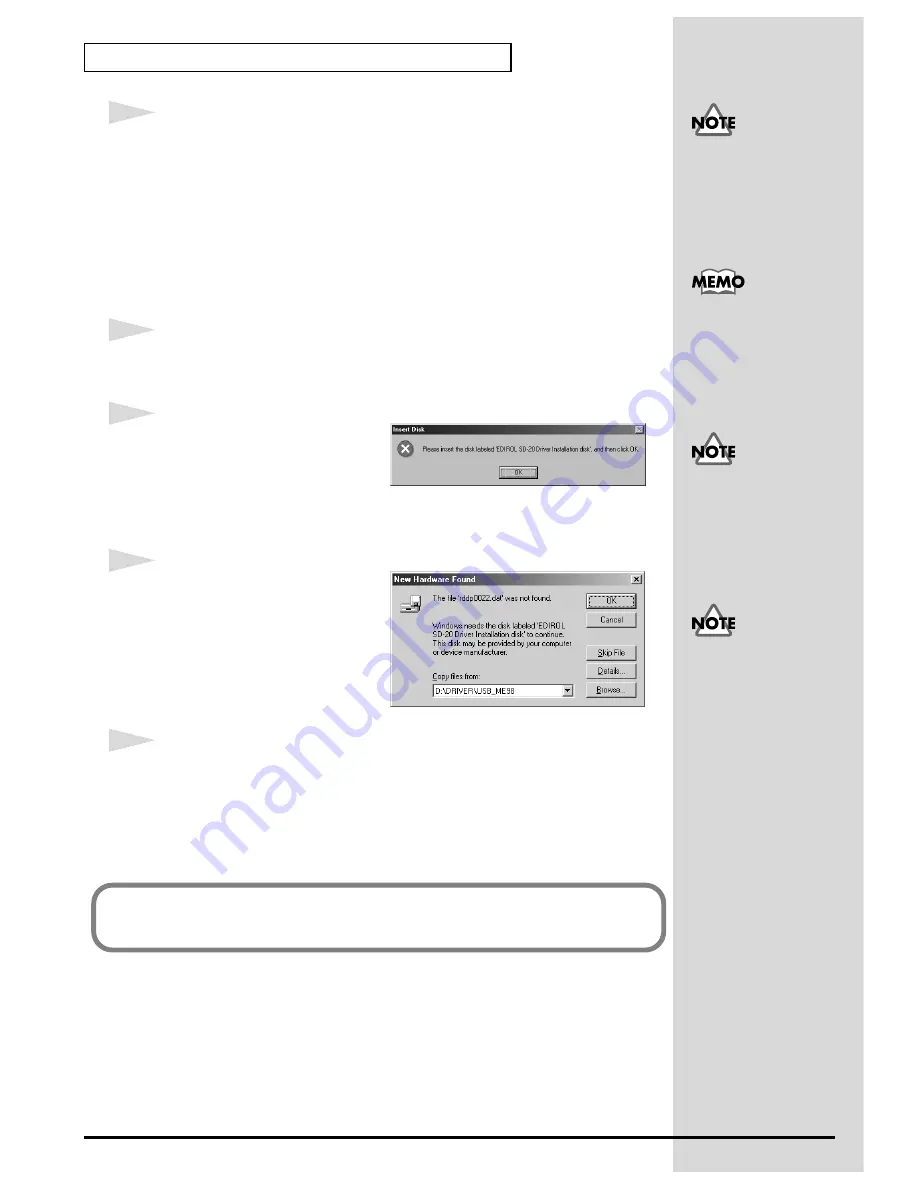
6
If you are using Windows 98, an
Insert Disk
dialog box will
appear.
Click
[OK]
.
fig.2-21a_40
7
The
New Hardware Found
dialog box will appear.
In the "
Copy files from
" area, type
"
D:\DRIVER\USB_ME98
" and
click
[OK]
.
8
Once the driver has been installed,
New Hardware Found
dialog box will
close.
In the
SETUPINF
dialog box, click
[OK]
. The
SETUPINF
dialog box will
close.
Even if you will normally
be using the SD-20 with
BUS power, please use the
AC adaptor while you are
installing the driver and
making settings.
This unit is equipped with
a protection circuit. A brief
interval (a few seconds)
after power up is required
before the unit will operate
normally.
If you are using Windows
98 and the
Insert Disk
dialog box dose not
appear, please read
The
“Insert Disk” dialog box
does not appear
(p. 235).
If the
New Hardware
Found
dialog box does not
appear, re-install the
driver using the same
procedure as described in
The “Insert Disk” dialog
box does not appear
(p.
235).
Next, you need to make the driver settings.
(->
Settings and checking
(p. 39)
Содержание StudioCanvas SD-20 24bit Digital
Страница 273: ...273 MEMO ...
Страница 274: ...274 MEMO ...