20
III-3.
T-Rail Mount
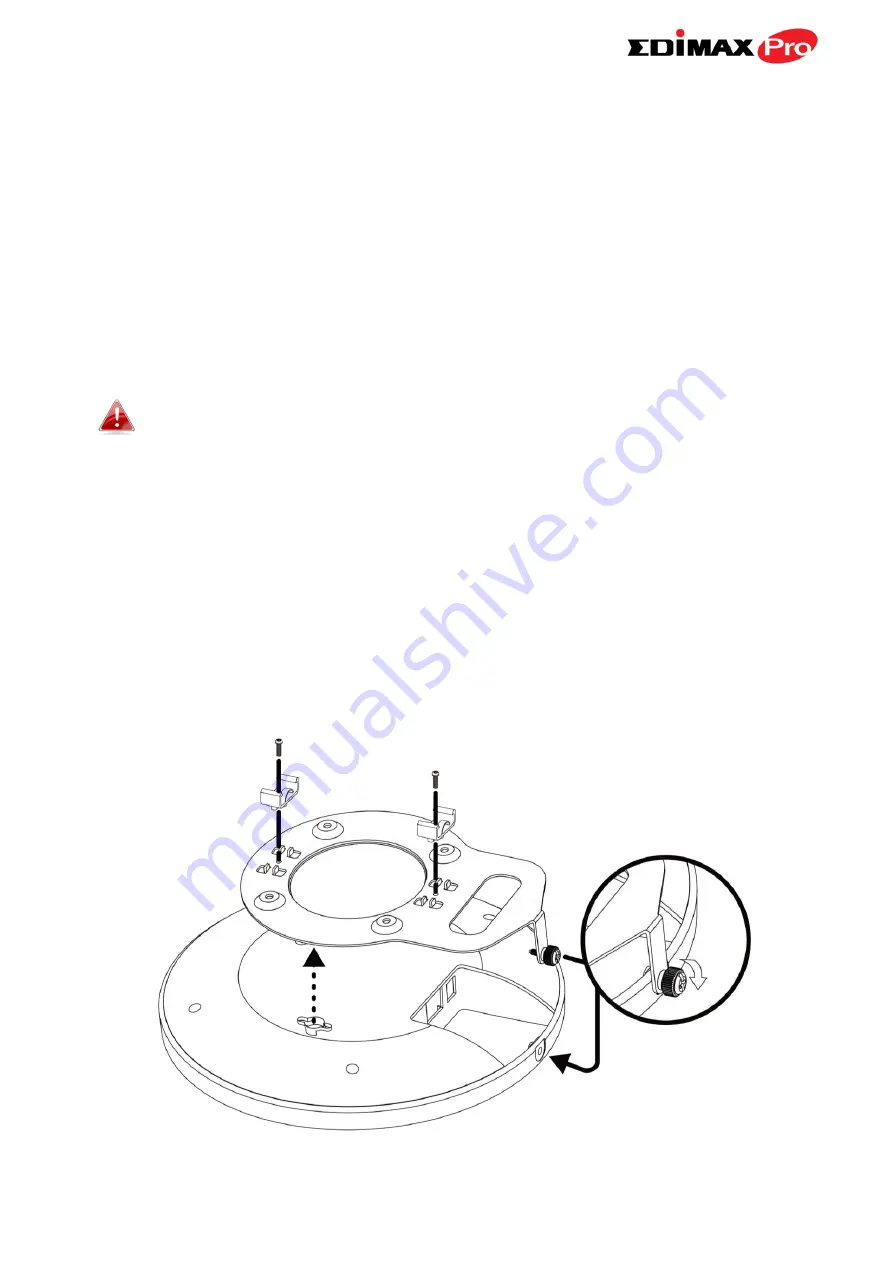
To mount the access point to a T-Rail, please follow the instructions below
and refer to diagram
C, D
&
E
.
1.
Select the correct size T-Rail bracket from the two sizes which are
included in the package contents.
2.
Attach the T-Rail bracket
to the ceiling mount using the included screw
s
x
2 as shown in
i.
You can use the included bracket and longer screws If you need
more space between the access point and the T-Rail.
3.
Attach the access point to the ceiling mount bracket by aligning the
grooves in the access point to the ceiling mount, as shown in
ii
.
4.
Secure the access point firmly in place using the included screw as shown
in
iii
.
5.
Clip the access point onto your T-Rail using the now attached T-Rail
bracket.
C
i
ii
iii
Содержание CAP1750
Страница 1: ...CAP1750 User Manual 12 2015 v1 1...
Страница 24: ...18 A i ii iii...
Страница 25: ...19 B i ii iii iv...
Страница 27: ...21 D E i i ii ii iii iii...
Страница 31: ...25...
Страница 82: ...76 3 Remember to Apply your changes and make sure Enable is checked...
Страница 96: ...90 a password check the Open file with password box and enter the password in the field underneath...
Страница 101: ...Edimax Pro NMS 95 Edimax Pro NMS...
Страница 108: ...Edimax Pro NMS 102...
Страница 116: ...Edimax Pro NMS 110 Toolbox The Toolbox panel provides a network diagnostic tools ping and traceroute...
Страница 232: ...Edimax Pro NMS 226 3 Click Local Area Connection 4 Click Properties...
Страница 233: ...Edimax Pro NMS 227 5 Select Internet Protocol Version 4 TCP IPv4 and then click Properties...
Страница 240: ...Edimax Pro NMS 234 5 Enter the IP address 192 168 2 10 and subnet mask 255 255 255 0 Click on Apply to save the changes...
Страница 254: ...248...


