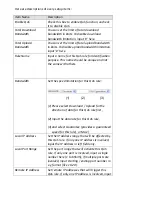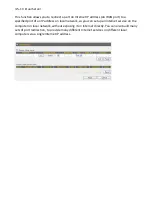
the
IP
address
in
left
field
only.
Remote
Port
Range
Set
the
port
range
that
will
activate
this
QoS
rule.
If
only
one
port
is
involved,
input
a
single
number
here
(1
to
65535);
if
multiple
ports
are
involved,
input
starting
/
ending
port
number
in
x
‐
y
format
(like
10
‐
20).
Traffic
Type
If
you’re
creating
a
QoS
rule
for
a
specific
type
of
traffic,
you
can
select
it
from
this
menu
and
you
don’t
have
to
input
port
range
above.
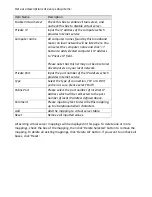
Protocol
Select
the
protocol
type
here
(TCP
or
UDP).
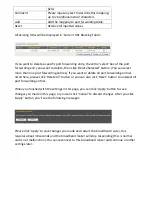
Add
Click
‘add’
button
to
add
a
new
QoS
rule
(detailed
instructions
will
be
given
below).
Reset
If
you
want
to
erase
all
values
you
just
entered.
Click
‘Reset’
Edit
If
you
want
to
modify
the
content
of
a
specific
rule,
please
check
the
‘select’
box
of
the
rule
you
want
to
edit,
then
click
‘Edit’
button.
Only
one
rule
should
be
selected
a
time!
Delete
Selected
You
can
delete
selected
rules
by
clicking
this
button.
You
can
select
one
or
more
rules
to
delete
by
check
the
‘select’
the
box
of
the
rule(s)
you
want
to
delete
a
time.
If
the
QoS
table
is
empty,
this
button
will
be
grayed
out
and
cannot
be
clicked.
Delete
All
By
clicking
this
button,
you
can
delete
all
rules
currently
listed
in
the
QoS
table.
If
the
QoS
table
is
empty,
this
button
will
be
grayed
out
and
cannot
be
clicked.
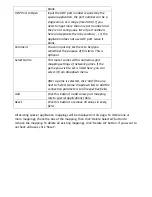
Move
Up
Move
selected
rule
up.
First
QoS
rule
will
be
proceed
first,
so
you
can
move
higher
priority
rules
up.
Move
Down
Move
selected
rule
down.
When
you
finished
with
the
settings
in
this
page,
you
can
click
‘Apply’
button
to
save
changes
you
made
in
this
page,
or
you
can
click
‘Cancel’
to
discard
changes.
After
you
click
‘Apply’
button,
you’ll
see
the
following
messages:
Содержание BR-622nC
Страница 1: ......
Страница 12: ...Bottom Item Name Description Wall mount hole Mount BR 6228nS_nC on the wall...
Страница 17: ...2 Select Obtain an IP address from a DHCP server then click OK...
Страница 19: ...2 Select Obtain an IP address automatically and Obtain DNS server address automatically then click OK...
Страница 21: ...2 Select Obtain an IP address automatically and Obtain DNS server address automatically then click OK...
Страница 23: ...2 Select Obtain an IP address automatically and Obtain DNS server address automatically then click OK...
Страница 28: ...Please click start run at the bottom lower corner of your desktop Input cmd then click OK...
Страница 136: ...3 7 1 Internet Connection This page shows the current status of Internet connection...
Страница 137: ...3 7 2 Device Status This page shows current wireless LAN and wired LAN configuration...
Страница 140: ...3 7 5 Active DHCP Client This page shows all current DHCP clients You can click Refresh to reload the list...
Страница 147: ......


