


page 2
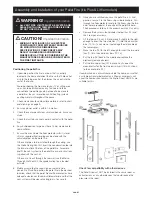
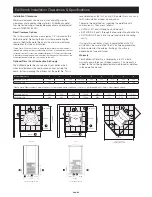
• THE APPLIANCE AND FLUE-SYSTEM SHALL BE
INSTALLED IN ACCORDANCE WITH AS/NZS 2918
AND THE APPROPRIATE REQUIREMENTS OF THE
RELEVANT BUILDING CODE OR CODES.
• THE PELLET FIRE MUST NOT BE LOCATED
IMMEDIATELY BELOW AN ELECTRICAL SOCKET-
OUTLET.
• CAUTION: THE PELLET FIRE HAS MOVING PARTS.
DISCONNECT POWER BEFORE SERVICING.
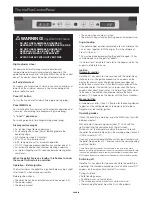
WARNING!
Important Information
The pellet fire is designed to heat the room it is installed in by
radiation and by air movement from the front grilles. The heat is
generated by automatic pellet combustion in the firebox.
The only risks which may derive from use of the pellet fire are
linked with non-compliance with the installation instructions,
direct contact with live electrical parts (inside) or with the fire or
hot parts (glass, pipes and hot air outlet), and the introduction
of foreign substances. Only use wood pellets as fuel.
If components fail, the pellet fire is fitted with safety devices
which turn it off. This must be allowed to happen without
interference.
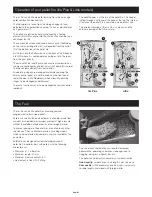
For correct operation, the pellet fire must be installed in
compliance with the instructions on pages 5 & 6 and the door
must not be opened while running: combustion is managed
automatically so no manual operations are needed.
Please take particular note of the following:
• Never put foreign substances in the firebox or hopper.
• Do not use flammable products to clean the smoke duct.
• Firebox and hopper components must only be cleaned
using a vacuum cleaner.
• The glass must be cleaned only when cold with glass
cleaner and cloth. Do not clean door glass when hot.
• During operation, the outlet pipes and door reach high
temperatures. Install a child guard if children present.
• Do not keep objects which are not able to withstand heat
in the immediate vicinity of the pellet fire.
• Never use liquid fuels to light the pellet fire or rekindle the
embers.
• Do not block ventilation openings in the room where the
pellet fire is installed or air inlets in the pellet fire itself.
• Do not get the pellet fire wet, and do not put wet hands
near electrical parts.
• Do not fit reducers on the smoke outlet pipes.
• The pellet fire must be installed in a suitable place as
regards fire safety, and provided with all the facilities
(power supply and outlets) it requires for correct safe
operation.
• Before carrying out any maintenance, disconnect the
device from the mains power supply.
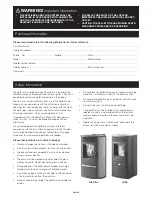
Safety Information
Iris Plus
Little
Please record and retain the following information for future reference
Customer Name ...............................................................................................................................................................................
Installation address ...........................................................................................................................................................................
Phone Hm ............................................... Mobile ......................................... Work ........................................................................
Model
.................................................................................................... Serial Number ..........................................................
Retailer purchased from ...................................................................................................................................................................
Retailer Address ............................................................................................. Date Purchased .......................................................
Comments ......................................................................................................................................................................................
......................................................................................................................................................................................
Purchase Information