23
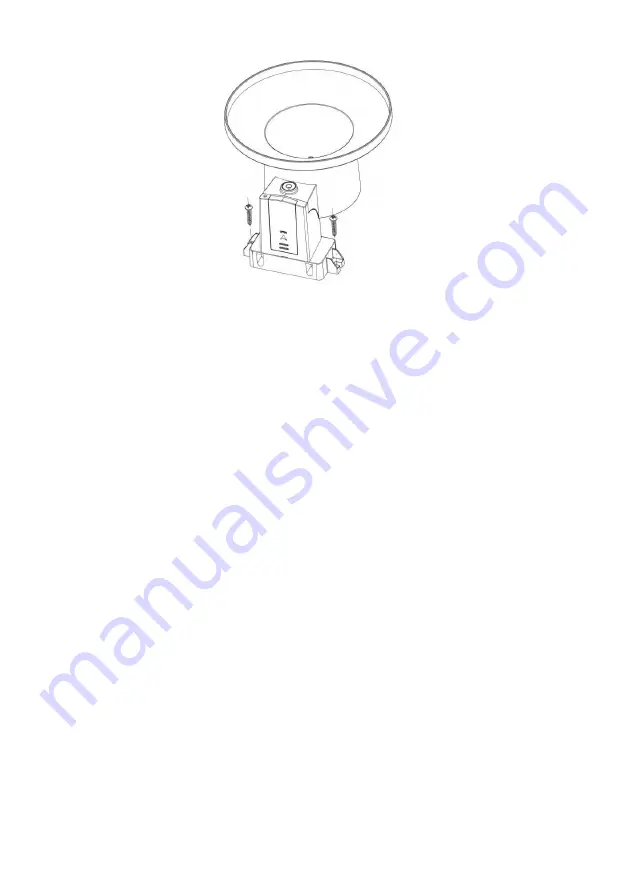
Figure 16: Rain gauge sensor mounting with screws installation diagram
Note:
Use the bubble level beside the rain sensor as a guide to verify that the
sensor is levelled. Use shims as necessary to achieve level installation.
4.4
Outdoor Temperature and Humidity Sensor Set Up
Note:
To avoid permanent damage, please take note of the battery polarity before
inserting the batteries. Looking at Figure 17 from left to right the left-most
(or bottom) battery is to be installed with its + terminal pointing down, and
the other battery with its + terminal pointing up.
Remove the battery door on the back of the sensor by sliding it in the
direction of the arrow. Insert two AA batteries as described and put
compartment door back and slide it in the opposite direction to lock.
Содержание GW1002
Страница 38: ...38 Dashboard Graph display ...
Страница 39: ...39 List display Weather Map ...


