background image

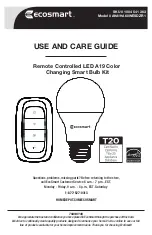
Remote Controlled LED A19 Color 

Changing Smart Bulb Kit

THANK YOU

We appreciate the trust and confidence you have placed in EcoSmart through the purchase of this bulb.

We strive to continually create quality products designed to enhance your home. Visit us online to see our full 

line of products available for your home improvement needs. Thank you for choosing EcoSmart!

USE AND CARE GUIDE

SKU # 1004 541 363

Model # A9A19A60WESDZR1

1-877-527-0313

HOMEDEPOT.COM/ECOSMART

Questions, problems, missing parts? Before returning to the store,

call EcoSmart Customer Service 8 a.m. - 7 p.m., EST, 

Monday - Friday, 9 a.m. - 6 p.m., EST, Saturday 

Содержание 1004 541 363

Страница 1: ... products designed to enhance your home Visit us online to see our full line of products available for your home improvement needs Thank you for choosing EcoSmart USE AND CARE GUIDE SKU 1004 541 363 Model A9A19A60WESDZR1 1 877 527 0313 HOMEDEPOT COM ECOSMART Questions problems missing parts Before returning to the store call EcoSmart Customer Service 8 a m 7 p m EST Monday Friday 9 a m 6 p m EST S...

Страница 2: ...WARRANTY Wireless Protocol Zigbee 3 0 This device is fully Zigbee 3 0 certified Zigbee Limited Warranty Bulb is guaranteed to last 3 years based on 3 hours use per day 7 days per week The remote is guaranteed to last 3 years based on 100 times use per day 7days per week The remote guarantee does not include normal wear and tear and batteries If this product does not last 3 years after date of purc...

Страница 3: ... Remote Bracket C 1 Reset Pin D 1 Mounting Screws Sets E 1 A AA BB CC DD EE II JJ GG KK HH FF GG REMOTE INTRODUCTION B C E D Part Description AA Indicator Light BB ON OFF CC Dimming DD Color Temperature Tunable EE Memory Part Description FF Plastic Battery Strip GG Reset Button Pinhole HH Battery 3V CR2450 II Screw JJ Battery Cover KK Groove to pry out the battery ...

Страница 4: ... one inch using the screws E Two magnets NN are used to magnetize the remote B as below 2 Using Double Sided Adhesive Tape Peel off the adhesive liner PP and attach the bracket C to the wall or other firm surface Part Description MM Groove to separate the back side NN Magnet Part Description PP 3M adhesive liner PP C PP NOTE To avoid radio signal interference do not install the remote bracket outd...

Страница 5: ...nges the color temperature with a smooth transition Press the ON OFF button BB to turn the light ON or OFF Press the dimming button CC to change the brightness from 5 100 There are two ways to change the brightness with the dimming button CC Short presses on the button change the brightness in a step manner Holding down the button continuously changes the brightness with a smooth transition ON OFF...

Страница 6: ...ain on for 3 seconds This indicates that the LED bulb A and remote B have been successfully linked AA BB CC DD EE NOTE Only one LED Bulb will be unpaired at a time To unpair all the LED Bulbs simultaneously reset all the LED Bulb and remote by following the instructions in the factory default section of the instructions To unpair the LED Bulb with the remote hold down the ON OFF button BB and the ...

Страница 7: ... work with wall dimmers or other controlled lighting systems Works with Amazon Eco Plus and SmartThings hubs only Refer to hub manufacturing instructions or website for scene setting scheduling and any other app features Using the wall switch physically switch ON and OFF 6 times within 5 seconds The LED bulb will flash twice after a successful reset Basic Instructions NOTE Ensure the hub is powere...

Страница 8: ...on t have a code to connect the bulb Click Done The LED bulb will now connect as Ecosmart Bulb Name and control the bulb Works with Amazon Echo Plus Open the Amazon Alexa app Select Add Device Select Light Scroll down the light brand list to select other The LED bulb will connect to Alexa by clicking DISCOVER DEVICES ensure the light is on and in a pairing mode Set up the device and the light bulb...

Страница 9: ...or modifications not expressly approved by the manufacturer could void the user s authority to operate the equipment NOTE This equipment has been tested and found to comply with the limits for a Class B digital device pursuant to Part 15 of the FCC Rules These limits are designed to provide reasonable protection against harmful interference in a residential installation This equipment generates us...

Страница 10: ...inking Repeat the linking process The remote fails to unpair the light when the indicatoris blinking The devices have failed to respond to the steps of the unpairing process Press any button to interrupt the indicator blinking and retry the unpair process Reset the remote and try again 10 The light cannot be turned on The battery power is off The battery is not installed correctly Make sure the ba...

Страница 11: ... problems missing parts Before returning to the store call EcoSmart Customer Service 8 a m 7 p m EST Monday Friday 9 a m 6 p m EST Saturday 1 877 527 0313 HOMEDEPOT COM ECOSMART Retain this manual for future use ...

Отзывы: