ECM Elektronika II Prof Скачать руководство пользователя страница 25

Ε

NGLISH


Instruction manual


ELEKTRONIKA II PROFI


24 

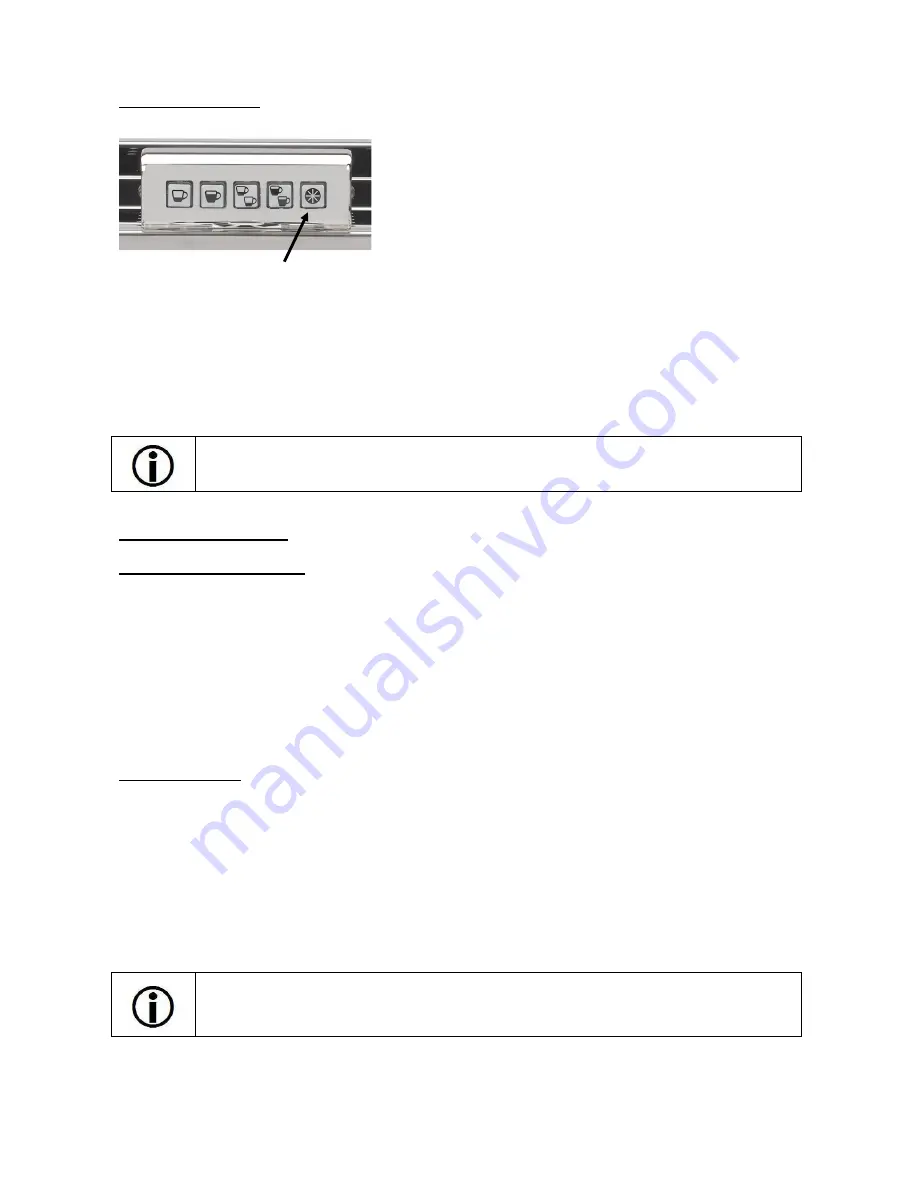
5.2  Dose programming 


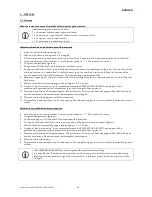
To program the doses proceed as follows: 
 

1


Choose a filter holder and fill it with the suitable quantity of coffee according to the button you would like to 
program (e. g. filter 1 cup for filter holder 1 cup: 7g – 9g  coffee, button no. 1). Place a cup under the filter 
holder. 

2


Press the star button and keep it pressed until it flashes. 

3


Choose the button you would like to program and press it shortly. Coffee is released into the cup. 

4


As soon as the desired quantity of coffee is reached, press the button again. Thus, the dose for the chosen 
button has been programmed. 


Please note that the doses can vary if different quantities of coffee are used for coffee preparation 
or if the imposed pressure on the coffee is different while tamping. 


Every button can be reprogrammed at any time. 


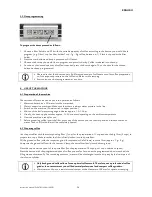
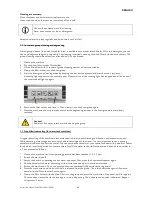
6  USE OF THE MACHINE  

6.1  Preparation of the machine 

 
The switched off machine can be put into operation as follows: 
1


Water tank machines: Fill water into the water tank. 

2


Water connection machines: Make sure that there is always water pressure in the line. 

3


Switch on the machine. (Power switch in upper position.) 

4


Wait until the boiler pressure gauge indicates approx. 1.0-1.2 bar. 

5


Usually, the heat-up phase takes approx. 15-20 minutes depending on the ambient temperature. 

6


Now the machine is ready for use. 

7


Before preparing coffee insert the filter, press one of the buttons on the control panel and release some hot 
water. Thus, the filter holder will be completely heated. 

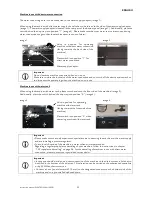
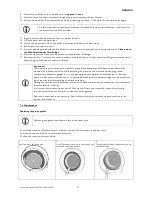
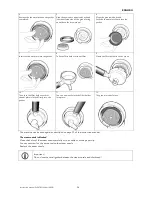
6.2  Preparing coffee 
 

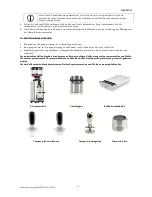
Use the portafilter with the corresponding filter (1 cup) for the preparation of 1 cup and use the big filter (2 cups) to 
prepare two cups. Make sure that the filter is firmly locked into the portafilter. 
Fill the ground coffee (with the respective grind for espresso or Café Crème) into the filter (approx. 7 g – 9 g).  
Compress the ground coffee with the tamper. Clamp the portafilter firmly into the brew group. 
 
Place the cup under the spout of the portafilter (for the preparation of 2 cups, put 1 cup under each spout). 
Press the button with the programmed dose of coffee you prefer. As soon as the programmed dose is reached, the 
filling stops automatically. The remaining pressure / water will be discharged into the drip tray by the lower part of 
the infusion cylinder. 


Only fresh ground coffee allows for an optimal coffee result. Therefore, use a professional coffee 
grinder. In our assortment you will find several professional and compact coffee grinders. 


We recommend to use a stainless steel tamper with a diameter of 58 mm for optimum tamping. 


Содержание Elektronika II Prof

Страница 1: ......

Страница 2: ...ei eventuellen Problemen auf diese zur ckgreifen zu k nnen Dear customer With the Elektronika II Profi you have purchased a high quality espresso coffee machine We thank you for your choice and wish y...

Страница 3: ...inweis f r den Bediener Ber cksichtigen Sie diese Hinweise um Verletzungen zu vermeiden Achtung Wichtiger Hinweis zur korrekten Bedienung der Maschine Caution Important notes on safety for the user Pa...

Страница 4: ...atische Reinigung und Entfettung der Br hgruppe 12 7 3 Vorbeugende Entkalkung f r Wassertankmaschinen 13 7 4 Kleine technische Servicearbeiten 14 8 TRANSPORT UND LAGERUNG 15 8 1 Verpackung 15 8 2 Tran...

Страница 5: ...c group cleaning and degreasing 26 7 3 Prophilactic descaling for water tank machines 26 7 4 Maintenance 27 8 TRANSPORT AND WAREHOUSING 29 8 1 Packing 29 8 2 Transport 29 8 3 Warehousing 29 9 DISPOSAL...

Страница 6: ...en durch eine f r ihre Sicherheit zust ndige Person beaufsichtigt oder erhielten von ihr Anweisungen wie das Ger t zu benutzen ist Kinder sollten beaufsichtigt werden um sicherzustellen dass sie nicht...

Страница 7: ...hen Einsatz bestimmt Jegliche Benutzung f r andere Zwecke ist seitens des Herstellers untersagt und zu unterlassen F r Sch den die auf nicht sachgem en Gebrauch zur ckzuf hren sind bernehmen wir keine...

Страница 8: ...in Einklang mit den g ltigen Gesetzen und rtlichen Vorschriften erfolgen Im Folgenden werden Vorbereitung Stromanschluss Wasseranschluss und Abflussanschluss der Maschine erl utert Bitte beachten Sie...

Страница 9: ...ltet und die Elektronik der Espressomaschine auf Festwasserbetrieb umgestellt wird Bitte stellen Sie sicher dass das Absperrventil an Ihrem Wasseranschluss beim Festwasseranschluss Betrieb immer ge ff...

Страница 10: ...er Inbetriebnahme berpr fen dass das Dampf und Hei wasserventil geschlossen ist die Maschine ausgeschaltet ist Der Metallkippschalter steht in unterer Position der Stecker nicht in die Steckdose einge...

Страница 11: ...er kurz aus und wieder ein 5 2 Einstellung der Programmierung Zur Einstellung der Programmierung sind folgende Schritte auszuf hren 1 Entsprechenden Filtertr ger mit entsprechender Kaffeemenge vorbere...

Страница 12: ...per mit 58 mm Durchmesser 6 3 Hei wasserentnahme 1 Geeignetes Gef mit w rmeisoliertem Haltegriff unter das Hei wasserrohr halten 2 ffnen Sie das Hei wasserventils ber den Kipphebelschalter nun k nnen...

Страница 13: ...nehmen Reinigung je nach Erfordernis Reinigen Sie Dampf und Warmwasserventil nach jedem Gebrauch S ubern Sie das Au engeh use bei abgeschalteter und abgek hlter Maschine Erneuern Sie das Kesselwasser...

Страница 14: ...rd der W rmetauscher mit der Entkalkungsfl ssigkeit bef llt Nochmals Sterntaste bet tigen 7 Filtertr ger mit Blindsieb in die Br hgruppe einsetzen und die Sterntaste dr cken f r ca 20 Sekunden Fl ssig...

Страница 15: ...gerungen in und am Ger t verursacht werden fallen nicht unter die Herstellerhaftung Ebenfalls erlischt hier die Ger tegarantie Reparatur Einsendungen an unseren Zentralkundendienst werden ausschlie li...

Страница 16: ...ammer ges ubert werden Das Endst ck des Dampfrohres kann hierzu auch abgeschraubt werden Die D se anschlie end wieder anschrauben Wichtig Die kleine Dichtung zwischen D se und Gewinde nicht verlieren...

Страница 17: ...iche Ursache Behebungsvorschl ge Mahlung zu grob Den Kaffee feiner mahlen Kaffeemehl fester anpressen Br hdruck reduzieren Kaffeemischung zu alt Frischen Kaffee verwenden Zu viel Chlor im Wasser Chlor...

Страница 18: ...e Gruppenreinigung durchzuf hren genaue Anleitung Seite 12 Den Filtertr ger danach nicht mehr in die Gruppe einspannen den Kessel zu entleeren 1 Bei der betriebsbereiten Maschine den Ein Ausschalter a...

Страница 19: ...den 12 EMPFOHLENES ZUBEH R Blindsieb zur Gruppenreinigung im Lieferumfang enthalten Reinigungssmittel zur Gruppenreinigung mit Blindsieb im Fachhandel und bei uns erh ltlich Entkalkungspulver zur rege...

Страница 20: ...the machine with carbonated water but instead with soft potable water Do not operate the machine without water If you have any further questions or if you require any further information please contac...

Страница 21: ...water dispenser 6 Pump pressure gauge 7 Boiler pressure gauge 8 Brewing group 9 Filter holder 10 Green control lamp 11 Power switch 12 Drip tray 13 Filter holder spout 14 Valve water tank direct water...

Страница 22: ...tion Place the machine on an even and stable surface You can regulate the height by adjusting the feet of the machine Never place the machine on hot surfaces 4 2 Electrical connection Make sure that t...

Страница 23: ...use with water tank When using the machine with water tank please turn the valve to the front side of the machine image 3 Additionally place the switch behind the drip tray into position 0 image 4 im...

Страница 24: ...ssion valve that ventilates the boiler during the heat up phase 11 Press the star button and dispense approx 250 ml of water This way the heat exchanger will be filled with water and the circulation o...

Страница 25: ...essure gauge indicates approx 1 0 1 2 bar 5 Usually the heat up phase takes approx 15 20 minutes depending on the ambient temperature 6 Now the machine is ready for use 7 Before preparing coffee inser...

Страница 26: ...the steam lever for approx 5 seconds to release the condensation water in the pipe 2 Immerse the steam nozzle at the end of the steam dispenser into the liquid 3 Re open the steam handle steam lever 4...

Страница 27: ...he degreasing residues in the brew group are completely removed Caution Beware of hot water splashes while cleaning the group 7 3 Prophilactic descaling for water tank machines A regular descaling of...

Страница 28: ...instructions are meant for prophylactic descaling only Please do not descale the machine if it is already calcified While descaling the machine the lime residues can plug several components like valve...

Страница 29: ...r 9 Clamp the filter holder in to the group 10 Then turn the filter holder until the shower plate is locked firmly into the gasket 11 You can now easily lock the filter holder into place 12 The group...

Страница 30: ...than four items of the same kind Do not place heavy items on the packing 8 3 Warehousing Keep the machine packed in a dry place Do not stack more than four items of the same kind Do not place heavy it...

Страница 31: ...rinder When changing the coffee beans changing the grind can also be necessary The buttons of the control panel flash there is not enough water in the water tank Refill water Water was refilled the bu...

Страница 32: ...nds to release the condensation water and to create dry steam 4 Fill 1 3 of the jug with milk and place it under the steam nozzle The nozzle should be immersed in the middle of the milk jug 5 Slowly o...

Страница 33: ...caling of the machine available at your specialised dealer For a perfect coffee result a good espresso coffee machine and coffee grinder are as important as good coffee Our professional espresso coffe...

Отзывы: