background image

Notes on installation / Notas sobre la instalación / Remarques concernant l'installation

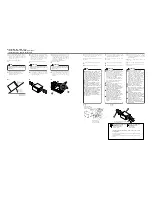
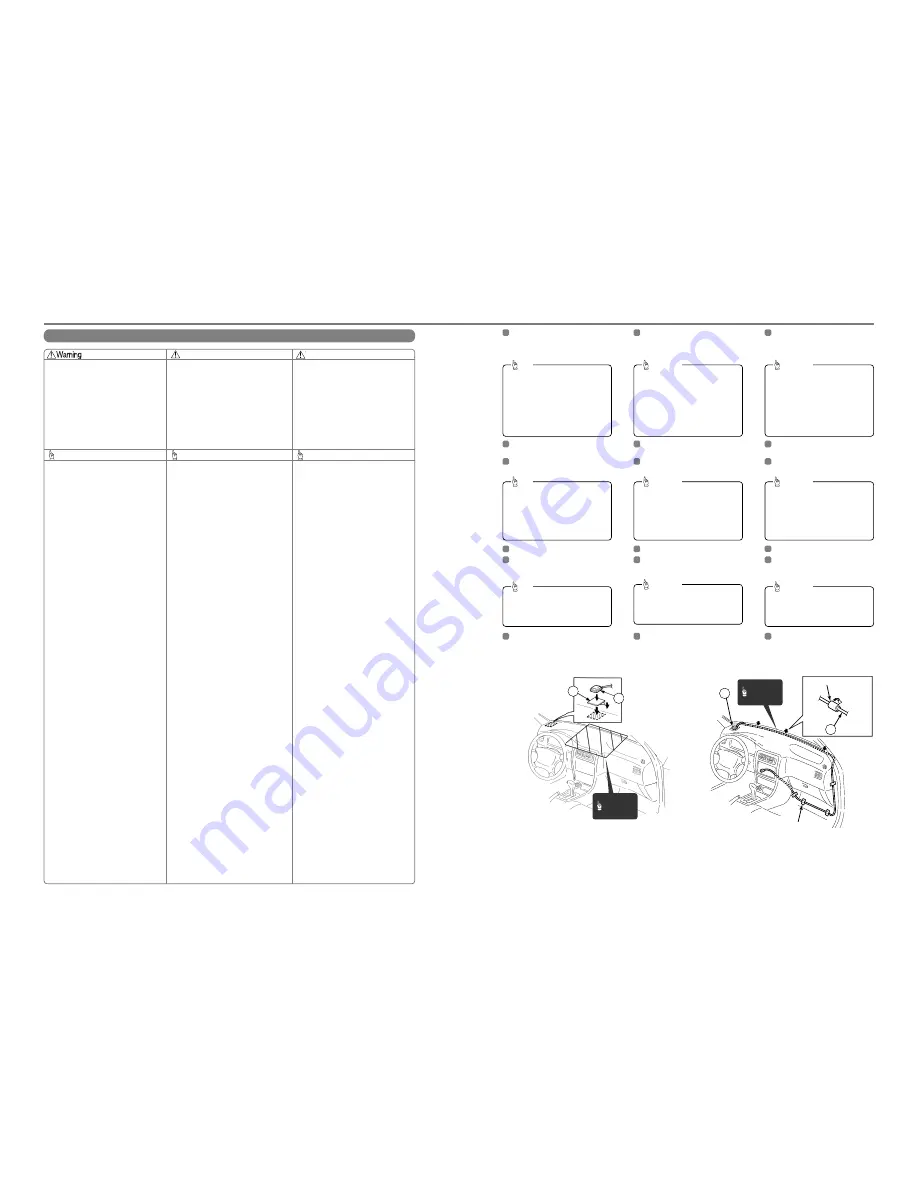
Installing the GPS antenna /

Installing the GPS antenna /

Cómo instalar la antena del GPS /

Cómo instalar la antena del GPS /

Installation de l'antenne GPS

Installation de l'antenne GPS

Tip

Advertencia

Avertissement

Consejo

Conseil

If the vehicle glass is a special type of glass such as
heat-reflective glass or bullet-proof glass, be sure to
install the GPS antenna outside the vehicle. If the GPS
antenna is installed inside the vehicle, the reception
sensitivity will severely drop and will affect the
accuracy of the position measurement.

If installing the GPS antenna inside the vehicle, be
sure it is mounted on the ground plate.

If installing the GPS antenna inside the vehicle, the
location and the slope of the vehicle's windshield will
determine the accuracy of the GPS antenna to receive
the GPS signal. If the GPS antenna location inside the
vehicle is hindering the accuracy of the GPS antenna,
then you may want to install the antenna outside the
vehicle.

The materials used in front and rear vehicle windows
can cause GPS reception sensitivity to drop
significantly. If this happens, install the GPS antenna
outside the vehicle.

If the attachment surface is a non-plastic surface such
as genuine leather, wood panel, or cloth, attaching the
antenna may damage the surface finish. Do not attach
the ground plate to such surfaces.

Wipe the installation surface thoroughly so that it is
clear of any dirt, moisture, or grease before installing
the antenna.

Do not apply any coatings to the GPS antenna,
otherwise it may cause a drop in the reception
sensitivity of the antenna.

Route the GPS antenna wire as far away as possible
from TV and radio antennas, and wires, otherwise it
may cause interference with video and audio signals.

Do not install the antenna in places (such as front
pillars and roof panel) that are shielded from the sky.

The main GPS antenna unit should be installed in a
level position where the signals will be as unobstructed
as much as possible, such as on the vehicle's roof.
Satellite signals cannot be received if the antenna is
obscured or obstructed.

If installing the main GPS antenna unit outside the
vehicle, remove the main antenna unit if leaving the
vehicle unattended for long periods in order to prevent
theft or malicious damage to the antenna.

Hold the main GPS antenna unit when removing the
antenna. Do not pull on the GPS wire, otherwise it may
become damaged and result in problems with correct
operation.

If installing the GPS antenna outside the vehicle,
remove the main GPS antenna unit when washing the
vehicle. (If you wash the vehicle with the main antenna
unit still attached, avoid spraying the wire section
directly with water so that no water gets inside the
vehicle.)

The magnet that is attached to the main GPS antenna
unit is extremely strong. Be sure to note the following
when installing the antenna.

• Do not put the antenna down onto the ground or

onto dirty or dusty surfaces. If iron filings become
attached to the magnet, they may cause damage to
the vehicle's body.

• Keep the antenna away from watches and

magnetic cards, otherwise they may be damaged
and/or rendered unusable.

Si el vidrio del vehículo es un tipo especial de vidrio
como vidrio reflector de calor o vidrio a prueba de
balas, asegúrese de instalar la antena del GPS fuera
del vehículo. Si se instala la antena del GPS dentro
del vehículo, la sensibilidad de la recepción disminuirá
severamente y esto afectará la precisión de la medida
de posición.

Si instala la antena del GPS dentro del vehículo,
asegúrese de que esté instalada en la placa de
conexión a tierra.

Si instala la antena del GPS dentro del vehículo, la
ubicación y la pendiente del parabrisas del vehículo
determinarán la precisión de la antena del GPS para
recibir la señal GPS. Si la ubicación de la antena del
GPS dentro del vehículo obstaculiza la precisión de la
antena del GPS, probablemente desee entonces
instalar la antena fuera del vehículo.

Los materiales utilizados en las ventanas delanteras y
traseras de los vehículos pueden hacer que la
sensibilidad de la recepción GPS disminuya
significativamente. Si esto ocurre, instale la antena del
GPS fuera del vehículo.

Si la superficie donde se sujetará la antena no es
plástica como, cuero auténtico, panel de madera o
paño, adherir la unidad puede dañar el acabado de la
superficie. No adhiera la placa de conexión a tierra a
otras superficies.

Antes de instalar la antena, limpie bien la superficie de
instalación para que no tenga suciedad, humedad ni
grasa.

No aplique ningún revestimiento a la antena del GPS;
de lo contrario podría disminuir la sensibilidad de la
recepción de la antena.

Guíe los cables de la antena del GPS lo más lejos
posible de las antenas y cables de TV y radio; de lo
contrario podría causar interferencia con señales de
video y audio.

No instale la antena en lugares (como pilares
delanteros y panel del techo) que estén escondidos
del cielo.

Se debería instalar la antena principal del GPS en una
posición nivelada donde la señal esté lo menos
bloqueada posible, como en el techo del vehículo.

No se pueden recibir señales satelitales si la antena

está bloqueada u obstaculizada.

Si instala la antena principal del GPS fuera del
vehículo, quite la unidad de la antena principal si deja
el vehículo solo por largos ratos para evitar el robo o
daños malignos a la antena.

Sostenga la antena principal del GPS cuando quite la
antena. No jale del cable, de lo contrario podría dañar
y ocasionar problemas en el correcto funcionamiento.

Si instala la antena del GPS fuera del vehículo, quite
la unidad de antena principal del GPS cuando lave el
vehículo. (Si lava el vehículo con la unidad de la
antena principal adherida, evite rociar directamente
con agua la sección del cable para que no entre agua
en el vehículo.)

El imán sujeto a la antena principal del GPS es
extremadamente potente. Asegúrese de tener en
cuenta lo siguiente cuando instale la antena.

• No coloque la antena sobre el piso o en superficies

sucias o polvorientas. Si limaduras de hierro se
pegan al imán, podrían dañar la carrocería del
vehículo.

• Mantenga la antena lejos de relojes y tarjetas

magnéticas, de lo contrario pueden dañarse y/o
quedar inservibles.

Si les vitres du véhicule sont en verre spécial, tel que
du verre réfléchissant la chaleur ou du verre pare-
balles, veillez à installer l'antenne GPS à l'extérieur du
véhicule. Si vous installez l'antenne GPS à l'intérieur
du véhicule, la sensibilité de réception sera gravement
amoindrie, et la précision des mesures de position
sera faussée.

Si vous installez l'antenne GPS à l'intérieur du
véhicule, veillez à la monter sur la plaque de masse.

Si vous installez l'antenne GPS à l'intérieur du
véhicule, l'emplacement et l'inclinaison du pare-brise
du véhicule déterminera la précision de réception du
signal de l'antenne GPS. Si l'emplacement de
l'antenne GPS à l'intérieur du véhicule gêne la
précision de l'antenne GPS, il faut installer l'antenne à
l'extérieur du véhicule.

Les matériaux utilisés dans les vitres avant et arrière
du véhicule peuvent amoindrir considérablement la
sensibilité de la réception GPS.  Dans ce cas, installez
l'antenne GPS à l'extérieur du véhicule.

Si la surface de fixation n'est pas en matière plastique,
par exemple en cuir véritable, en bois ou en tissu,
vous risquerez d'endommager la finition de la surface
en fixant l'antenne. Ne fixez pas la plaque de masse
sur de telles surfaces.

Essuyez soigneusement la surface d'installation afin
qu'il n'y ait plus de saletés, d'humidité ou de graisse
avant d'installer l'antenne.

N'appliquez aucun revêtement sur l'antenne GPS,
sinon la sensibilité de réception de l'antenne GPS
risquera d'être amoindrie.

Acheminez le câble de l'antenne GPS le plus loin
possible des câbles et des antennes de télévision et
de radio, sinon les signaux vidéo et audio risqueront
d'être brouillés.

N'installez pas l'antenne à des endroits faisant écran
au ciel (tels que des montants avant et des panneaux
de pavillon).

L'unité principale de l'antenne GPS doit être installée à
un endroit horizontal où les signaux sont aussi peu
obstrués que possible, par exemple sur le pavillon du
véhicule. Si des objets font écran ou obstruent
l'antenne, les signaux satellite ne pourront pas être
reçus.

Si vous installez l'antenne GPS à l'extérieur du
véhicule, déposez l'unité principale de l'antenne si
vous laissez le véhicule sans surveillance pendant
longtemps, afin d'éviter tout vol ou endommagement
malveillant de l'antenne.

Lorsque vous déposez l'antenne, saisissez l'unité
principale de l'antenne GPS. Ne tirez pas sur le câble
du GPS, car vous risqueriez de l'endommager et de
causer des anomalies de fonctionnement.

Si vous installez l'antenne GPS à l'extérieur du
véhicule, déposez l'unité principale de l'antenne GPS
lorsque vous lavez le véhicule. (Si vous lavez le
véhicule en laissant l'unité principale de l'antenne
fixée, évitez de mouiller directement la section du
câble afin d'éviter toute pénétration d'eau dans le
véhicule.)

L'aimant fixé à l'unité principale de l'antenne GPS est
très puissant. Veillez à bien noter les points suivants
lorsque vous installez l'antenne.

• Ne posez pas l'antenne sur le sol ou sur des

surfaces sales ou poussiéreuses. Si des parcelles
métalliques se fixent à l'aimant, ils risqueront
d'endommager la carrosserie du véhicule.

• N'approchez pas de montres ou de cartes

magnétiques de l'antenne, car elles risqueraient
d'être endommagées et/ou rendues inutilisables.

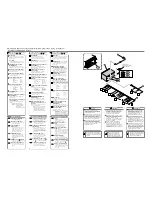
The wires should be bound together with tape
or a similar securing method (example: wire
ties) so that they do not interfere with driving. If
they become wound or entangled around parts
such as the steering wheel, shifting lever, or
brake pedal, accidents may result.

Do not install the GPS antenna where it will
obstruct the driver's vision or where it will be
an obstacle while driving, otherwise traffic
accidents may result.

Los cables deberían estar atados juntos con
cinta o algún método de seguridad similar (por
ejemplo: sujeta cables) para que no interfieran
cuando maneja. Si se dañan o se enredan
cerca de piezas como el volante, la palanca de
cambios o el pedal de freno, podrían
producirse accidentes.

No instale la antena del GPS donde obstruya
la visión del conductor o donde se convierta en
un obstáculo mientras maneja; de lo contrario
podrían producirse accidentes de tránsito.

Les câbles doivent être liés ensemble avec du
ruban ou une méthode de fixation similaire
(par exemple: serre-fils) pour éviter toute gêne
pendant la conduite. S'ils s'enroulent ou
s'emmêlent autour de composants tels que le
volant, le levier de vitesses ou la pédale de
frein, un accident risquera de s'ensuivre.

N'installez pas l'antenne GPS dans le champ
de vision du conducteur ou à un endroit
pouvant gêner la conduite, sinon un accident
risquera de s'ensuivre.

Choose an installation location on the
dashboard which is flat and has a clear
view of the sky.

1

Install the ground plate to the
dashboard.

2

Select a location that is at least 20 in.
away from the main unit. If this is not
done, the GPS measurement precision
will drop.

Be sure to use the ground plate when
installing the GPS antenna. If the ground
plate is not used, the reception sensitivity
will drop and will affect the accuracy of the
position measurement.

Tip

Install the GPS antenna to the ground
plate.

3

If installing the GPS antenna inside the
vehicle, the installation location and the
shape of the vehicle's body will determine
GPS accuracy.  Accuracy is usually lower
when the GPS antenna is installed inside
the vehicle.

Tip

Secure the GPS antenna.

4

Route the GPS antenna wire along the
crevice between the front windshield and
the dashboard.

5

If the GPS antenna wire protrudes from
the dashboard, wind tape around it so
that it stays securely fixed in the crevice
between the front windshield and the
dashboard.

Tip

Route the GPS antenna wire to the main
unit's installation location.

6

Elija un lugar para la instalación en el
tablero de instrumentos que sea plano y
tenga una vista despejada del cielo.

1

Instale la placa de conexión a tierra en el
tablero de instrumentos.

2

Instale la antena del GPS en la placa de
conexión a tierra.

3

Si instala la antena del GPS dentro del
vehículo, el lugar de instalación y la forma
de la carrocería del vehículo
determinarán la precisión del GPS. La
precisión es generalmente inferior si se
instala la antena del GPS dentro del
vehículo.

Consejo

Asegure el cable de la antena del GPS.

4

Guíe el cable de la antena del GPS a
través de la grieta entre el parabrisas
delantero y el tablero de instrumentos.

5

Si el cable de la antena del GPS sobresale
del tablero de instrumentos, enrolle cinta
alrededor del mismo para que quede bien
sujeto en la grieta entre el parabrisas
delantero y el tablero de instrumentos.

Consejo

Guíe el cable de la antena del GPS a la
posición de instalación de la unidad
principal.

6

Choisissez un emplacement
d'installation sur le tableau de bord,
qui soit bien plat et exposé clairement
au ciel.

1

Installez la plaque de masse sur le
tableau de bord.

2

Installez l'antenne GPS sur la plaque
de masse.

3

Si vous installez l'antenne GPS à
l'intérieur du véhicule, l'emplacement
d'installation et la forme de la carrosserie
du véhicule déterminera la précision du
système GPS. La précision est
généralement amoindrie lorsque
l'antenne GPS est installée à l'intérieur du
véhicule.

Conseil

Fixez le câble de l'antenne GPS.

4

Acheminez le câble de l'antenne GPS
le long de la rainure située entre le
pare-brise avant et le tableau de bord.

5

Si le câble de l'antenne GPS dépasse du
tableau de bord, enrobez-le de ruban afin
qu'il reste solidement fixé dans la rainure
située entre le pare-brise avant et le
tableau de bord.

Conseil

Acheminez le câble de l'antenne GPS
vers l'emplacement d'installation de
l'unité principale.

6

Seleccione un lugar que esté a por lo
menos 20 pulgadas de distancia de la
unidad principal. Si no se hace esto, se
reducirá la precisión de la medida GPS.

Asegúrese de utilizar la placa de conexión
a tierra cuando instale la antena del GPS.
Si no se utiliza la placa de conexión a
tierra, la sensibilidad de la recepción
disminuirá y esto afectará la precisión de
la medida de posición.

Consejo

Choisissez un endroit se trouvant à au
moins 50 cm (20 pouces) de l'unité
principale. Sinon, la précision des
mesures GPS sera amoindrie.

Veillez à utiliser la plaque de masse
lorsque vous installez l'antenne GPS. Si
vous n'utilisez pas la plaque de masse, la
sensibilité de réception sera amoindrie, et
ceci affectera la précision des mesures de
position.

Conseil

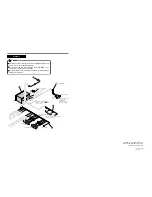
Tip/

Consejo/

Conseil

Tape / Cinta / Ruban

Tip/

Consejo/

Conseil

Tape / Cinta / Ruban

8

8

9

8

Содержание AVN2210p mk II

Страница 1: ... in special design Nous vous remercions d avoir achete ce recepteur Veuillez lire ce manuel afin d utiliser votre appareil correctement Nous vous recommandons de conserver ce manuel dans un endroit sOr afin de pouvoir Ie consulter ulterieurement MANUAL DEL PROPIETARIO In Dash Portable Navigation with CD USB Multi Source Receiver in special design Tras adquirir este receptor rogamos lea atentamente...

Страница 2: ... as shock or personal injury Never install this main unit where it will interfere with safe operation of the vehicle Never block the drivers view Do not install main unit where it may interfere with operation of the brakes the steering or any safety systems including seat belts and air bags Before drilling holes in a vehicle for installation you must confirm the locations of pipes tanks electrical...

Страница 3: ...driving Accidents may occur as a result of not paying attention to your driving Do not place foreign objects in the disc insertion slot or USB input terminal Fires or shocks may result Do not disassemble or alter this main unit Accidents fires or shocks may result Do not let water or foreign objects enter the internal parts of this main unit Smoke fires or shocks may result Do not use when main un...

Страница 4: ...orts arcing and fires When changing the installation location for this main unit please consult the dealer where you bought it for safety reasons Expertise is necessary for removal and installation Keep volume to a reasonable level so that you can hear sounds from outside the vehicle including warning sounds voices and sirens Failure to do so may cause an accident Be careful that hands and fingers...

Страница 5: ...witching Audio Sources 10 Adjusting Volume 10 Listening to the tuner 10 Tuning to a station 10 Tuning to a station automatically 10 Tuning to a station manually 10 Listening to CD MP3IWMA 11 When no CD is inserted 11 When a CD has been inserted 11 Listening to music files in USB memory 11 How to Use Options 12 When using iPod 12 When using satellite radio 12 When using AUX 12 Common operations 13 ...

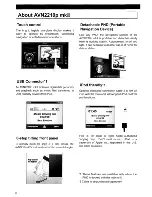
Страница 6: ...t it can be taken to another car or at home for data updates iPod friendly 1 Optional dedicated connection cable 2 to link an iPod with the main unit allowing full iPod controls and functions Music Driving On ECLIPSE Beat Emotion 45 Music Driving On ECLIPSE Beat Emotion Preferences elect 6 step tilting front panel To optimally match the angle of a car s console the AVN2210p mkD s front panel can b...

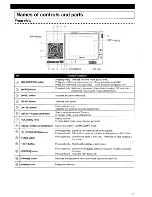
Страница 7: ... Selects radio station and CD tracks In function mode select selting items j VOL rotary knob Adjusts volume In rotary select mode select the item you want SELECT Upper Lower button Selects the folder in CD MP3 WMA mode OPEN EJECT button Pressing briefly Ejects disc or opens closes the front panel Press and hold Tilts the front panel by one step at each pressing of the button FUNC button Pressing b...

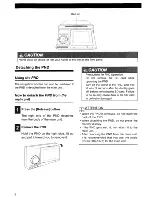
Страница 8: ... and pull it toward you to remove it 8 Precautions for PND Operation Do not remove the SD card while operating the PND Turn off the power to the PND and wait at least 3 seconds after the display goes off before removing the SD card Failure to do so may cause data in the SO card to be lost or damaged ATTENTION When the PND is removed do not touch the back of the PND When attaching the PND do not pr...

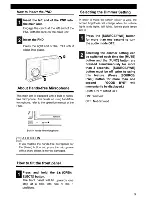
Страница 9: ... lit IIPress the SOURCE PWR button for more than one second to turn the audio mode OFF I I Selecting the dimmer setting can Y be switched each time the MUTE button and the FUNC button are pressed simultaneously for more than 3 seconds SOURCE PWR button must be off prior to using this feature Press SOURCEI PWR button for more than one second GOOD BYE will momentarily be displayed DIMM ON DIMM OFF O...

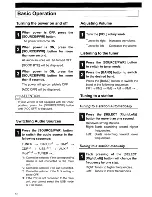
Страница 10: ...in unit 2 Cannot be selected if no CD is inserted 3 Cannot be selected if the AUX setting is set to OFF 4 If the PND is not connected to the main unit you cannot select the USB mode or iPod mode 10 Adjusting Volume IITurn the VOL rotary knob Turn to the right Increases the volume Turn to the left Decreases the volume Listening to the tuner IIPress the SOURCE PWR button to switch to tuner mode I Pr...

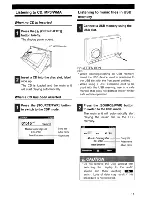
Страница 11: ...hen using a USB extension cord to be used with the USB memory use in a safe manner that does not distract and or hinder safe vehicle operation 451211 Music Driving On Song title ECLIPSE Artist name Beat Emotion Album name 0 00 USB 12 51 R Press the SOURCE PWR button Y to switch to the USB mode The main unit will automatically start playing the music file in the USB memory Music Driving On Song tit...

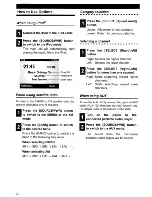
Страница 12: ...IRIUS SR1 SR2 SR3 SR4 SR1 When selecting XM XM1 XM2 XM3 XM4 XM1 12 Category selection _ IIPress the SELECT Upper Lower button Upper Advances to next category Lower Return to previous category Selecting a channel IIPress the SELECT Right Left button Right Selects the higher channel Left Selects the lower channel I I Press the SELECT Right Left 111 button for more than one second Right Starts search...

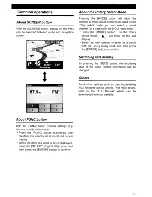
Страница 13: ... Mode Pressing the MODE button will allow the channel or track select modes to be used In the rotary select mode you can select a preset channel or a track with the VOL rotary knob Press the MODE button In the rotary select mode will blink on the sub display Select an item preset channel or a track with the VOL rotary knob and then press the ENTER button to confirm Switching text display By pressi...

Страница 14: ... este manual y anote en el el numero de I serie de su AVN2210p mkII para su posterior indentificacion II Oicho numero de serie aparece en una etiqueta 0 bien lW I estampado sobre el equipo il ill 1 Num de serie FUJITSU TEN LIMITED ConlactFUJITSU TEN CORP OF AMERICA 19600 So Vermont Avenue Torrance CA 90502 Call1 800 55 ECLlPSE Dealer Locator 1 800 233 2216 lnformation www eclipse web com ECLIPSE i...

Страница 15: ...city of the wire will be exceeded resulting in a fire or electric shock Never attempt to disassemble or modify the main unit otherwise an accident fire or electric shock may result When installing the main unit into a vehicle with a passenger side air bag do not secure it to the air bag s cover or in places where it may impede air bag deployment otherwise proper air bag operation may not be ensure...

Страница 16: ...re utilisée que comme équipement de bord sinon une électrocution ou des blessures risqueraient de s ensuivre N effectuez pas la lecture de sons déformés pendant de longues périodes les haut parleurs risqueraient de surchauffer et de causer un incendie Une fois l installation et le câblage terminés remettez les freins et les équipements électriques tels que les feux l avertisseur sonore les feux de...

Страница 17: ...tres vis elles risqueront d endommager l intérieur de l unité principale Si vous utilisez des boulons à tête hexagonale rouges M5 x 8 servez vous des quatre boulons utilisés pour installer le support d expédition et les quatre boulons à tête hexagonale rouges M5x8 fournis avec les accessoires Lors de l installation veillez à ne pas appliquer une force excessive sur les touches ou sur l affichage d...

Страница 18: ...a surface de fixation n est pas en matière plastique par exemple en cuir véritable en bois ou en tissu vous risquerez d endommager la finition de la surface en fixant l antenne Ne fixez pas la plaque de masse sur de telles surfaces Essuyez soigneusement la surface d installation afin qu il n y ait plus de saletés d humidité ou de graisse avant d installer l antenne N appliquez aucun revêtement sur...

Страница 19: ...nte antes de realizar las conexiones Si los cables no están bien conectados pueden ocurrir accidentes o problemas Las ubicaciones de los cables de señales de pulso de velocidad del vehículo pueden variar dependiendo del modelo y versión del vehículo Consulte con el concesionario del automóvil o el comerciante Eclipse más próximo por detalles Vérifiez soigneusement le signal d impulsion de vitesse ...

Страница 20: ...ie de ligne arrière Effectuez la connexion au connecteur RCA d un amplificateur extérieur Bornes de sortie de ligne Subwoofer Elles sont utilisées pour la sortie sans atténuateur Elles peuvent être utilisées comme borne de subwoofer si un amplificateur séparé avec filtre d ultra graves est connecté Borne E LAN 13P Si vous connectez des équipements audio portables connectez un câble AUX vendu sépar...

Страница 21: ...IDAD DEL VEHÍCULO HACIA LA BATERÍA 12V Suministro permanente HACIA ACC Fuente de alimentación HACIA EL INTERRUPTOR DE LA LUZ DELANTERA Iluminación HACIA EL RELÉ DE LA ANTENA ELÉCTRICA Suministro A ACTIVACIÓ N REMOTA Amplificadores etc A AMPLIFICADOR EXTERNO A CONTROL REMOTO DE DIRECCIÓN ENCHUFE DE LA ANTENA Púrpura Blanco Negro 2 A CONECTORES DE SALIDA RCA DEL EQUIPO EXTERNO REPRODUCTOR DE MP3 REP...

Страница 22: ...E VERS LA TÉLÉCOMMANDE DE DIRECTION FICHE D ANTENNE Violet Blanc Noir 2 VERS LES CONNECTEURS DE SORTIE RCA D ÉQUIPEMENTS EXTERNES LECTEUR MP3 LECTEUR MD ETC CÔTÉ DROIT Rouge CÔTÉ GAUCHE Blanc Installez et connectez toutes les unités périphériques avant de les connecter à l unité principale Ne retirez aucun des capuchons de protection RCA etc sauf si les connecteurs sont utilisés Veillez à enrober ...

Страница 23: ......

Страница 24: ...7 ...

Страница 25: ......

Страница 26: ......

Страница 27: ...1 4 5 C5 _ I r I V a TOrnTOrnt s v ...

Страница 28: ...3 TOmTO yf 1 2 English 4 Espanal 20 Fran ais 36 ...

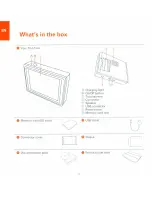
Страница 29: ...C o A Charging light B On Off button C Touchscreen D Connector E Speaker F USB connector G Reset button H Memory card slot E annn 8 Memory card SO card o Connector cover o Documentation pack o 4 8 USB cable o Sleeve o Product code card ...

Страница 30: ...e bag to protect the screen B ckur your Ton Tort It s always a good idea to make a backup ofthe contents of your TomTom You can make a backup using TomTom HOME Safety preferences When the safety lock is enabled only a few buttons and features are available while you are driving When you are stationary all the buttons and features are available For more information about TomTom HOME see Using TomTo...

Страница 31: ...of your TomTom Then turn your TomTom on 6 Take care of your TomTom It is important to take care of your TomTom and to clean it correctly Use a soft cloth to wipe the screen of your TomTom do not use any liquid cleaners If your TomTom gets wet dry it with a soft cloth Do not open the casing of your TomTom under any circumstances Doing so may be dangerous and will invalidate your warranty Do not use...

Страница 32: ...be outdoors to locate your current position The first time you start your TomTom it can take up to 5 minutes to find your current position If it takes longer than 5 minutes make sure that you are in an 7 Getting started open place without tall buildings or trees around you In the future your position will be found much faster normally within a few seconds Once your TomTom has located your current ...

Страница 33: ...ess you can choose from four options City center tap this button to set your destination as the center of a city or town Street and house number tap this button to set an exact address as your destination ZIP code tap this button to enter a ZIP code as your destination fully supported only in UK and the Netherlands Cross street or intersection tap this button to set your destination as the point w...

Страница 34: ...e of the street to set the destination City New Y New York MO New York NE New York NY A B C D E F G H I J K L M N 0 p Q R S T U V W x y z 123 Back House number 1 31 m 34 7 Now enter the house number of your destination and then tap Done 8 Your TomTom asks you whether you need to arrive at a particular time 1 6 2 7 3 8 4 9 5 o Tap YES to enter an arrival time Your TomTom shows you whether you will ...

Страница 35: ...Driving View 10 ...

Страница 36: ...o enable or disable traffic information Mobile phone This button opens the mobile phone menu You can for example make calls and write or read messages For more information see Hands free calling on page 14 Change preferences This button opens the Preferences menu You can change many things about the way TomTom looks and behaves 11 When you first start using your TomTom not all of the buttons will ...

Страница 37: ...reo starts to play the first song on the iPod or USB storage device 2 3 5 6 rI When you switch to controlling your car stereo it switches to the radio unless you are already using a different audio source To switch to other audio input sources press the Source button The volume of all sound is set by the volume control on the car stereo You can adjust the volume of spoken instructions separately b...

Страница 38: ...s button to select from all the songs o Artist tap this button to select a song by a particular singer or group o Genre tap this button to select a particular type of music o Album tap this button to select from a list of all the albums o Audiobooks tap this button to select an Audiobook Audiobooks cannot be played from USB storage devices To skip to the next or previous song use the controls on t...

Страница 39: ...is once Your TomTom remembers your phone Note not all phones are supported or compatible with all features For more information visit www tomtom com phones Make sure that your phone is set to discoverable or visible to all You may have to enter the password 0000 on your phone in order to connect to your TomTom After you have established a connection with your phone you can set up a wireless data c...

Страница 40: ...l Receiving a Call If someone calls you while you are driving accept or reject the call by tapping the screen Auto Answer You can tell your TomTom to answer every call automatically after a certain time Tap Phone preferences in the mobile phone menu then tap Auto answer preferences Select when your TomTom will automatically answer your calls 15 Sharing your TomTom You can establish connections wit...

Страница 41: ...ffic Minimize preferences traffic delays Disable Traffic Browse map TomTom Traffic is a TomTom PLUS service that sends up to date traffic information to your TomTom To use TomTom Traffic you must have a mobile phone with Bluetooth and a wireless data connection for example GPRS EDGE UMTS COMA TomTom Traffic takes the most up to date information from the best local sources Note Tom Tom Traffic is n...

Страница 42: ...on GPRS EDGE UMTS or CDMA Your mobile phone company may charge you for using a wireless data connection Don t forget that you can download many TomTom PLUS services to your computer without needing to set up a wireless data connection Not all services are available in all countries For more information visit www tomtom com plus 17 TomTom PLUS Traffic Get the fastest and most reliable updates from ...

Страница 43: ...es POls and other extras on your TomTom Read the full version of the user manual Plan trips in advance Buy TomTom PLUS services and manage your subscriptions To install TomTom HOME insert the CD supplied with your TomTom into your computer If the installation does not start browse to the CD on your computer and double click the file Install TomTom HOME Connect your TomTom to your computer and swit...

Страница 44: ...ts 2 Click Backup under Contents 3 Click Backup TomTom HOME makes a backup of your TomTom on your computer Re tonng a B lckuD If you ever have a problem with your TomTom you can restore the backup Follow steps 1 and 2 above then select the latest backup and click Restore The latest backup will be restored to your TomTom For more information see the Help included with TomTom HOME 19 at 1_ Pi II I N...

Страница 45: ...ierce open or disassemble the battery If the battery leaks and you come into contact with the leaked fluids rinse thoroughly with water and seek medical attention immediately For safety reasons and to prolong the lifetime of the battery charging will not occur at low below 0 C 32 F or high over 45 C 113 F temperatures Temperatures Standard operation 10 C 14 F to 55 C 131 F short period storage 20 ...

Страница 46: ...pter plug it into an outlet which is on a different circuit from that to which the receiver is connected Consult an experienced radio TV technician for help 53 Addendum Important This equipment was tested for FCC compliance under conditions that included the use of shielded cables and connectors between it and the peripherals It is important that you use shielded cable and connectors to reduce the...

Страница 47: ...l errors or omissions contained herein nor for incidental or consequential damages resulting from the performance or use of this material This document contains information protected by copyright No part of this document may be photocopied or reproduced in any form without prior written consent from TomTom International B V TomTom device 4POO 001 Part numbers N14644 This Class B digital apparatus ...

Страница 48: ...9 Acoustic Technologies Inc 55 Copyright notices MPEG Layer 3 audio coding technology licensed from Fraunhofer liS and Thomson Supply of this product does not convey a license nor imply any right to distribute content created with this product in revenue generating broadcast systems terrestrial satellite cable and or other distribution channels streaming applications via Internet intranets and or ...

Страница 49: ......

Страница 50: ...TomTom ...

Страница 51: ...ox aYour TomTom ACharging light BOn off button CTouchscreen DConnector ESpeaker FUSB connector GReset button HMemory card slot bMemory card SD card cUSB cable dConnector cover eSleeve fDocumentation pack gProduct code card A B C D E F G H ...

Страница 52: ...y lock in the by tapping Safety preferences in the Preferences menu We recommend using the safety lock at all times Keep to the speed limit To help you keep to the speed limit your TomTom can tell you the speed limit for the road you are on To see the speed limit select to show your speed in the Status bar preferences in the Preferences menu The speed limit is shown next to your current speed Note...

Страница 53: ... it Alternatively you can download TomTom HOME from www tomtom com Make sure you always have the latest version of TomTom HOME For more information about TomTom HOME see Using TomTom HOME on page 55 3 In the Planning section select your TomTom A picture of your TomTom is shown in the main section of TomTom HOME 4 Click the On Off button on the picture of your TomTom to switch it on in TomTom HOME ...

Страница 54: ...t cloth Do not open the casing of your TomTom under any circumstances Doing so may be dangerous and will invalidate your warranty Do not use the memory card SD card with any device other than a TomTom device Other devices may damage the memory card Do not expose your TomTom to high or low temperatures which can cause permanent damage For example don t leave it in the car on hot summer days or duri...

Страница 55: ...The Driving View is shown in black and white until your TomTom locates your current position For more information about the Driving View see Driving View on page 14 Locating your current position Your TomTom must be outdoors to locate your current position The first time you start your TomTom it can take up to 5 minutes to find your current position If it takes longer than 5 minutes make sure that...

Страница 56: ...trol the brightness of the screen select not to link the night view to the dimmer setting in the Docking preferences in the Preferences menu To switch to night view manually tap Use night colours in the Preferences menu ...

Страница 57: ...you can choose from four options City centre tap this button to set your destination as the centre of a city or town Street and house number tap this button to set an exact address as your destination Postcode tap this button to enter a postcode as your destination Note You can enter a postcode for any country In the UK and the Netherlands postcodes are detailed enough to identify a house on their...

Страница 58: ...As with the name of the town the names of the streets that match what you have typed are shown When your destination is shown in the list tap the name of the street to set the destination 7 Now enter the house number of your destination and then tap Done 8 Your TomTom asks you whether you need to arrive at a particular time Tap YES to enter an arrival time Your TomTom shows you whether you will ar...

Страница 59: ...inutes early you can wait and leave in 30 minutes time rather than arrive early Your arrival time is constantly recalculated during your journey The status bar shows whether you will arrive on time or late as shown below You will arrive 55 minutes before the arrival time you entered If the estimated arrival time is more than five minutes before the time you entered it is shown in green You will ar...

Страница 60: ...destination using the map browser For more information about the map browser see Using the map on page 21 Latitude Longitude Tap this button to enter a destination with latitude and longitude values TomTom Buddy Tap this button to navigate to the current position of a TomTom Buddy Don t forget that the Buddy may move before you reach him For more information about TomTom Buddies see TomTom PLUS on...

Страница 61: ...he destination for your journey 5 Choose the type of route that should be planned Fastest route the route which takes the least time Shortest route the shortest distance between the locations you set This may not be the quickest route especially if the shortest route is through a town or city Avoid motorways a route which avoids motorways Walking route a route designed for making the journey on fo...

Страница 62: ...on to see each turn in the journey Tap the right and left arrows to move forwards and backwards through the journey Tap the screen to turn off the 3D display and view the map from above Browse map of route Tap this button to see an overview of the route using the map browser For more information about the map browser see Using the map on page 21 Show route demo Tap this button to watch a demo of t...

Страница 63: ... to do it Tap this area to repeat the last spoken instruction and to change the volume EThe name of the next street to turn onto FInformation about your journey Normally this area shows the remaining journey time remaining distance and arrival time To set which information is displayed tap Status bar preferences in the Preferences menu GIndicator of the strength of the GPS signal For more informat...

Страница 64: ...bile phone This button opens the mobile phone menu You can for example make calls and write or read messages For more information see Hands free calling on page 35 Change preferences This button opens the Preferences menu You can change many things about the way TomTom looks and behaves For more information see Preferences on page 38 Hidden buttons and features When you first start using your TomT...

Страница 65: ...lock is enabled you are not able to access all buttons and features of your TomTom The Main Menu shows only a few buttons that may be needed while you are driving As soon as your car stops moving you will be able to access all of the buttons and features again To disable the safety lock tap Safety preferences in the Preferences menu ...

Страница 66: ... the volume on your TomTom Using the radio Your TomTom shows the radio station that you are tuned to and the frequency You can save the a station so that it is a preset There are 6 presets per frequency To save a frequency press and hold the number that you want to use to save the frequency When the colour of the button changes to black the frequency is saved To select a preset station tap the pre...

Страница 67: ...t Note You can create playlists in a third party application like iTunes Musicmatch or Winamp Song tap this button to select from all the songs Artist tap this button to select a song by a particular singer or group Genre tap this button to select a particular type of music Album tap this button to select from a list of all the albums Audiobooks tap this button to select an Audiobook Audiobooks ca...

Страница 68: ...for another route from your current location to your destination If you decide you would prefer to use the original route after all tap Recalculate original Why would I need to do this Apart from the roads near your position and near your destination the new route will use totally different roads to reach your destination This is an easy way of calculating a totally different route Avoid roadblock...

Страница 69: ...nning on page 32 Recalculate original Tap this button to return to the original route without any deviations for roadblocks or to travel via particular locations Avoid part of route Tap this button to avoid a part of the route Use this button if you see that your route includes a road or junction you don t like or which is well known for traffic problems You then choose the road you want to avoid ...

Страница 70: ...r position BYour current position CGPS button Tap this button to centre the map on your current position DThe Options button Use the Options button to set what is shown on the map EThe cursor FThe Find button Tap this button to find specific addresses and Points of Interest on the map GThe Cursor button Tap this button to navigate to the cursor position make a Favourite of the cursor position or f...

Страница 71: ...his button to call the cursor position This button is only available if your TomTom has the phone number for the cursor postion The phone numbers of many POIs are stored in your TomTom If you entered phone numbers for POIs you have created you can also call them For more information about hands free calling see Hands free calling on page 35 Add as Favourite Tap this button to create a Favourite at...

Страница 72: ...me that is easy to remember Your TomTom will always suggest a name usually the address of the Favourite To enter the name just start typing You don t have to delete the suggested name Home You can set your Home location as a Favourite Favourite You cannot create a Favourite from another Favourite This option will always be unavailable in this menu To rename a Favourite tap Manage Favourites in the...

Страница 73: ...oose a POI in a particular town or city You have to specify a town or city POI near Home to search from a list of POIs near your Home location If you are currently navigating to a destination you can also select from a list of POIs which are on your route or near your destination Choose one of these options POI along route POI near destination 2 Select the category of POI Tap the category of POI i...

Страница 74: ... 1 Tap the screen to bring up the Main Menu 2 Tap Change preferences to open the Preferences menu 3 Tap Manage Favourites Tip Tap the arrow to move to the next page buttons Point on map Tap this button to create a Favourite using the map browser Select the location of the Favourite using the cursor then tap Done For more information about the map browser see Using the map on page 21 Latitude Longi...

Страница 75: ...can I change the name of a Favourite 1 Tap the screen to bring up the Main Menu 2 Tap Change preferences to open the Preferences menu 3 Tap Manage Favourites Tip Tap the arrow to move to the next page buttons 4 Tap the Favourite you want to rename 5 Tap Rename ...

Страница 76: ... the Preferences menu 2 Select the POI categories to display on the map Tap Find to search for a POI by name 3 Tap Done The POIs you selected are shown on the map as symbols Calling a POI Your TomTom knows the phone numbers for many POIs You can for example call a restaurant to book a table or a cinema to book tickets For information about using your TomTom for hands free calling see Hands free ca...

Страница 77: ...e options POI along route POI near destination 5 Select the category of POI Tap Any POI category to search for a POI by name Tap the category of POI if it is shown Tap the arrow to choose from the complete list of categories Select the category from the list or start to type the name of the category and select it when it is shown in the list 6 From the list of POIs shown select the POI you want to...

Страница 78: ...u create a POI you can save a phone number with it Categories when you create a POI you have to put it in a category For example you could create a category of POIs called Favourite restaurants With each POI save their phone number so that you can call them from your TomTom to reserve a table How can I create my own POIs 1 Tap the screen to bring up the Main Menu 2 Tap Change preferences 3 Tap Man...

Страница 79: ...rlands Crossing or intersection Recent destination Select a POI location from a list of places you have recently used as destinations Point of Interest You can add a Point of Interest POI as a POI For example if you are creating a category of POIs for your favourite restaurants use this option instead of entering the addresses of the restaurants GPS postion Tap this button to add your current post...

Страница 80: ...rom the list or start to type the name of the category and select it when it is shown in the list 6 Set how close the POI should be when you receive a warning 7 Choose the warning sound for the category of POI you selected Last docked Tap this button to save the location where your TomTom was last docked in the windscreen dock in your car If your TomTom loses GPS reception for the last part of the...

Страница 81: ...erary When would I use an Itinerary You could use an Itinerary for these kinds of trips A driving holiday through a country with lots of stops A two day car journey with an overnight stop A short drive which passes particular Points of Interest In all these examples you could tap Navigate to for each place However if you use an Itinerary you can save time by programming everything in advance Creat...

Страница 82: ...ach the waypoint Organising an Itinerary Tap an item on your Itinerary to open a page of buttons for editing the item The buttons shown below are available Itinerary planning The Itinerary planning screen opens At first there are no items on the Itinerary Mark as waypoint You can change a waypoint into a destination using this button Remember that waypoints are points on your journey to your desti...

Страница 83: ...tem followed by the rest of the items in the Itinerary This button is only shown if you have already visited this item Move item up Tap this button to move the item up the Itinerary This button is unavailable if the item is at the top of the Itinerary Move item down Tap this button to move the item down the Itinerary This button is unavailable if the item is at the bottom of the Itinerary Show on ...

Страница 84: ...s once Your TomTom remembers your phone Tap Mobile phone in the Main Menu then follow the instructions on the screen Setting up TomTom PLUS After you have established a connection with your phone you can set up a wireless data connection for TomTom PLUS services For information about TomTom PLUS see TomTom PLUS on page 53 Tips Make sure that you switch on Bluetooth on your phone Make sure that you...

Страница 85: ...n with your phone you can start making calls Note Your TomTom must be docked in your car stereo to make hands free calls 1 Tap Mobile phone in the Main Menu 2 Tap Call Note Make sure that your phone is currently selected The current phone is shown at the bottom of the screen 3 Do one of the following Tap Home to call your Home location If you have not entered a number for your Home location this b...

Страница 86: ... 27 Receiving a call If someone calls you while you are driving accept or reject the call by tapping the screen Auto answer You can tell your TomTom to answer every call automatically after a certain time Tap Phone preferences in the mobile phone menu then tap Auto answer preferences Select when your TomTom will automatically answer your calls Sharing your TomTom You can establish connections with...

Страница 87: ...nced buttons and features again by tapping this button For everyday use you won t need all the buttons and features Use Night colours Tap this button to reduce the brightness the of the screen and use darker colours on the map By default the colours that are used for the screen is linked to the dimmer setting on your car stereo When the display on your car stereo is dimmed night colours are used T...

Страница 88: ... category of POI quickly tap Find then start to type the name of the POI category As soon as the category is shown in the list you can select it For more information about POIs see Points of Interest on page 27 Turn off 3D display Tap this button to view the map from above while you are navigating Turn on 3D display To switch back to seeing the map from your perspective as you drive tap Turn on 3D...

Страница 89: ... button to turn the spoken instructions off The button changes to Turn on sound If you turn the sound off warnings for upcoming POIs are also turned off Volume preferences Tap this button to change the volume of the spoken instructions Manage Favourites Tap this button to rename or delete Favourites To find a Favourite quickly tap Find then start to type the name of the Favourite As soon as the Fa...

Страница 90: ...his button to change the language used for all the buttons and messages you see on your TomTom You can choose from a wide range of languages When you change the language you are also given the opportunity to change the voice Warn when near POI Tap this button to be alerted when you are near a Point of Interest POI For example your TomTom can tell you when there is a petrol station nearby To find o...

Страница 91: ...available if all menu options are shown To show all menu options tap Show ALL menu options For more information see Hidden buttons and features on page 38 Keyboard preferences Tap this button to select the size of the keys on the keyboard and the keyboard layout You can select from two sizes Large keyboard Small keyboard Three keyboard layouts are available ABCD keyboard QWERTY keyboard AZERTY key...

Страница 92: ...te a category of POIs called Friends and add all your friends addresses as POIs in the category You can even add your friends phone numbers with their address so you can call them from your TomTom For more information about POIs see Points of Interest on page 27 Status bar preferences Tap this button to select the information shown on the status bar Remaining time the estimated time left until you...

Страница 93: ... menu options tap Show ALL menu options For more information see Hidden buttons and features on page 38 Change map colours Tap this button to select the colour schemes used for day and night map colours You can also download more colour schemes from TomTom PLUS For more information see the TomTom PLUS leaflet included with your product Brightness preferences Tap this button to set the brightness o...

Страница 94: ...t your TomTom should ask you when there is a toll road on the route you are asked whether you want to avoid the toll road as soon as you plan the route Compass preferences Tap this button to select whether a compass is shown and what the compass shows The following options are available One with arrow pointing north the arrow always points north and the direction you are moving is at the top of th...

Страница 95: ... Time Latitudes and longitudes Temperature Air pressure Operate left handed Tap this button to move important buttons for example the Done and Cancel buttons as well as the zoom bar to the left hand side of the screen This makes it easier to tap the buttons with your left hand without blocking the screen To move the buttons back to the right hand side of the screen tap Operate right handed Name pr...

Страница 96: ...es 5 Click Set Owner You can now set a 4 digit password for your TomTom so that only you can use it You can only create a 4 digit password using TomTom HOME You can only change or delete a 4 digit password on your TomTom Turn screen upside down This button may only be available if all menu options are shown To show all menu options tap Show ALL menu options For more information see Hidden buttons ...

Страница 97: ...S reception your GPS position and other GPS information Edit TomTom PLUS account Tap this button to log in to your TomTom PLUS account If you have more than one TomTom PLUS account or if several people are sharing the same TomTom you can log in to another TomTom PLUS account Start up preferences Tap this button to set what your TomTom should do when you first switch it on The following options are...

Страница 98: ...Tap this button to turn off the possibility of receiving wireless data You will still be connected to your mobile phone via Bluetooth and will still be able to receive and make hands free calls You will not be able to receive any data that uses a wireless data connection such as TomTom Traffic To turn wireless data on again tap Enable wireless data Do not ask arrival time Tap this button to stop y...

Страница 99: ...ts to setup TomTom Traffic Whenever your TomTom is inserted in your car stereo it uses TMC traffic information To select to always use TomTom Traffic instead of TMC tap Change Traffic preferences in the Traffic menu then select Use TomTom Traffic instead of RDS TMC when docked About TomTom Traffic TomTom Traffic is a TomTom PLUS service that sends up to date traffic information to your TomTom To u...

Страница 100: ...subscription with your mobile network operator For information about connecting to your phone see Hands free calling on page 35 Updating traffic information With TomTom Traffic there are two ways to update the traffic information Tap Update traffic info in the Traffic menu Set Traffic to be updated automatically at regular intervals To do this tap Change Traffic preferences in the Traffic menu Sel...

Страница 101: ...52 Note The best route may be the same as the route originally planned ...

Страница 102: ...r CDMA Your mobile operator may charge you for using a wireless data connection Don t forget that you can download many TomTom PLUS services to your computer without needing to set up a wireless data connection Not all services are available in all countries For more information visit www tomtom com plus Traffic Get the fastest and most reliable updates from local sources Safety cameras Be smart a...

Страница 103: ...54 Points of Interest Find the places you need quickly with the locations of thousands of Points of Interest POIs ...

Страница 104: ...omTom HOME put the CD which came with your TomTom into your computer If the installation does not start browse to the CD on your computer and double click the file Install TomTom HOME Connect your TomTom to your computer and switch it on Making a backup One of the most important things you can do with TomTom HOME is make a backup of your TomTom 1 Connect your TomTom to your computer using the USB ...

Страница 105: ... a problem with your TomTom you can restore the backup Follow steps 1 and 2 above then select the latest backup and click Restore The latest backup will be restored to your TomTom For more information see the Help included with TomTom HOME ...

Страница 106: ...in your car stereo and it has a built in GPS receiver that it uses when it is not inserted in the car stereo Using the GPS signal your TomTom can work out where you are and how fast you are going GPS signals work in all weather anywhere in the world Note Your TomTom does not transmit your position so others cannot use it to track you while you are driving You can however send your position to TomT...

Страница 107: ...ve environment Do not put store or leave your product in or near a heat source in a high temperature location in strong direct sunlight in a microwave oven or in a pressurized container and do not expose it to temperatures over 60 C 140 F Failure to follow these guidelines may cause the Lithium Ion battery to leak acid become hot explode or ignite and cause injury and or damage Do not pierce open ...

Страница 108: ...r plug it into an outlet which is on a different circuit from that to which the receiver is connected Consult an experienced radio TV technician for help Important This equipment was tested for FCC compliance under conditions that included the use of shielded cables and connectors between it and the peripherals It is important that you use shielded cable and connectors to reduce the possibility of...

Страница 109: ...laite täyttää oleellisilta osin EU n direktiivin 99 5 EY vaatimukset Este equipamento está em conformidade com os requisitos essenciais da Directiva da UE 99 5 CE TomTom tímto prohlašuje že TomTom je ve shodč se základními požadavky a dalšími pĝíslušnými ustanoveními smčrnice 1995 5 ES NV ÿ 426 2000 Sb a Prohlášení o shodč je k dispozici na www tomtom com Toto zaĝízení lze provozovat v þeské repub...

Страница 110: ...pale locale per un opportuno riciclaggio De conformidad con la Directiva 2002 96 CE de la UE sobre residuos de aparatos eléctricos y electrónicos RAEE este producto eléctrico no puede desecharse con el resto de residuos no clasificados Deshágase de este producto devolviéndolo al punto de venta o a un punto de recogida municipal para su reciclaje I henhold til EU direktiv 2002 96 EF om affald af el...

Страница 111: ...go odpadu komunalnego Prosimy o usuniecie niniejszego produktu poprzez jego zwrot do punktu zakupu lub oddanie do miejscowego komunalnego punktu zbiórki odpadów przeznaczonych do recyklingu V súlade so smernicou 2002 96 ES o odpade z elekrických a elektronických zariadení OEEZ sa toto elektrické zariadenie nesmie odstranovat ako netriedený komunálny odpad Výrobok odstránte jeho vrátením v mieste n...

Страница 112: ...d Copyright dienst voor het kadaster en de openbare registers Apeldoorn 2007 Ordnance Survey of Northern Ireland IGN France Swisstopo BEV GZ 1368 2007 Geonext DeAgostini Norwegian Mapping Authority Public Roads Administration Mapsolutions DAV This product includes mapping data licensed from Ordnance Survey with the permission of the Controller of Her Majesty s Stationery Office Crown copyright and...

Страница 113: ...ations and the like or on physical media compact discs digital versatile discs semiconductor chips hard drives memory cards and the like An independent license for such use is required For details please visit mp3licensing com Some images are taken from NASA s Earth Observatory The purpose of NASA s Earth Observatory is to provide a freely accessible publication on the Internet where the public ca...

Страница 114: ...lof al Sal lwDrIo_ _ _ _alqo M qwM_OI 10 _ OD lIO _ _ ll _ DI I _ _ ID __ I I a 1D r ellf _ooo w _l _ _ jlll EUlA Fwnod _ _ _ of TIUNllATION Of L WllUTY 1_Torn1 M l _ M _ I D l ID _ _ O I _ _ _ W _ _ D Ior ID IN or dMD Jou of_ IOu ot _ 0 ot or he Ww Dt Q oucot otOl y1D Sal lwM lI _ _ Tomlom _ _ ot o t _ lO I _ lNIlj OOJ IJI Il Ior_ _I o __ dIr_ _ _ _1 __ allomTom _ ofllll tomOf 10 EUI A_ t lo _ID ...

Страница 115: ...TomTom PLUS services fREE AL Traihc Traiico Traiic ...

Страница 116: ... PLUS ATTENDRE Enregistrez vous maintenant pour acceder facilement aux Services TomTom PLUS page 8 9 4 12006 TomTom Internatlona B V The Netherlands Patents pend 09 All nghts reserved TomTom and he TomTom logo are registered trademarks of TomTom Internat onal B V The Netherlands AU other trademarks are the property of thelf respectiVe owners The use of TomTom products IS governed by a licence agre...

Страница 117: ...frece informaci6n en tiempo real sobre el trMico y el tiempo meteorol6gico camaras de trMico ademas de voces para descargar puntos de interes etc Toujours plus Les services TomTom PLUS vous fournissent des informations en temps reel sur Ie trafic et la meteo tout en vous permettant de telecharger des voix les radars des points d interet et bien plus Navigate around the traffic Navegue evitando ata...

Страница 118: ...nd much more More fun on the road Choose from a huge range of popular voices Get instructions from John Cleese or select one of our many funny voices Buddies Home Need a break Find a hotel or restaurant directly choose from millions of special TomTom Pomts of Interest Want to locate your friends TomTom Buddies instant messagmg and navigation merge together UseTomTom on your computer Use TomTom HOM...

Страница 119: ...UMTS through your mobile network operator Please note that your network operator may charge you for data connection 2 TomTom s Pf_ OI l slXcenfully aetl ed Ellay U S ng TomTom PLUS I I You are now registered for one month free Traffic Tap Continue Enjoy Example of how real time Traffic looks in aTomTom device To download current traffic data for yOU planned route select Update TraffiC Info For det...

Страница 120: ......

Страница 121: ... Limited et TomTom Inc n assument aucune responsabilite quand aux amendes penalites et dommages encourus pour avoir contrevenu au present avis Si vous prevoyez conduire votre vehicule en Califomie Fujitsu Ten et TomTom recommandent I installation du socle de montage conformement aux instructions du present feuillet Remarque L alinea du California Vehicle Code dont il est question ici s applique no...

Страница 122: ...la tarjeta SO mientras el dispositivo de navegaci6n portatil este funcionando Apague el dispositivo de navegaci6n portatil y espere al menos 3 segundos tras el apagado de la pantalla antes de retirar la tarjeta SO Si no respeta esta medida de seguridad podria causar despertectos en los datos 0 una perdida de datos de la tarjeta SO Precauzioni per if funzionamento del sistema di navigazione Non rim...

Страница 123: ...Part no 3POO 08O ...

Страница 124: ......

Страница 125: ...TomTom USA Canada o IL N GO o o o IL N Product code Produktcode Code de produit Productcode Codice Prodotto Codigo de producto Produkt kode Produkt koden ...

Страница 126: ......
Страница 127: ...BTENIR LE SERVICE ASSOCIE ALA GARANTIE Certaines instructions de produits Eclipse fournissent des procedures de diagnostic pour determiner si votre produit necessite Ie service La solution la plus rapide peut etre trouvee dans les instructions Veuillez d abords regarder ici Si vos HAUT PARLEURS DE VOITURE Eclipse requiert un service veuillez contacter pour Ie service Ie detaillant ou VOUS avez ach...

Страница 128: ... any industrial or commercial application HOW TO OBTAIN WARRANTY SERVICE Some Eclipse Product instructions provide troubleshooting procedures to determine if your Product needs service The fastest solution may be found in the instructions Please look here first Should your Eclipse CAR SPEAKER require service please contact the retailer where you purchased this Product for service For other Eclipse...

Отзывы: