Echoflex Installation Guide
Dual Tech Ceiling-mount Vacancy Sensor
Installation
Installation should follow all local codes and standard electrical practices.
Note:
NEC Class 2 product to be wired in accordance to NEC Article
725 and local jurisdiction requirements.
The ceiling-mount sensor is provided with a mounting plate that can be
mounted to a junction box, finished ceiling, or soft ceiling tile. Determine the
installation method and follow the detailed instructions:
•
Junction Box or Surface Installation below
•
Soft Ceiling Tile Installation on the facing page
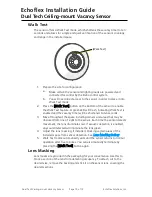
Junction Box or Surface Installation
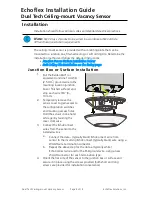
1.
Pull the Belden 8471 (or
equivalent) and one 14 AWG
(2.5 mm
2
) ground wire to the
mounting location (junction
box or finished surface) and
strip each wire 3/8” (9–
10 mm).
2.
Temporarily remove the
sensor cover to gain access to
the configuration switches
and mounting access holes.
Hold the sensor in one hand
while gently twisting the
cover clockwise.
3.
Connect the EchoConnect
wires from the sensor to the
installed wires.
a.
Connect the data - (typically black) EchoConnect wire from
sensor to the incoming EchoConnect (typically black) wire using a
WAGO wire termination connector.
b.
Repeat the above step for the data + (typically white)
EchoConnect wire and for the ESD ground wire, using a new
WAGO connector for each termination type.
4.
Orient the flat side of the sensor to the junction box or surface and
secure it in place using the screws provided (both short and long
screws are provided for installation convenience).
Dual Tech Ceiling-mount Vacancy Sensor
Page 4 of 12
Echoflex Solutions, Inc.


