Publication Number AD05006002E
Page 6
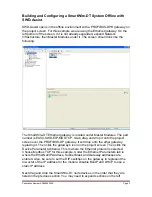
Press the
Renew
button under target configuration. This triggers the SmartWire-
DT Ethernet gateway to read and store the list of devices physically present in
the SmartWire-DT system.
Press the
PC to Device
button under the Planned Configuration on the left
portion of the screen. This will download the offline project just created to the
Ethernet gateway.
The SmartWire-DT system is now ready to be controlled and monitored with an
EtherNet/IP or Modbus TCP Ethernet master. Please refer to the EtherNet/IP or
Modbus TCP section below for additional information on configuring these
master modules to control and monitor the devices on the SmartWire-DT system.
Using the Auto-Configuration Feature to Build and Configure a
SmartWire-DT System
If the procedure above was used to build, configure, and download a SmartWire-
DT system, you may skip this section. This section provides an alternate
approach, but the entire SmartWire-DT system must be assembled and powered.
Connect the SmartWire-DT Ethernet gateway to the SmartWire devices and
apply power. Connect the SmartWire-DT Ethernet gateway to your PC using the
EU4A-RJ45-USB-CAB1 cable or equivalent.
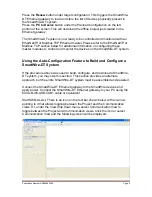
Start SWD-Assist. There is an icon on the tool bar shown below with an arrow
pointing to it that allows toggling between the Project and the Communication
views. Or, under the View drop down menu, select Communication View to
toggle between the Project and Communication views. Click the icon or select
Communication View and the following screen will be displayed:

