PAGE - 15
-
PAGE - 14 -
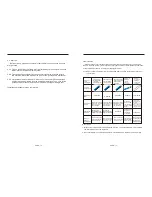
Lock
(
clockwise
)
Open
(
counter clockwise
)
Figure 19
.
Filter cartridge
replacement diagram
3 . 2 F i l t e r e l e m e n t r e p l a c e m e n t p r o c e d u r e
3 . 2 . 1 C l o s e w a t e r i n l e t b a l l v a l v e .
3 . 2 . 2 R e m o v e t h e u s e d f i l t e r c a r t r i d g e a n d d i s c a r d . I n s e r t t h e n e w f i l t e r c a r t r i d g e
a n d p u s h f o r w a r d . M a k e s u r e t h a t f i l t e r c a r t r i d g e e n t e r s t h e l o c k t e n o n .
T h e n t u r n c l o c k w i s e l y f o r 1 / 4 , a n d l o c k o n .
3 . 2 . 3 I n s e q u e n c e , r e m o v e o t h e r f i l t e r c a r t r i d g e t o m a i n t a i n t h e s e r v i c e l i f e o f t h e
m e m b r a n e s .
3 . 2 . 4 R e p l a c e m e n t o f 5 t h s t a g e f i l t e r i n - l i n e p o s t f i l t e r c a r t r i d g e s, p l e a s e r e f e r t o
p i c t u r e 1 8 .
When you would like to remove the PE tube, please take off both sides of C
clamp, then push the adjustable clamp toward internal, and then dismantles.
When changing new filter, please follow up the direction as shown on filter
housing. Otherwise, the machine will not work properly. It will be easier to install
the filter if you follow up the above installation procedure with opposite direction.
Caution: if the fitting area is leaking, all you have to do is pull down PE tube and
cut down 0.5 cm from PE tube. After that, just connect it to filter.
Caution1: Due to the internal pressure of system, if you feel it's difficult to loosen
the filter, please try to knock the filter or turn on the gooseneck faucet
to release the pressure.
Caution2: In order to avoid clogging on membrane, please flush the system with
pure water, before replacing carbon filter.
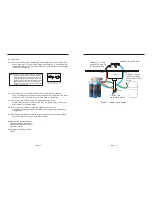
Figure 19. Post in-line activated carbon filter
cartridge replacement diagram
Take down first C clamp, then
push this adjustable clamp toward
internal, and then dismantle
PE TUBE
in-line post activated
carbon filter cartridge
membrane element
membrane housing cap
Figure 20. Membrane replacement
diagram
membrane housing
3.3 Filter membrane replacement procedure (See Figure 28, 29)
3.3.1 When TDS value is too high (exceed 10 PPM), recommend you
replace all three membranes.
3.3.2 First close water inlet ball valve.
3.3.3 There is no need to remove PE piping. All you need to do is to use
your hand to turn the cap of the membrane housing clockwisely. The
PE pipe connector turns automatically. See details in Figure 29.
3.3.4 Remove used membrane and discard. If it is difficult to be removed,
use sharp pliers and point to the plastic center rod of the membrane,
use force and pull out. Then, install the new membrane in the correct
direction. Pay attention to the direction of the membrane otherwise,
water may not come out.
3.3.5 Recommend to replace all three membranes at the same time for
TDS value to return to normal.
OPEN
CLOSE


