


6.Quick start 2 - RosStudio
Step 1: Run RosStudio
After RosStudio software is installed,
run the command: ./RosStudio.sh in the
home directory ( ~/RosStudio) of the
program. This software is successfully
installed if the main interface can be
entered after startup, as shown below:
Step 2: Configure to connect to LEO robot
Firstly make sure ROS robot is turned on. Then connect PC
’
s WIFI to this ROS robot. Click
RosWinodws main interface
’
s icon to enter the robot
’
s connection configuration interface.
The robot
’
s connection configuration interface is shown below. Then, click "Add" after
entering the robot configuration information.In the end, click
“
Source code download
”
to
download the source code from the LEO robot to this computer.
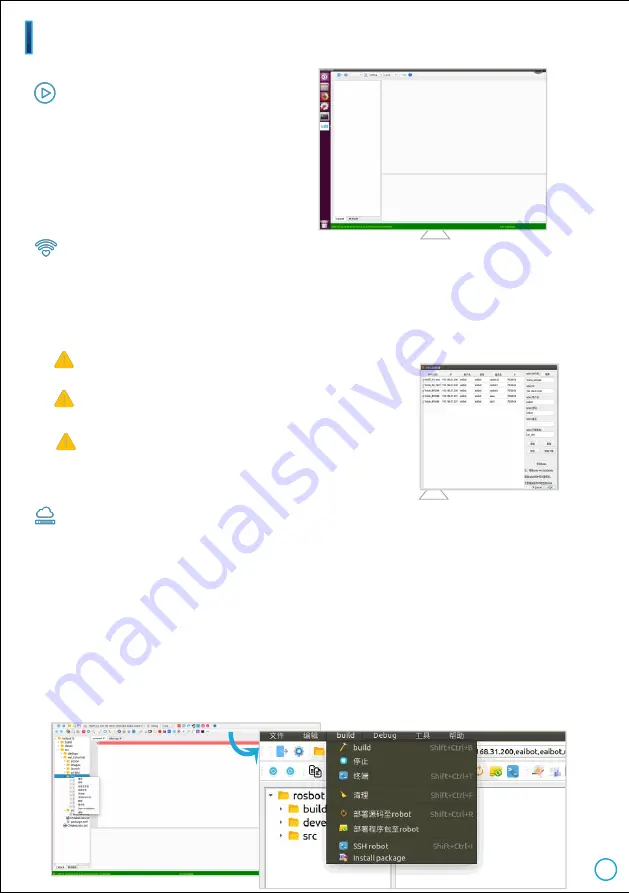
Step 3: Compiling and deployment
After source code is downloaded, the project of the source code is displayed on the
left, while the source code editing area is on the upper right, and the information
output area on the lower right, as shown below.
Click the
“
Build
”
function in the build menu to start compiling the project.
(Compiling parameter switch: Debug / Release is optional. The executable programs
generated by the
“
Debug
”
mode contains the gdb debugging information. There is none
in the Release mode.Local / Remote is optional.
“
Local
”
refers to the host and
“
Remote
”
refers to the current selected robot.)
The executable program package compiled on the host can be deployed to the target
robot by clicking the
“
Deploy Program Package to Robot
”
function in the build menu.
Note 1: Remarks is exclusive.
Note 2: LEO robot
’
s default name is EAI_LEO.
Note 3: When adding LEOrobot
’
s configuration information,
it needs to input the local root account password.
5


