EAI LEO Скачать руководство пользователя страница 10

Step 4: Select a map

After selecting a map, use the "Set initial position" function in "Settings" to set the 

position of the LEO robot on the map. After calibration, add resource points for pick&place. 

Click the "Settings" icon on the lower right corner, and then select "Add Resource" to enter 

into the resource adding interface. 

Resource points are divided into: 

0, Ordinary navigation target points; 

1, Charging points. Need to be added for automatic charging; 

2. Releasing points.Used by a robot with a robot arm.. When LEO robot is at this position, 

it grabs object from pallet and release it to external platform; 

3. Picking points.Used by a robot with a robot arm. When the robot is in this position, it 

grabs the object from the external platform onto the pallet. 

Use the direction control button to control the ROS robot to move to a certain position. 

Then, set this resource point type as the releasing point or picking point. After that, get 

the current position of the LEO robot on the map (SLAM). 

 If you use our standard item pick&place platform, you can click the "Use Default Values" 

function button to set the home point, observation point, platform height and temporary 

storage point to get the default parameters. 

 If on the other hand, you need to manually measure the home point, observation point, 

platform height and temporary storage point values 

​​

(manual measurement method: press the 

button on the robot arm, rotate and adjust the position of the robot arm. Then, click on the 

ROS console to get the number of relevant points). 

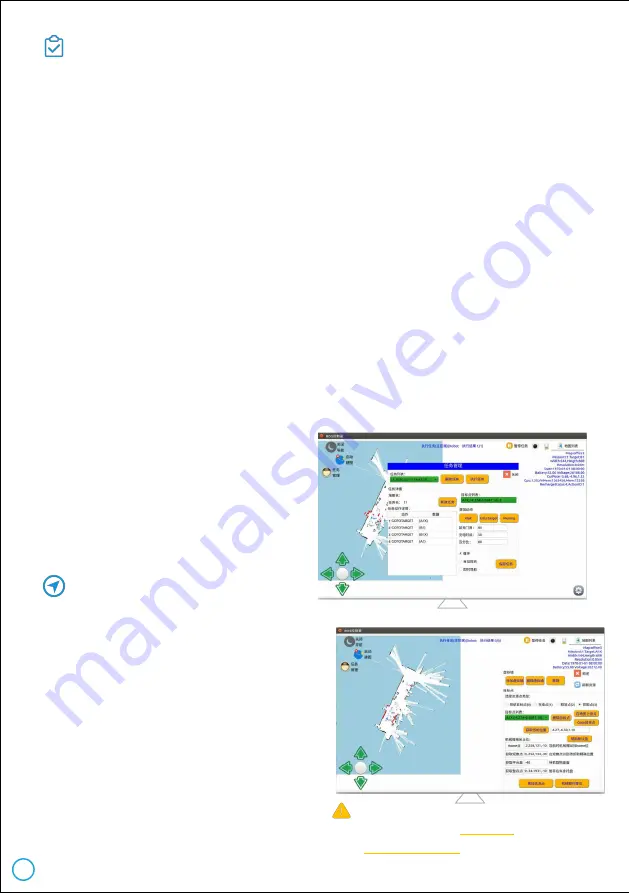
Step 5: Creat Pick&Place Task

Click "Task Management", click "New Task" on 

the task management interface, and enter the 

task name to create an action list for the new 

task. "Wait" means waiting still; "GotoTarget" 

means navigating to the target point (it can be 

any type of resource point); "Moving" means 

moving in a straight line. Organize the task 

sequence: A1X (pick) -> B1 (release) -> B1X 

(pick) -> A1 (release). Select the parameter 

"loop" to realize the pick&place back and forth 

between the two pallet. Click "Save Task" to 

save the task. After that, you could select 

this task and perform it.

8

Click "Add Resource Points" to save the 
target point according to the selected 
resource type. Create 4 resource points 
here: A1 and A1X are the same location, A1 
is the releasing point, A1X is the picking 
point; B1 and B1X are in the same location, 
B1 is the releasing point, and B1X is the 
picking point;

Note: For more information, 

please refer to 

RosStudio 

Operation Manual

Содержание LEO

Страница 1: ...EAI LEO ROS Educational Robot Product Manual Shenzhen EAI Technology Co Ltd www eaibot com Version No V1 0...

Страница 2: ...icular purpose non infringement of third party rights etc nor does it compensate for any special incidental accidental or indirect damages resulting from the use of this manual or the use of our produ...

Страница 3: ...ware RosStudio Operation Manual RosStudio Installation Guide RosCore APP User Manual LEO Driver Node Instruction STM32 Drive Protocol Documents Android SDK development source code package RosCore Andr...

Страница 4: ...g The machine is in the normal charging status Only one light is blinking The machine is in the charging error status Battery status light Describe how much power is left 3 Main Structure 2 Battery st...

Страница 5: ...ra 1 Optional robot arm DOBOT Magician robot arm Optional Battery and battery life Battery type Power lithium battery Battery capacity 11 2Ah 24V Charging time About 4 5 hours Charging voltage 29 4V B...

Страница 6: ...pping On the main interface of RosCore click Mapping and use the remote control at the lower left corner to control LEO to walk around the area After the map image is basically displayed click Save Ma...

Страница 7: ...piling and deployment After source code is downloaded the project of the source code is displayed on the left while the source code editing area is on the upper right and the information output area o...

Страница 8: ...lling ROS robot s movement mapping navigating executing tasks navigating to the target point and drive control The console is used to control the robot to load the map to view the laser data and to vi...

Страница 9: ...ned on Then connect PC s WIFI to this ROS robot Choose the LEO Robot to be connected as shown in below Then click EAI icon on the right side to get onto the ROS control console Step 3 Calibrate robot...

Страница 10: ...int platform height and temporary storage point to get the default parameters If on the other hand you need to manually measure the home point observation point platform height and temporary storage p...

Страница 11: ...s can be replaced by the user the user will be provided with a quotation for the parts according to after sales maintenance charge standard of Shenzhen EAI Technology Co Ltd If the user accepts the qu...

Страница 12: ...Shenzhen EAI Technology Co Ltd eai eaibot com F Area 2nd floor Phase II Galaxy incubator Bantian street Longgang district Shenzhen For more information please visit www eaibot com...

Отзывы: