30
Epoxy transducer to hull.
WARNING:
Use
only
the epoxy available from LEI. It has been for-
mulated to work with these installation procedures.
Other epoxy types may be too thin or may not cure to the
right consistency for optimum transducer performance.
2. The epoxy consists of the epoxy itself and a hardener. Remove the
two compounds from the package and place them on the paper plate.
Thoroughly stir the two compounds together until the mixture has a
uniform color and consistency. Do not mix too fast or bubbles will
form in the epoxy. After mixing, you have 20 minutes to complete the
installation before the epoxy becomes unworkable.
Spread a thin layer of epoxy (about 1/16" or 1.5 mm thick) on the face
of the transducer as shown in the previous figure.
Make sure there
are no air pockets in the epoxy layer!
Then, apply the remaining ep-
oxy to the sanded area on the hull.
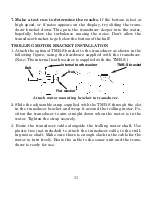
3. Press the transducer into the epoxy, twisting and turning it to force
any air bubbles out from under the transducer face. Stop pressing
Spread epoxy here
Sand this surface
Orient the Skimmer
with the nose facing
the bow of the boat.
To bow
Содержание Cada 250 S/Map
Страница 20: ...12 Notes ...
Страница 138: ...130 Notes ...

