4810 Clover Road • Greensboro, NC 27450 • 1-800-336-2776 • www.eagleequip.com • © Eagle Equipment 2018.01 • page 15
2. ASSIST ARM APPLICATION CONT.
C. Install the tire
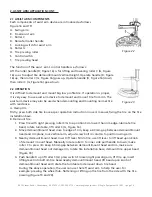
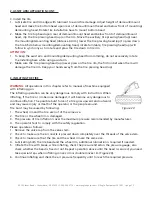
1. Lubricate tire and rim edge with lubricant to avoid tire damage. Adjust height of demount/mount
head and make tire bottom bead upon rear of demount/mount head and below front of mounting/
demounting head. Rotate tire installation base to mount bottom bead.
2. Make the tire top bead upon rear of demount/mount head and below front of demount/mount
head, clip the tire pressing head (up) on the rim. Move the auxiliary tire pressing head (up) near
the mounting/demounting head (distance 3-4cm), lower the tire pressing head (up) to press down
the tire 3-5cm below mounting/demounting head, rotate turntable, tire pressing head (up) will
follow in synchrony as to rotate and press the tire down in tire rim.
ATTENTION:
1. To keep the assist arm and mounting/demounting head from colliding, do not excessively rotate
the installing base while using assist arm.
2. Make sure the tire pressing head (up) never press on the tire rim, the friction between them will
damage the tire rim. Keep your hands away from the tire pressing head (up).
3. INFLATING THE TIRE
WARNING:
All operations in this chapter refer to manual of machine equipped
with inflating gun.
The inflating operation can be very dangerous. Comply with instruction. When
inflating, if the tire or rim become damaged, it will become very dangerous to
continue inflation. The possible burst force of a tire goes upward and outward,
and may cause injury or death of the operator or the people around.
Tire burst may be caused by following:
1. The wheel rim and the tire are not of the same size.
2. The tire or the wheel rim is damaged.
3. The pressure of tire inflation is over the maximum pressure recommended by manufacturer.
4. The operator fails to comply with the safety regulation.
Please operate as follows:
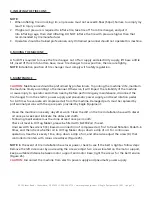
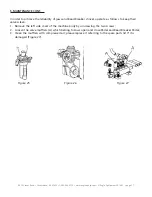
1. Remove the valve cap from the valve stem.
2. Check to make sure the air nozzle is pressed down completely over the threads of the valve stem.
3. Check to make sure that the tire and the wheel rim are the same size.
4. Lubricating both the tire bead and the wheel rim, additional lubrication is required if needed.
5. Inflate the tire with break, while inflating, check the pressure listed on the pressure gauge, also
check whether the bead is fixed or not. Repeat operation above until the bead is secured; you need
take special steps when inflating convex rim or double convex rim (Figure 24).
6. Continue inflating and check the air pressure frequently until to reach the required pressure.
Figure 24


