208
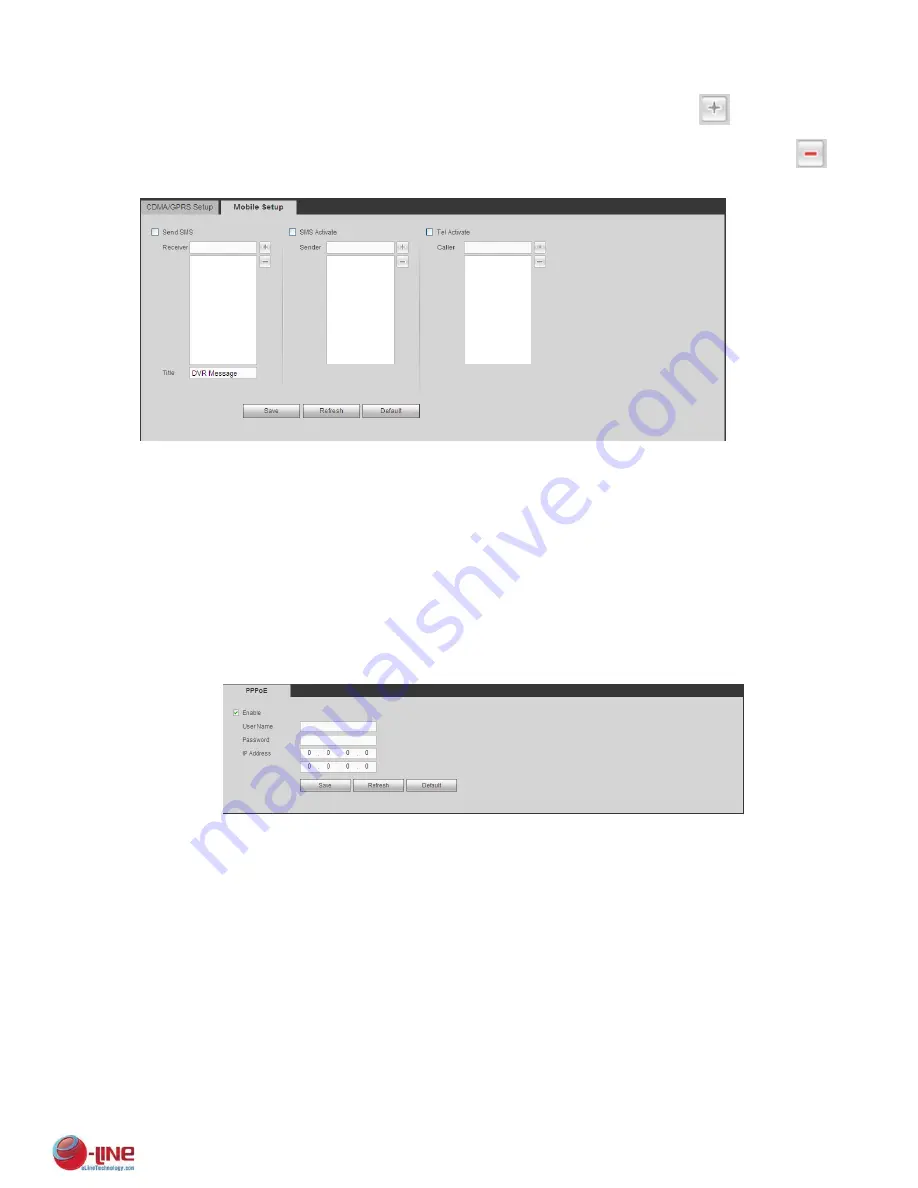
Check send SMS box and then input the phone number in the receiver column. Click
to add one
receiver. Repeat the above steps you can add more phones. Select a phone number and then click
,
you can delete it. Click OK button to complete the setup.
Figure 5-29
5.8.2.6 PPPoE
The PPPoE interface is shown as in Figure 5-30.
Input the PPPoE user name and password you get from the IPS (internet service provider) and enable
PPPoE function. Please save current setup and then reboot the device to get the setup activated.
Device connects to the internet via PPPoE after reboot. You can get the IP address in the WAN from the
IP address column.
Please note, you need to use previous IP address in the LAN to login the device. Please go to the
IP address item to via the device current device information. You can access the client-end via
this new address.
Figure 5-30
5.8.2.7 DDNS
The DDNS interface is shown as in Figure 5-31.
The DDNS is to set to connect the various servers so that you can access the system via the server.
Please go to the corresponding service website to apply a domain name and then access the system via
the domain. It works even your IP address has changed.
Please select DDNS from the dropdown list (Multiple choices). Before you use this function, please
make sure your purchased device support current function.
Содержание ELI-ECOM-4
Страница 7: ...vii APPENDIX E COMPATIBLE SWITCHER LIST 265 APPENDIX F COMPATIBLE WIRELESS MOUSE LIST 266 ...
Страница 15: ...71 2 3 ConnectionSample ELI ECOM 4 ELI ECOM 8 ELI ECOM 16 ...
Страница 85: ...153 Figure 4 81 Figure 4 82 Figure 4 83 ...
Страница 90: ...158 Figure 4 88 Figure 4 89 ...
Страница 91: ...159 Figure 4 90 Figure 4 91 ...
Страница 92: ...160 Figure 4 92 Figure 4 93 Figure 4 94 ...
Страница 152: ...220 Figure 5 51 Figure 5 52 Figure 5 53 ...
Страница 194: ...262 Maxtor DiamondMax 20 STM3320820AS 320G SATA Maxtor DiamondMax 20 STM3250820AS 250G SATA ...


