background image

25

E-flite Ultimate 20-300 Assembly Manual


2. Use four 4-40 x 1/2-inch socket head screws  

and four #4 washers to attach the main landing gear  

to the fuselage. Use a 3/32-inch ball driver to tighten  

the screws.

Note

: Use threadlock on the screws to prevent them from 

vibrating loose.

Motor and Cowling Installation

Required Parts

Fuselage assembly 

Motor and mount

#4 washer (4) 

Hook and loop tape

Hook and loop strap 

Cowling

Spinner 

Spinner backplate

Speed control 

Motor battery

3-inch (76mm) servo extension

EC3 extension lead w/6-inch wire, 16 GA

Machine screw, 2mm x 8mm (4)

Sheet metal screw, 2mm x 8mm (2)

Socket head screw, 4-40 x 3/8-inch (4)

Required Tools and Adhesives

Phillips screwdriver: #1, #2 

Ball driver: 3/32-inch

Threadlock


1, Attach the X-mount to the motor using the screws 

provided with the motor and a #2 Phillips screwdriver.

Note

: Use threadlock on the screws to prevent them from 

vibrating loose.

Содержание Ultimate 20-300 10 ARF

Страница 1: ...ecifications Wingspan 38 in 960mm Length 41 in 1045mm Wing Area 473 5 sq in 30 5 sq dm Weight w o Battery 34 36 oz 965 1020 g Weight w Battery 39 41 oz 1105 1160 g Ultimate 20 300 10 ARF Assembly Manu...

Страница 2: ...n In addition check boxes have been placed next to each step to keep track of each step completed Steps with a single circle are performed once while steps with two circles indicate that the step will...

Страница 3: ...ommend the crystal free interference free Spektrum DX6i 2 4GHz DSM 6 channel system If using your own transmitter we recommend the Spektrum 7 5 gram Super Sub Micro Digital Programmable Servos When us...

Страница 4: ...FLC505 Intelligent 1 to 5 Cell Balancing Charger Notes Regarding Servos and ESC WARNING Use of servos other than those we suggest may overload the BEC of the recommended Electronic Speed Control ESC P...

Страница 5: ...modification of or to any part of the Product This warranty does not cover damage due to improper installation operation maintenance or attempted repair by anyone other than Horizon Return of any good...

Страница 6: ...e your original sales receipt verifying the proof of purchase date Provided warranty conditions have been met your Product will be repaired or replaced free of charge Repair or replacement decisions a...

Страница 7: ...oid operating your model in the street where injury or damage can occur Never operate the model out into the street or populated areas for any reason Never operate your model with low transmitter batt...

Страница 8: ...e hinges inserted in the slots of the wing Check that the end of the aileron is aligned with the wing tip using a straight edge mmm 5 Make sure the aileron does not bind at the center of the wing mmm...

Страница 9: ...he hinges applying the CA to the slot in the hinge so it penetrates fully into the hinge for the best bond between the aileron and wing m 8 Repeat Steps 2 through 7 for the remaining aileron on the bo...

Страница 10: ...it 1 16 inch 1 5mm Phillips screwdriver 0 1 Felt tipped pen mmm 1 Slide the control horn into the pre drilled holes in the aileron Use a felt tipped pen to mark the area around the base of the control...

Страница 11: ...he CA fully cures Align horn to aileron centerline m 3 Repeat Step 2 for the top aileron at this time m 4 Secure a 6 inch 152mm servo extension to the aileron servo so it will not unplug inside the wi...

Страница 12: ...on m 7 Position the servo in the opening Use a pin drill and 1 16 inch 1 5mm drill bit to drill the holes for the servo mounting screws Use care not to slip and puncture the covering on the top of the...

Страница 13: ...drill and 1 16 inch 1 5mm drill bit to enlarge the hole that is 1 2 inch 13mm from the center of the servo horn m 11 Use a hobby knife to remove the webbing from the underside of the servo horn so th...

Страница 14: ...ctor backplate to secure the connector m 15 Slide a clevis retainer onto the clevis of the 2 5 inch 62mm servo linkage m 16 Attach the clevis to the outer hole of the control horn and slide the retain...

Страница 15: ...ould be centered and the servo horn aligned with the aileron hinge line before tightening the screw 19 Repeat Steps 10 through 18 for the remaining servo linkage Stabilizer Installation Required Parts...

Страница 16: ...ing tip to each stabilizer tip The distances on the right must match those on the left Reposition the stabilizer to achieve equal measurements A A A A 4 Stand back and view the aircraft from the rear...

Страница 17: ...ghtly INSIDE the lines drawn on the stabilizer Use light pressure so you do not cut into the underlying wood Remove the covering from the inside of the cut lines on the top and bottom of the stabilize...

Страница 18: ...he top of the stabilizer first Then slide the stabilizer in and wick thin CA on the top left and right joint first using the bottom lines for the alignment Now use the alcohol and paper towel to remov...

Страница 19: ...until instructed to do so m 1 Use a felt tipped pen to mark the center of three CA hinges This will help in positioning them equally in the elevator and stabilizer m 2 Slide the three hinges into the...

Страница 20: ...inside the hole in the elevator that the joiner wire fits into Follow the previous steps to position the stabilizer before the epoxy cures Be very careful to make sure that no epoxy runs back out of t...

Страница 21: ...e rudder to the fin using the hinges Remember to use a hobby knife to set the gap between the rudder and fin Apply thin CA to each side of the hinges Make sure to saturate the hinges applying the CA t...

Страница 22: ...ed pen to mark the area around the base of the control horn Remove the horn and use a hobby knife to cut the covering away from the area inside the outline Use medium CA to attach the control horn to...

Страница 23: ...drill the holes for the servo mounting screws Apply 2 3 drops of thin CA into each hole to harden the surrounding wood This will keep the screws secure in the holes Install the servo using the screws...

Страница 24: ...ear right and left Receiver 4 washer silver 4 Hook and loop material 6 inch 152mm servo extension 2 Socket head screw 4 40 x 1 2 inch 4 Required Tools and Adhesives Ball driver 3 32 inch Threadlock 1...

Страница 25: ...r and mount 4 washer 4 Hook and loop tape Hook and loop strap Cowling Spinner Spinner backplate Speed control Motor battery 3 inch 76mm servo extension EC3 extension lead w 6 inch wire 16 GA Machine s...

Страница 26: ...inside the fuselage A 3 inch 76mm servo extension will be required to connect the speed control to the receiver A 6 inch EC3 extension will also be required to extend the battery lead to the front of...

Страница 27: ...ight 7 Check the operation of the motor at this time It should rotate counterclockwise when viewed from the front of the aircraft If not follow the instructions provided with your speed control to cor...

Страница 28: ...propeller or the spinner make sure to check the balance of each afterwards 9 Prepare the spinner backplate and propeller as shown with the propeller adapter 10 Slide the propeller assembly onto the mo...

Страница 29: ...x 10mm machine screws 2 Required Tools and Adhesives Phillips screwdriver 1 Pin drill Drill bit 1 16 inch 1 5mm Low tack tape Adjustable wrench small Canopy glue 1 Use canopy glue to attach the canopy...

Страница 30: ...overing to access the screw holes for the interplane struts 4 Use the following image to orient the interplane struts for installation 5 Use four 2mm x 20mm machine screws and a 1 Phillips screwdriver...

Страница 31: ...Phillips screwdriver to secure the screws 7 Use four 2mm x 20mm machine screws and a 1 Phillips screwdriver to secure the interplane struts to the top wing as you did on the bottom wing m 8 After slid...

Страница 32: ...hrow of the elevator ailerons and rudder Adjust the position of the pushrod at the control horn to achieve the following measurements when moving the sticks to their endpoints One of the most importan...

Страница 33: ...ps that follow to achieve the correct and optimum servo and linkage setup for Ultimate 20 300 Note The correct servo arm lengths and control surface travels are listed below these steps 1 Set the nylo...

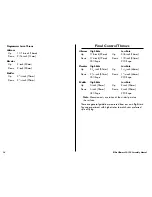
Страница 34: ...own 3 4 inch 19mm Down 1 2 inch 20mm 35 Expo 20 Expo Elevator High Rate Low Rate Up 2 1 4 inch 57mm Up 1 3 4 inch 44mm Down 2 1 4 inch 57mm Down 1 3 4 inch 44mm 35 Expo 20 Expo Rudder High Rate Low Ra...

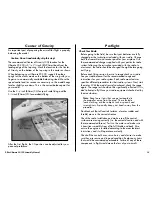
Страница 35: ...ded with the radio In most cases the radio should be charged the night before going out flying Before each flying session be sure to range check your radio See your radio manual for the recommended ra...

Страница 36: ...ur radio FlyingYour Ultimate 20 300 Flying the Ultimate 20 300 is a pleasure Takeoffs are easy as well as landings We hope you enjoy flying your Ultimate 20 300 as much as we do Happy Landings Instruc...

Страница 37: ...established in front of which all flying takes place with the other side for spectators Only personnel involved with flying the aircraft are allowed at or in front of the flight line Intentional flyi...

Страница 38: ...38 E flite Ultimate 20 300 Assembly Manual Building and Flying Notes...

Страница 39: ...39 E flite Ultimate 20 300 Assembly Manual Building and Flying Notes...

Страница 40: ...13465 2008 Horizon Hobby Inc 4105 Fieldstone Road Champaign Illinois 61822 877 504 0233 horizonhobby com E fliteRC com...

Отзывы: