29
E-flite Aeronca Champ 15e ARF Assembly Manual
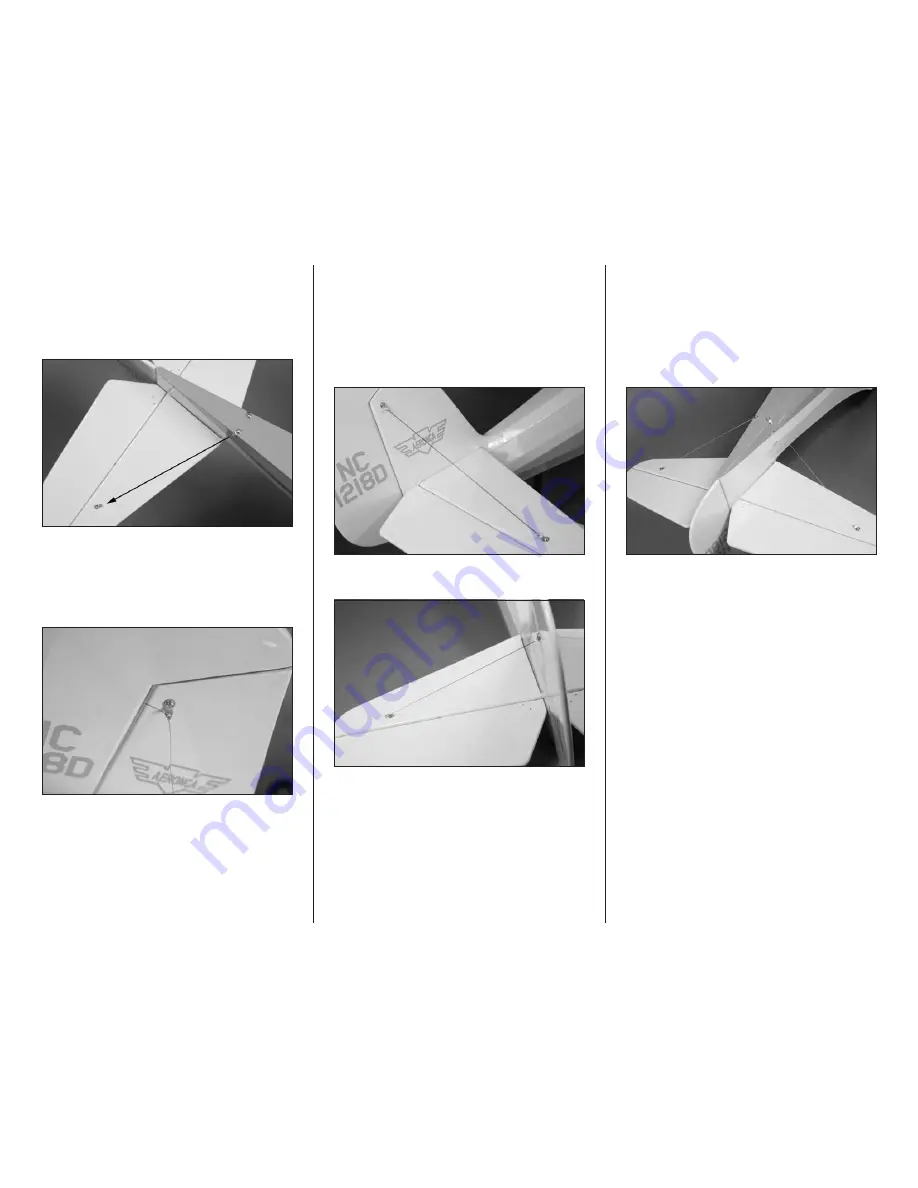
4. Install the last two fittings on the bottom of the
fuselage using 2mm x 6mm sheet metal screws.
Make sure the fittings are directed toward the
fittings on the bottom of the stabilizer. Use a #1
Phillips screwdriver to tighten the screws. Do not
fully tighten the screws fully at this time.
5. Tie the rigging line to the fitting on the fin. We
recommend using tweezers or hemostats to hold
onto the line while tying the knot. Once tied, place
a drop of thin CA on the knot to keep it from
coming loose.
6. Tie the rigging at the fitting on the top of the
stabilizer. Use hemostats or tweezers to hold the line
while tying the knot. Place a light amount of tension
on the line. Make sure not to pull the stabilizer out
of alignment with the fin, so use a square to verify
the stabilizer and fin are still aligned. Once tied,
place a drop of thin CA on the knot. Use scissors to
trim the excess line as close to the fitting as possible.
7. Repeat Steps 5 and 6 for the opposite side.
8. Tie the rigging on the bottom from the stabilizer
to the fuselage. Again, use hemostats or tweezers
when tying the knots, and apply a drop of thin CA
on the knot to prevent it from coming loose. Fully
tighten all of the nuts and screws on the rigging at
this time using a #1 Phillips screwdriver and 4mm
nut driver. Use thin CA on the outer side of each nut
to hold them in place.


