


Dynamic Displays, Inc. User Manual Doc: 0048070
1625 Westgate Road 17C3 A/D Series Rev 2
Eau Claire, WI 54073 Glee 17C3 Page #11 of 26
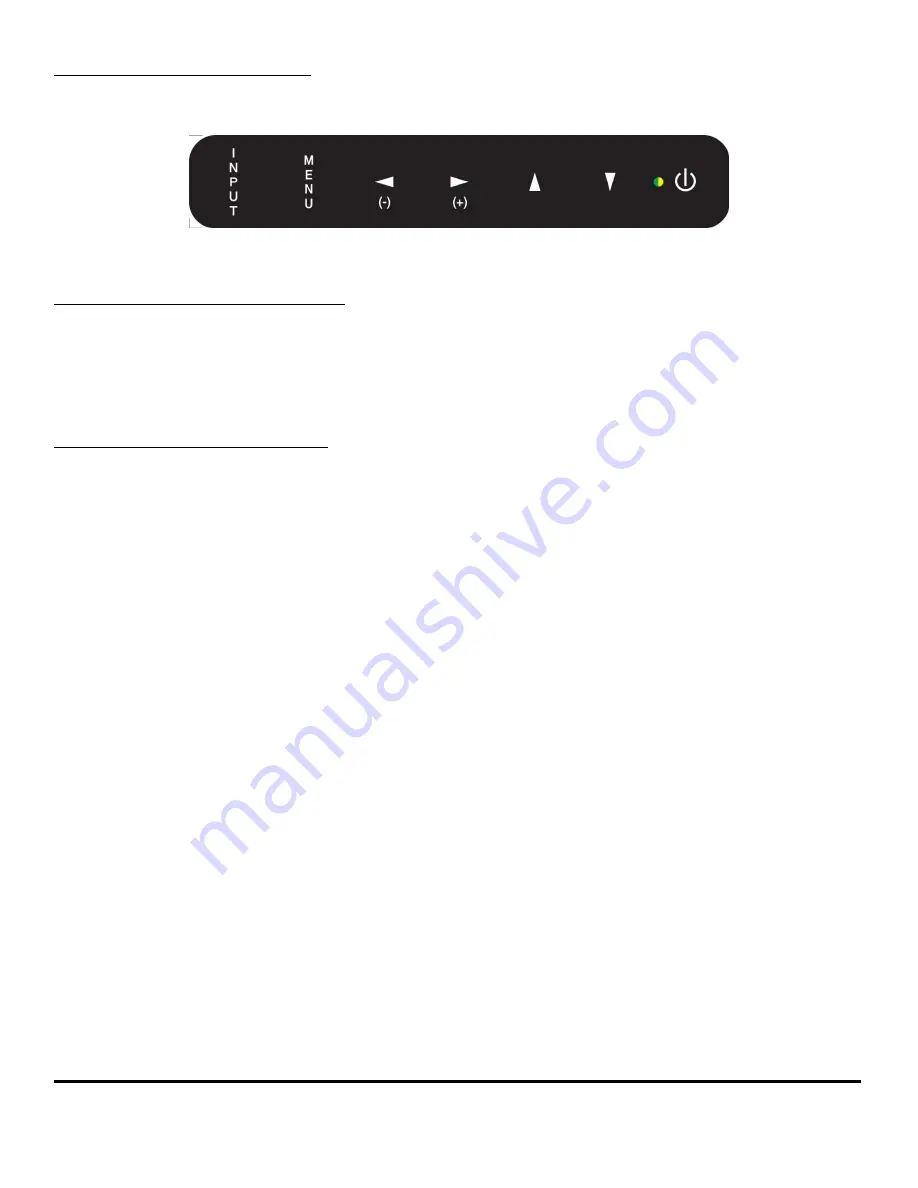
OSD CONTROLS & FUNCTIONS
The OSD interface is composed of 7 membrane switches (as shown below) and a Bi-color LED. All the adjustments
required for the monitor are done through these buttons which interface with the Menu selections on the OSD.
MENU OPERATING INSTRUCTIONS:
Your LCD monitor allows you to easily adjust the characteristics of the image being displayed. All these adjustments
are made using the OSD control buttons on the front or rear of the monitor. While you use these buttons to adjust
the controls, the OSD shows you their numeric values as they change.
MENU OSD CONTROL BUTTONS:
•
Source:
Input Video Source Selection.
•
MENU:
Activates OSD Screen or Return to previous menu.
•
Left (-) /
◄
:
Moves selection to left or decreases function value.
•
Right (+) /
►
:
Move selection to right or increase function value. Enter (OK)
•
UP /
▲
:
Increase value.
•
DOWN /
▼
:
Decreases value.
•
LED:
Green Light: Power ON
Orange Light: Power Saving or No Input Signal
•
POWER:
Power ON/OFF control. The monitor will enter into Auto Setup the first time the unit is first
turned on.
The monitor will enter “Auto Setup” auto
matically the first time the unit is first turned on. This option can be
disable, see “PC Setting” section “Auto Adjust Enable”).


