


- 25 -
Default Memory
The HD-700 is programmed with a default memory. This is a 'base" memory that will maintain, geometry,
convergence and gray scale values at any scan frequency.
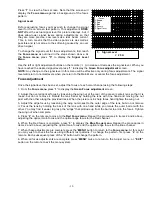
To make adjustments begin by applying a video signal. Press
"MENU"
to display the
Main Menu
and then
press
"9"
to go to the
Set Up Menu
.
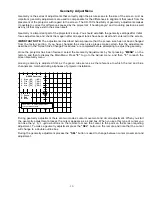
Press
"5"
to select
"Copy, Rename or Delete Video Memory"
. This will display a listing of all sources
entered into the HD-700 memory. Press
"0"
to highlight the
"Default Memory"
and then press
"8"
for
adjustments. Adjust the geometry and convergence to match your screen size and aspect ratio. After
adjustments are made, exit the system menus.
Now all other video memories can be copied onto
Default Memory
.
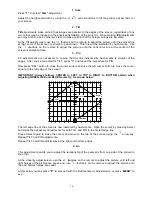
Setting Memories for TranScanner
The HD-700 enables the user to automatically set-up 3 TranScanner memories for all aspect ratios. Press
"+10"
to set TranScanner memory. (Important: TranScanner memories are copied from the default memory,
if the default memory is not correctly configured the TranScanner memories will adopt those incorrect
configurations.) It will open a sub menu. Program the exact same number of lines in the sub menu as in the
TranScanner, and then select the proper physical screen, size (
"1"
for 4:3 or
"2"
for 16:9). Following the
instructions, press Enter, memories for 1:85, 4:3 and 2:35 are now automatically entered.
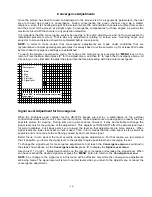
Preparation for installation
Once the unit has been configured for operation and all settings established, it may be taken to the
customer’s location for final installation. When installing the projector make certain that the projector to screen
distance is identical to the distance used in shop testing. If another distance is used the focus, geometry and
convergence adjustments will need to be fine tuned.
If the set is to be installed in a ceiling mount configuration, you will need to change the two jumpers inside
the set prior to installation.
To change the mounting position from floor to ceiling, or to projection throw direction from front to rear, follow
these instructions:
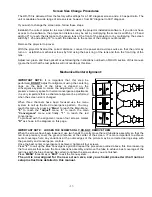
Scan Reversal
By changing the configuration of jumpers on the
Main board
and by selecting the mounting position in the
Set up menu
, it is possible to set the unit for any combination of floor or ceiling operation from front or rear
projection. To change the projection direction or picture orientations follow these steps:
CAUTION: THE UNIT MUST BE DISCONNECTED FROM AC POWER WHILE THIS ADJUSTMENT IS MADE!
1. Turn the unit off by pressing the power button “
OFF-ON
” on the remote control.
2. Unplug the AC line cord from the unit.
3. Remove the top cover.
4. Change the positions of H and V plugs on the Main board.
NOTE: Do not make any changes to the Red/Green/Blue plugs that separate the H2 and V2 plugs.