


3
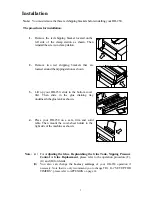
Installation
Note:
You must remove the three red shipping brackets before installing your DB-250.
The procedures for installation:
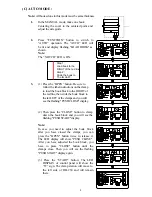
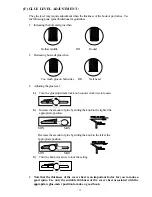
1.
Remove the red shipping bracket located on the
left side of the clamp station as shown. Then
reinstall the screws in clamp station.
2.
Remove two red shipping brackets that are
located around the nipping station as shown.
3.
Lift up your DB-250, slide in the bottom cover
first. Then slide in the glue draining tray
underneath the glue tank as shown.
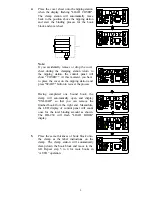
4.
Place your DB-250 on a safe, firm and solid
table. Then mount the cover-sheet holder to the
right side of the machine as shown.
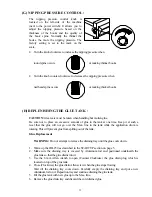
Note:
(A) For
Adjusting the Glue
,
Replenishing the Glue Tank, Nipping Pressure
Control
or
Glue Replacement
, please refer to the operation procedure (F),
(G) and (H) for details.
(B) You also can change the
factory settings
of your DB-250 operation if
necessary. Note that we only recommend you to change TR1. For “
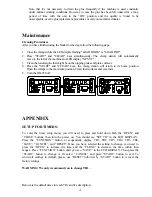
SETUP FOR
TIMERS”
, please refer to APPENDIX on page 14.
Содержание DB-200
Страница 1: ...PERFECT BINDER DB 200 OPERATION MANUAL Duplo USA Corp June 2000 LED Rev 1 3...
Страница 2: ......