usiNg YOur
PAINTPOD
seTTiNg uP
a
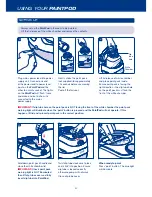
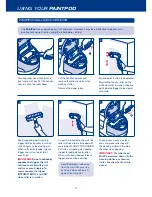
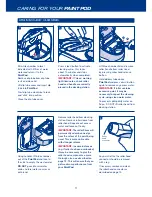
Plug mains power lead into power
supply unit. Connect one end
of the power lead to power lead
input on the
PaintPod and the
other to a mains socket. The lights
on the
PaintPod will ‘flash’ twice
and make a noise to show it is
connected to the mains
power supply.
Always set up the
PaintPod in the room to be painted.
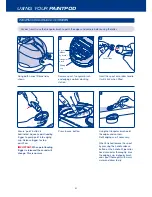
Lift the lid release of the white chamber and remove the contents.
Gently shake the paint pack
(not supplied) for approximately
10 seconds before unscrewing
the lid.
Peel off the foil seal.
Lift lid release of white chamber
and place paint pack inside.
Ensure paint pack is facing the
right direction – the dip tube hole
on the paint pack must face the
front of the white chamber.
IMPORTANT:
If dip tube hole on the paint pack is NOT facing the front of the white chamber the paint pack
warning light will illuminate when the ‘paint’ button is pressed and the
PaintPod
will not operate. If this
happens, lift lid and re-insert paint pack in the correct position.
d
e
f
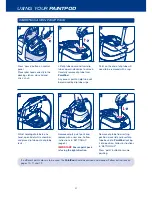
Fold down paint pack handle and
close the white chamber lid.
IMPORTANT:
Check paint pack
warning light is NOT illuminated
then lift dip tube cover and fully
insert dip tube into
PaintPod.
Twist dip tube clockwise to lock
and ‘click’ into position. Ensure
dip tube is locked correctly
otherwise pump will not work
Close dip tube cover.
for wall and ceilings
IM
PO
RTA
NT INFORMAT
ION
PLEASE READ
THEN REMOVE BEFORE
INSERTING PACK
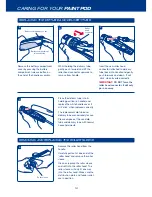
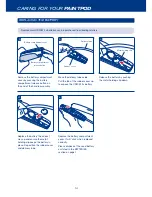
PAINTPOD emulsion pask MUST be
placed into the PaintPod rooler system
with the drip tube hole facing
the front of the unit
b
c
for wall and ceilings
emulsion
White
Chamber
Dip
tube
hole
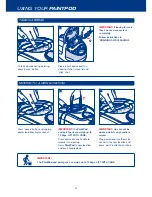
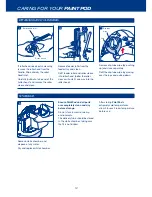
When ready to paint
Press ‘paint’ button. The blue light
will illuminate.
for wall and ceilings
splatter free
ultra smooth finish
5


