


7
DYNertia3 Quick Start (Inertia- Chassis type)
‘Linking’ Hardware to PC
Do not run other programs when using DYNertia3, background processes could interfere.
1.
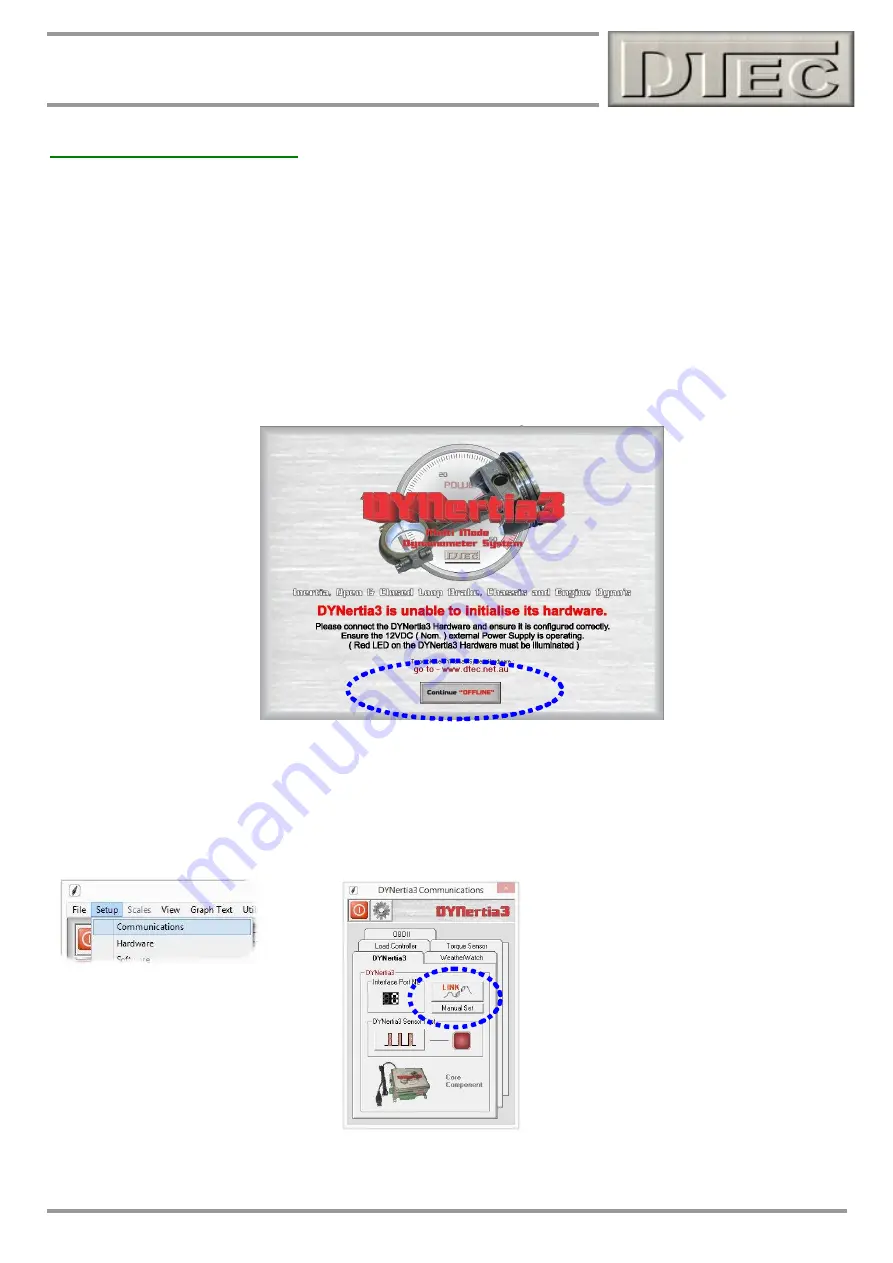
When you first run DYNertia3 you will be shown this Window. Press the
“Continue
OFFLINE
” button, this is
necessary as DYNertia3 software does not yet know what PC communication port your control units are connected
to, it must be first ‘Linked’.
Once ‘Linked’ DYNertia3 will automatically find the hardware in future when it is connected, powered and the software is
started. If you plug DYNertia hardware into another USB port you may need to re-link.
This Window will also appear whenever DYNertia3 is started and the control units are not connected, powered or
‘Linked’. Pressing the “Continue OFFLINE” button allows you to continue to use DYNertia3 software to view and analyse
dat
a ‘off-line’ (i.e. with no hardware connected to the PC).
2.
Plug the USB lead in, start DYNertia3 software, select the menu optio
n “Setup” and then choose
“Communication”
and
then press the “LINK” button to DYNertia3 to automatically configure the port interface. Then repeat for
‘Weather Watch’ if connected.
With the USB connected to DYNertia the status LED (next to the sensor connector) will blink twice at first to indicate
microprocessor is initialising. After this the LED will illuminate to indicate power.


