background image

7

A R M I N G  A N D  D I S A R M I N G

3.5

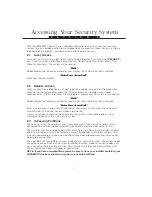
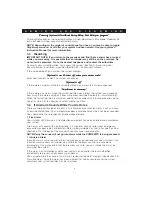
Alarm Memory

Your system will record any alarms that occurred while the system/partition was armed. If an
alarm occurred while the system/partition was armed, upon disarming it the following
message will be announced:

“There are (number) alarms in memory: {Zone XX}.”

“There are (number) alarms in memory: {Zone XX}.”

“There are (number) alarms in memory: {Zone XX}.”

“There are (number) alarms in memory: {Zone XX}.”

“There are (number) alarms in memory: {Zone XX}.”

To hear again the zones that went into alarm, press [

]. The system will prompt:

“For Alarm Memory, press [3].”

“For Alarm Memory, press [3].”

“For Alarm Memory, press [3].”

“For Alarm Memory, press [3].”

“For Alarm Memory, press [3].”

Press [3], and the system will indicate the zones in Alarm Memory:

“There are (number) alarms in memory, {Zone XX}.

“There are (number) alarms in memory, {Zone XX}.

“There are (number) alarms in memory, {Zone XX}.

“There are (number) alarms in memory, {Zone XX}.

“There are (number) alarms in memory, {Zone XX}.

To exit, press [#].”

To exit, press [#].”

To exit, press [#].”

To exit, press [#].”

To exit, press [#].”

When finished reviewing the zones in alarm memory, press [#] to return to the other system
status messages.

3.6

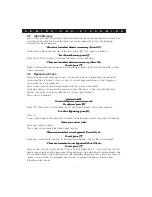
Bypassing Zones

Zones may be bypassed when access is required to part of a protected area while the
system/partition is armed. Once a system is armed, bypassed zones will not trigger an
alarm when they are breached.

You can only set a zone to be bypassed while the system is disarmed.

To bypass zones, first access the security system (Section 2—Accessing Your Security
System) and select a partition (Section 2.3—Accessing Partitions).

The system will prompt:

“{System} is OFF.

“{System} is OFF.

“{System} is OFF.

“{System} is OFF.

“{System} is OFF.

To turn ON, enter your access code.

To turn ON, enter your access code.

To turn ON, enter your access code.

To turn ON, enter your access code.

To turn ON, enter your access code.

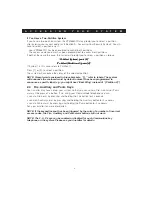
 For options, press [

 For options, press [

 For options, press [

 For options, press [

 For options, press [

].”

].”

].”

].”

].”

Press [

]. The system will announce the list of System Options. The system prompts:

“For Zone Bypassing, press [1].”

“For Zone Bypassing, press [1].”

“For Zone Bypassing, press [1].”

“For Zone Bypassing, press [1].”

“For Zone Bypassing, press [1].”

Press [1].

If your system requires that you enter an access code to bypass zones, the system will prompt:

“Enter your access code.”

“Enter your access code.”

“Enter your access code.”

“Enter your access code.”

“Enter your access code.”

Enter your [access code].

The system will announce the Zone Bypass menu:

“There are (number) zones bypassed: {Zone XX}, etc...

“There are (number) zones bypassed: {Zone XX}, etc...

“There are (number) zones bypassed: {Zone XX}, etc...

“There are (number) zones bypassed: {Zone XX}, etc...

“There are (number) zones bypassed: {Zone XX}, etc...

To exit, press [#].”

To exit, press [#].”

To exit, press [#].”

To exit, press [#].”

To exit, press [#].”

To bypass a zone, enter the one- or two-digit zone number. The system will announce:

“ There are (number) zones bypassed: {Zone XX}, etc..

“ There are (number) zones bypassed: {Zone XX}, etc..

“ There are (number) zones bypassed: {Zone XX}, etc..

“ There are (number) zones bypassed: {Zone XX}, etc..

“ There are (number) zones bypassed: {Zone XX}, etc..

To exit, press [#].”

To exit, press [#].”

To exit, press [#].”

To exit, press [#].”

To exit, press [#].”

You can now arm the system/partition at any time (see Section  3.1—Away Arming) and the
zone(s) you selected will be bypassed. Zone bypasses are automatically removed each time
the system/partition is disarmed and must be reapplied before the next arming. For security
reasons, your installer may program your system to prevent the bypass function from
affecting certain zones.

Содержание Communique VPM5580TC

Страница 1: ...on Manual Version 2 0 W A R N I N G Thismanualcontains informationonlimitationsregardingproductuseandfunctionandinformation on the limitations as to liability of the manufacturer The entire manual should be carefully read ...

Страница 2: ...hich follow The smoke detectors may have been improperly installed or positioned Smoke may not be able to reach the smoke detectors such as when the fire is in a chimney walls or roofs or on the other side of closed doors Smoke detectors may not detect smoke from fires on another level of the residence or building Every fire is different in the amount of smoke produced and the rate of burning Smok...

Страница 3: ...e Conditions 8 Setting VPM5580TC Options 9 5 1 Setting The Time and Date 9 5 2 Volume Control 9 5 3 Speech Rate Control 9 5 4 Door Chime Feature 10 Home Automation 11 6 1 Accessing the Home Automation Menu 11 6 2 How to Use the Item Control Menu 12 6 3 Mode Control 12 6 4 Global Item Control 13 6 5 Output Control Feature 13 6 6 Temperature Control 14 6 7 Accessing Temperature Control from an LCD55...

Страница 4: ...ts that your installer may have changed are written in brace brackets as shown here To Select Partition 2 press 2 To Select Partition 2 press 2 To Select Partition 2 press 2 To Select Partition 2 press 2 To Select Partition 2 press 2 When instructed to press a key or keys to perform an operation symbols for the keys will be enclosed in square brackets as shown here Enter 1 1 About Your Security Sy...

Страница 5: ...gular keypad is an important part of your security system It is used to send commands to the system and to display system information Even though a telephone and the VPM5580TC can be used to operate your system the telephone will not automatically display or indicate system status or zones in alarm Therefore it is essential that a regular keypad be placed in a location that is accessible to all us...

Страница 6: ... announce Enter Your Access Code Enter Your Access Code Enter Your Access Code Enter Your Access Code Enter Your Access Code Enter a valid access code within 20 seconds or the system will hang up The system will also hang up if 3 incorrect Access Codes are entered Once a valid access code has been entered the system will announce one or more messages to advise of the status of the system 2 3 Acces...

Страница 7: ...atus of the selected partition NOTE Prompt words enclosed in brace brackets refer to labels The system will announce the enclosed word by default unless it has been programmed to announce a specific label e g you might hear East Wing instead of Partition 2 2 4 Fire Auxiliary and Panic Keys Your installer may have set up your system so that you can send a Fire Auxiliary or Panic alarm at the press ...

Страница 8: ... Secure before turning ON Secure before turning ON Secure before turning ON Secure before turning ON Secure before turning ON When the Secure before turning on message is heard ensure that any breached zones on the system partition are secure e g by closing any open doors that the system partition monitors before trying to arm the partition NOTE Depending on the model of control panel you have you...

Страница 9: ...ces No alarms in memory No alarms in memory No alarms in memory No alarms in memory No alarms in memory If there were any alarms when the system partition was armed the system can announce how many there were and which zones were breached see Section 3 5 Alarm Memory When the system partition is disarmed additional messages may be announced to advise you of its status or to allow you to select ano...

Страница 10: ...tem is OFF System is OFF To turn ON enter your access code To turn ON enter your access code To turn ON enter your access code To turn ON enter your access code To turn ON enter your access code For options press For options press For options press For options press For options press Press The system will announce the list of System Options The system prompts For Zone Bypassing press 1 For Zone By...

Страница 11: ...r the system is on If this does not correct the problem call for service Phone line trouble Phone line trouble Phone line trouble Phone line trouble Phone line trouble Your system has detected a problem with the telephone line If this problem does not correct itself or happens frequently call for service Communication trouble Communication trouble Communication trouble Communication trouble Commun...

Страница 12: ...ge volume press 1 Volume is high To change volume press 1 Volume is high To change volume press 1 Volume is high To change volume press 1 Press 1 to toggle through the volume levels until the desired volume is selected Press to return to the Special Functions menu 5 3 Speech Rate Control The speech rate of the system messages prompts can be controlled with this feature With the system disarmed Sec...

Страница 13: ...arming depending on the control panel you have your system may allow you to enable the Door Chime feature without first disarming the partition Access the security system Section 2 Accessing Your Security System and select a partition Section 2 3 Accessing Partitions Press You will hear the prompt For Door Chime control press 4 For Door Chime control press 4 For Door Chime control press 4 For Door...

Страница 14: ...ed to follow one or more schedules The schedules are programmed by your installer see Section 6 6 Thermostat Control To have schedules programmed or modified contact your installer 6 1 Accessing the Home Automation Menu Local Access To access Home Automation functions from a Communiqué telephone set press the AUTOMATION key If you are using a telephone connected to a Communiqué DAI station press 7...

Страница 15: ...ature allows you to increase or decrease the brightness of an item usually a light NOTE This feature will only be enabled on items capable of dimming Items which have this feature enabled will have extra options in the Item Control menu Only items with the Dimming feature enabled will have these options If such an item is selected in the Item Control menu the system will announce the menu above wi...

Страница 16: ...ems ON press 1 To turn Global Items ON press 1 To turn Global Items OFF press 2 To turn Global Items OFF press 2 To turn Global Items OFF press 2 To turn Global Items OFF press 2 To turn Global Items OFF press 2 To exit press To exit press To exit press To exit press To exit press 6 5 Output Control Feature The Output Control feature allows you to activate a programmable output on the main alarm c...

Страница 17: ...ostat Modes Off Cool Heat or Automatic If the thermostat has been connected by your installer to a cooling device e g central air conditioning system you can select the Cool Mode to maintain temperature below a certain level with the cooling device If the thermostat has been connected to a heating device e g furnace system you can select the Heat Mode to maintain temperature above a certain level ...

Страница 18: ...ress 4 For Fan Control press 4 For Fan Control press 4 For Fan Control press 4 Accesses the Fan Control menu For the next thermostat press 5 For the next thermostat press 5 For the next thermostat press 5 For the next thermostat press 5 For the next thermostat press 5 Advances to the next thermostat For the previous thermostat press 6 For the previous thermostat press 6 For the previous thermostat...

Страница 19: ...When the desired thermostat is displayed press 5 You can now select any of five options Set Temperature Occupancy Setting Thermostat Mode Fan Control Keypad View The first four options allow you to change the settings on the currently selected thermostat in a similar manner to the VPM5580TC menus described in section 6 6 Use the Keypad View option to determine which thermostat s indoor outdoor tem...

Страница 20: ...ill begin to flash slowly and the display will read Feature Key is Undefined To program the feature key press the flashing Station key again The display will read Name PGM DONE _ Enter the name of the feature key using the dialpad and press the PGM key when you have finished The display will now prompt you to enter the automation keycode that you wish to have the feature key perform The Hold Music...

Страница 21: ...display will return to the Sel Automation Security Feature Key prompt where another feature key may be selected To exit system programming press the Handsfree key Function Key Programming Security feature keys can also be programmed as function keys such as Stay Arm Quick Exit etc To program a feature key as a function key enter F press the HOLD MUSIC key followed by the function key code and then...

Страница 22: ...For User Option Programming press 9 Users X Y and Z are programmed Users X Y and Z are programmed Users X Y and Z are programmed Users X Y and Z are programmed Users X Y and Z are programmed To exit press To exit press To exit press To exit press To exit press NOTE Your system may or may not prompt you with the User Option Programming prompt Please consult your security system s User s Manual for ...

Страница 23: ...rior door Consider the following when making your escape plans Make sure that doors and windows that open to the outside are easily opened Ensure that they are not painted shut and that their locking mechanisms operate smoothly If opening an exit or using an exit is too difficult for children the elderly or handicapped plans for rescue should be developed This includes making sure that those who a...

Страница 24: ...ncy Settings Day Occupancy Setting Night Occupancy Setting Auxiliary Occupancy Setting Away Occupancy Setting These occupancy settings allow you to easily change the temperature range for the area controlled by the thermostat Depending on which Thermostat Mode is turned on the thermostat will use either heating or cooling devices to maintain the temperature within the range programmed for the occu...

Страница 25: ...utilisé par ce dispositif La terminaison du circuit bouclé peut être constituée de n importe quelle combinaison de dispositifs pourvu que la somme des indices de charge de l ensemble des dispositifs ne dépasse pas 100 ACREN 1 4B DCREN 1 2 NOTICE The Industry Canada label identifies certified equipment This certification means that the equipment meets certain telecommunications network protective o...

Страница 26: ...er of attempts will be limited to a replacement of the product as the exclusive rem edy for breach of warranty Under no circumstances shall Digital Se curity Controls Ltd be liable for any special incidental or conse quential damages based upon breach of warranty breach of contract negligence strict liability or any other legal theory Such damages include but are not limited to loss of profits los...

Страница 27: ...LEPHONE CONNECTION REQUIREMENTS Except for the telephone company provided ringers all connections to the telephone network shall be made through standard plugs and telephone company provided jacks or equivalent in such a manner as to allow for easy immediate disconnection of the terminal equipment Standard jacks shall be so arranged that if the plug connected there is withdrawn no interference to ...

Страница 28: ... 1999 Digital Security Controls Ltd Printed in Canada 29004457 R002 ...

Отзывы: