background image


This document and the information contained herein, is the exclusive property of Drivecon and represents a non-public, confidential and proprietary trade secret that may not be 

reproduced, disclosed to third parties, altered or otherwise employed in any manner whatsoever without the express written consent of Drivecon. 

Copyright © (2015) Drivecon. All rights reserved.


(4) 


CHAPTER 1: CUSTOMER INFORMATION 

THANK YOU FOR PURCHASING A DRIVECON PRODUCT 
 

READ  ALL  INSTRUCTIONS  AND  WARNINGS  CAREFULLY  BEFORE  MOUNTING,  INSTALLING,  AND 
CONFIGURING THE PRODUCTS. 
 
These instructions are published by Drivecon without any guarantee. The instructions may be removed or revised by 
Drivecon at any time and without further notice. Corrections and additions will be added to the latest version of the 
instruction. 
 
IMPORTANT! These instructions contain a separate chapter directed towards end users. The chapter can be printed 
and handed to end users. The instructions that contain  information  on  the installation and  configuration  of the radio 
remote control unit on  the machine are not intended  to be passed  on to the end user. Only such information may be 
passed on to the end user that is needed to operate the machine correctly  by  radio remote control. 
 

 Drivecon 

 9505 72

nd

 Ave. Suite 100 

 Pleasant Prairie, WI 53158 


END USER WARNINGS & RESTRICTIONS 


NOTE!  We recommend  that the functionality  of the STOP  button  is  being  tested  at a  regular basis:  At a  minimum, 
when used for 200 hours. Test the STOP button by pressing it and pulling it out. 

INSTALLING, CONNECTING, AND MOUNTING 

  Allow only licensed or qualified personnel to install the product. 

  Switch the power supply off to the receiver before connecting the equipment. 

  Check that you have connected the power supply to the correct connection terminal. 

  To utilize the safety of the system, use the stop relays in the safety circuitry of the object that you want to 

control. 

  Use undamaged cables. No cables should hang loose. 

  Avoid installing in areas affected by strong vibrations. 

  Place the receiver well away from wind, damp, and water. 

  Cable glands and vent plugs must face down to prevent water from seeping in. 

THE USER 

  Make sure that the user is following the instructions. 

  Make sure that the user has reached the certified age of your country to operate the equipment. 

  Make sure that the user is not under the influence of drugs, alcohol and medicines. 

  Allow only qualified personnel to have access to the transmitter and operate the equipment. 

  Make sure that the user does not leave the transmitter unsupervised. 

  Make sure that the user always turns the transmitter off when not in use. 

  Make sure that the user keeps a good overview of the work area. 

Содержание 53223843

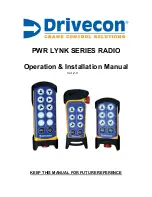
Страница 1: ...PWR LYNK SERIES RADIO Operation Installation Manual KEEP THIS MANUAL FOR FUTURE REFERENCE Ver 2 0...

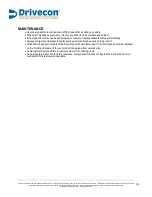
Страница 2: ...rivecon and represents a non public confidential and proprietary trade secret that may not be reproduced disclosed to third parties altered or otherwise employed in any manner whatsoever without the e...

Страница 3: ...R LAYOUT 12 TECHNICAL DATA 13 PWRLynk TX8R TRANSMITTER 14 TRANSMITTER LAYOUT 14 TECHNICAL DATA 15 PWRLynk TX12 TRANSMITTER 16 TRANSMITTER LAYOUT 16 TECHNICAL DATA 17 CHAPTER 3 USERS GUIDE 18 START THE...

Страница 4: ...chine correctly by radio remote control Drivecon 9505 72 nd Ave Suite 100 Pleasant Prairie WI 53158 END USER WARNINGS RESTRICTIONS NOTE We recommend that the functionality of the STOP button is being...

Страница 5: ...as often as possible When error messages areshown itis very importantto find outwhatcaused them Ifthestopbuttonismechanicallydamaged contactyourrepresentativeforserviceimmediately Alwayscontactyourrep...

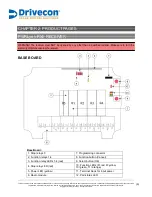
Страница 6: ...econ All rights reserved 6 CHAPTER 2 PRODUCT PAGES PWRLynk RXII RECEIVER WARNING The receiver must NOT be opened by any other than a qualified installer Make sure to turn the electricity off before op...

Страница 7: ...t that may not be reproduced disclosed to third parties altered or otherwise employed in any manner whatsoever without the express written consent of Drivecon Copyright 2015 Drivecon All rights reserv...

Страница 8: ...in any manner whatsoever without the express written consent of Drivecon Copyright 2015 Drivecon All rights reserved 8 TECHNICAL DATA PWRLynk RXII RECEIVER Part No 53223848 Frequency 2 4 GHz 16 channe...

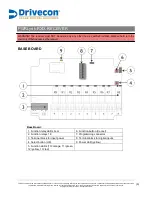
Страница 9: ...of Drivecon Copyright 2015 Drivecon All rights reserved 9 PWRLynk RXIX RECEIVER WARNING The receiver must NOT be opened by any other than a qualified installer Make sure to turn the electricity off be...

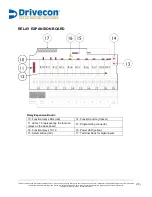
Страница 10: ...therwise employed in any manner whatsoever without the express written consent of Drivecon Copyright 2015 Drivecon All rights reserved 10 RELAY EXPANSION BOARD Relay Expansion Board 10 Function relay...

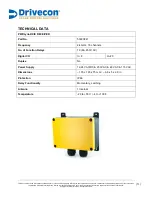
Страница 11: ...atsoever without the express written consent of Drivecon Copyright 2015 Drivecon All rights reserved 11 TECHNICAL DATA PWRLynk RXIX RECEIVER Part No 53223847 Frequency 2 4 GHz 16 channels No of Functi...

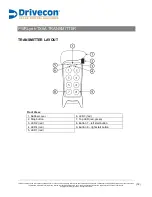
Страница 12: ...isclosed to third parties altered or otherwise employed in any manner whatsoever without the express written consent of Drivecon Copyright 2015 Drivecon All rights reserved 12 PWRLynk TX8A TRANSMITTER...

Страница 13: ...sent of Drivecon Copyright 2015 Drivecon All rights reserved 13 TECHNICAL DATA PWRLynk TX8A Part No 53223843 Frequency 2 4 GHz 16 channels Mod Type FM Modulation narrow band Code Comb 16 777 216 Radio...

Страница 14: ...manner whatsoever without the express written consent of Drivecon Copyright 2015 Drivecon All rights reserved 14 PWRLynk TX8R TRANSMITTER TRANSMITTER LAYOUT Front View Back View 1 Rubber cover 1 Rubbe...

Страница 15: ...f Drivecon Copyright 2015 Drivecon All rights reserved 15 TECHNICAL DATA PWRLynk TX8R Part No 53223845 Frequency 2 4 GHz 16 channels Mod Type FM Modulation narrow band Code Comb 4 000 000 000 Radio Ty...

Страница 16: ...without the express written consent of Drivecon Copyright 2015 Drivecon All rights reserved 16 PWRLynk TX12 TRANSMITTER TRANSMITTER LAYOUT Front View Back View 1 Rubber cover 13 Button 7 1 Rubber cov...

Страница 17: ...con Copyright 2015 Drivecon All rights reserved 17 TECHNICAL DATA PWRLynk TX12 Part No 53223846 Frequency 2 4 GHz 16 channels Mod Type FM Modulation narrow band Code Comb 4 000 000 000 Radio Type Low...

Страница 18: ...same time for at least 1 second LEDs 3 4 light red 4 Release the start buttons LEDs 3 4 go out The top LED flashes green REGISTER THE TRANSMITTER IN THE RECEIVER 1 Make sure that the stop button is pr...

Страница 19: ...EDs light red 3 All relay LEDs go out Release the Select button All transmitters are erased from the receiver Note If function LED on the receiver flashes red one or several transmitters are still reg...

Страница 20: ...de is invalid the transmitter turns off If the code is accepted the top LED flashes green The transmitter LEDs 1 4 red starts to flash 6 WITHIN 1 MINUTE FROM ENTERING THE CODE Press button 3 The top L...

Страница 21: ...e code 1 2 3 4 press the buttons 1 2 3 4 The transmitter LEDs 1 4 red light up If the code is invalid the transmitter turns off If the code is accepted the top LED flashes green The transmitter LEDs 1...

Страница 22: ...buttons 1 2 3 4 The transmitter LEDs 1 4 red light up If the code is invalid the transmitter turns off If the code is accepted the top LED flashes green The transmitter LEDs 1 4 red starts to flash 6...

Страница 23: ...at the stop button is pressed 2 Press button 8 Keep pressed 3 Twist and pull out the stop button 4 Release button 8 Top LED flashes green 5 WITHIN 1 MINUTE FROM PULLING OUT THE STOP BUTTON Enter the c...

Страница 24: ...y manner whatsoever without the express written consent of Drivecon Copyright 2015 Drivecon All rights reserved 24 CHAPTER 4 BATTERY AND MAINTENANCE GUIDE REMOVING THE RUBBER COVER The transmitter com...

Страница 25: ...lid by unscrewing the 2 screws with a screwdriver 2 Switch the 3 x 1 5V AA batteries Use alkaline batteries for optimal performance 3 Put the transmitter battery lid back on using the screwdriver Bat...

Страница 26: ...ED flashes red If the transmitter has an external battery you can also remove the battery and charge it in the SV DC charging unit 3 When fully charged the top LED lights green 4 Remove the charger pl...

Страница 27: ...erials that pose an environmental health or safety risk FCC STATEMENT Statement for warning The user is cautioned that changes or modifications not expressly approved by the party responsible for comp...

Страница 28: ...ic confidential and proprietary trade secret that may not be reproduced disclosed to third parties altered or otherwise employed in any manner whatsoever without the express written consent of Driveco...

Страница 29: ...represents a non public confidential and proprietary trade secret that may not be reproduced disclosed to third parties altered or otherwise employed in any manner whatsoever without the express writt...

Страница 30: ...esents a non public confidential and proprietary trade secret that may not be reproduced disclosed to third parties altered or otherwise employed in any manner whatsoever without the express written c...

Страница 31: ...esents a non public confidential and proprietary trade secret that may not be reproduced disclosed to third parties altered or otherwise employed in any manner whatsoever without the express written c...

Страница 32: ...prietary trade secret that may not be reproduced disclosed to third parties altered or otherwise employed in any manner whatsoever without the express written consent of Drivecon Copyright 2015 Drivec...

Отзывы: