background image

PROJECTION

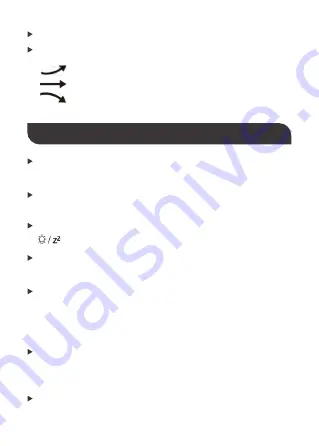
The Projection Clock can display the barometric pressure trends.
The Projection Clock can display the barometric pressure trend.

Once the projection switch is "ON", the projection will be 
activated.

When the projection switch is "OFF", the projection will be 
closed.

When the Projection Clock is plugged in, the projection will 
always stay lit.

The recommended projection distance is between 1 meters and 
3 meters. At night, the Projection Clock can project clear images 
(time and other contents) on walls or ceilings (make sure there is 
no interference from lamps).

The displayed contents include time and indoor/outdoor 
temperature. Indoor and outdoor temperature take turns 
displaying every 5 seconds.

Long press the "-" button for 3 seconds to flip projection for 180 
degrees.

The barometric pressure will rise.
The barometric pressure will remain constant.
The barometric pressure will decline.

When the Projection Clock is powered by batteries, press the "


          " button and the projection will stay lit for 15 seconds.

- 14 -

Содержание DPWS-OUT-001

Страница 1: ...PROJECTION CLOCK Manual Model DPWS OUT 001 01...

Страница 2: ...or The weather forecast function Colorful backlight function USB output port 5V 1A Power supply Indoor temperature measurement ranges 14 F 9 9 C 122 F 50 C Outdoor temperature measurement ranges 40 F...

Страница 3: ...d 4 F 20 C to 140 F 60 C and that for polymer lithium ion batteries is around 40 F 40 C to 158 F 70 C Please choose batteries based on the ambient environment A1 Weather forecast A2 Time A3 Week A4 In...

Страница 4: ...emperature The Projection Clock starts to connect the Remote Sensor which takes about 3 minutes A flashing RF antenna symbol will be displayed on the Projection Clock B1 button B2 MODE button B3 MEM b...

Страница 5: ...WWVB signal reception manually press the and button at the same time If no signals are received within 7 minutes then the search for WWVB signal stops the radio mast icon disappears and restarts in th...

Страница 6: ...ms with concrete walls e g cellars offices etc In this condition please place your Projection Clock close to a window Short press the MODE button to check the calendar time of Alarm1 and time of Alarm...

Страница 7: ...to set a correct time zone 8 PST 07 MST 06 CST and 5 EST Press MODE button to confirm your setting and the DST icon starts to flash Now use and buttons to turn on off DST Press MODE button to confirm...

Страница 8: ...y from Setting Mode to Normal Time Mode The time zone must be set correctly according to your location Otherwise the time will be incorrect when time signals are received If the daylight saving time s...

Страница 9: ...your setting and the Minute icon of the Alarm 2 starts to flash Use the and buttons to set the desired minute Press MEM button to confirm your setting and to end the setting procedures After 20 secon...

Страница 10: ...ojection Clock can display the outdoor temperature and trends The volume of sound crescendo duration 2 minutes will be increased for 4 times to make sure the alarm can be heard The first snooze alarm...

Страница 11: ...ssion manually During the reception there will be an animation of the RF antenna symbol on the Projection Clock You may refer to the following icons NOTE When a Wireless Sensor is connected with the P...

Страница 12: ...rement range the HH H will be displayed instead To switch between indoor outdoor maximum minimum tempera ture data press the MEM button Once to display the indoor outdoor maximum temperature readings...

Страница 13: ...st service as well as the forecast from your Projection Clock into account If there are discrepancies between the results from your device and that of the local weather forecast service please follow...

Страница 14: ...and 3 meters At night the Projection Clock can project clear images time and other contents on walls or ceilings make sure there is no interference from lamps The displayed contents include time and i...

Страница 15: ...des 4 options 3 different brightness levels and turning off the backlight Users can adjust brightness according to the personal preferences or turn off the backlight When the Projection Clock is plugg...

Страница 16: ...l be automatically turned off to prevent the interference with the reception procedures The 8 backlight colors include white red orange yellow green cyan blue and purple NOTE USB OUTPUT PORT Inludes a...

Страница 17: ...WWW drprepare COM...

Отзывы: