20
english
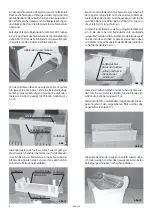
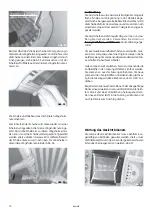
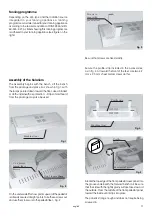
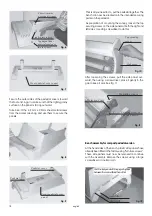
In preparation for the assembly of the canopy, first push
the fitted side panels outward slightly at the upper end.
Insert a screwdriver or similar tool into the gap to hold the
side panels in this position, see Fig. 19.
Mouthlike groove
Protection Plate
Attachment screw for
protection plate
Fig. 19
Do not remove
this screw
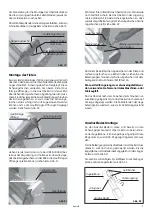
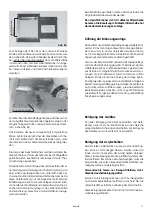
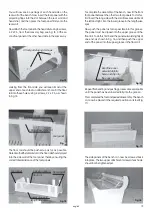
With the aid of a second person, now lift the canopy out of
the packaging, and hold it above the bench so that both
bearing bushes with the groove can slide into the mouth-
shaped opening, see Fig. 21.
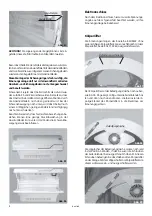
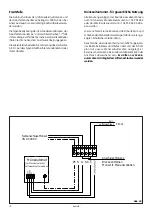
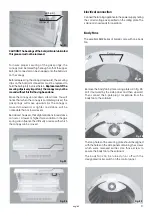
Ball-joint
connector
Gas Spring
Safety washer
Ball-joint
connector
Installation-
groove
Fig. 23
Cotter pin-holes
Gas Pressure Spring Installation
Safety rings have been clipped into the upper end of
the gas pressure springs (which are already firmly
mounted on the safety bracket) - on the ball socket.
These rings must be removed as schown in Fig. 23
In order to fasten the gas pressure springs on the top,
the top must be lifted upward as far as possible until
the ball socket on the gas pressure spring is directly
aligned with the ball pin.
Applying moderate to strong pressure, press the ball
socket onto the ball pin.
NOTE!
The ball-joint connectors have been
lubricated at the factory with a special grease, which
may not be removed.
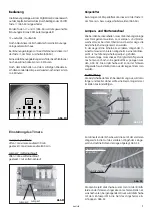
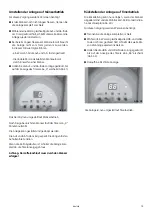
Fig. 22
Screw in solidly
Rotating housing
Protection
plate
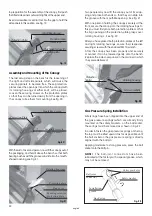
After the canopy has been properly and securely
mounted, it can be lowered gently onto the bench.
Replace the side cover panels in the manner in which
they were delivered.
Two people may now lift the canopy out of its wrap-
ping and place both ends so that they can slide into
the groove with the mouthlike opening. See fig. 21.
With one person holding the canopy securely at the
front, secure the canopy into the rotating housings. To
this you must first place both protection-plates so that
the big opening on the protection-plate grasps over
rotating housings. See fig. 22.
After you have placed both protection-plates at the left
and right rotating housings, secure their respective
securing screws with the enclosed SW 10 wrench.
Securing screw for
protection plate
Protection plate
Side cover
Rotating housings
Fig.21
Assembly and Mounting of the Canopy
The last setup step on the bench is the loosening of
the right and left side panels, which will cause the
securing panels to become free. These protection-
plates cover the openings into which the canopy (with
its rotating housings at either end), will be placed.
Loosen the securing screws on the protection plates
so that they can be turned away from the opening in
the canopy to free them for mounting. See fig. 20.
Mouthlike groove
Protection Plate
Securing screw to
Canopy Chassis
Fig.20
Содержание excellent 24/1
Страница 28: ...28 Notizen notes...

