background image

………………………………………………………………

.

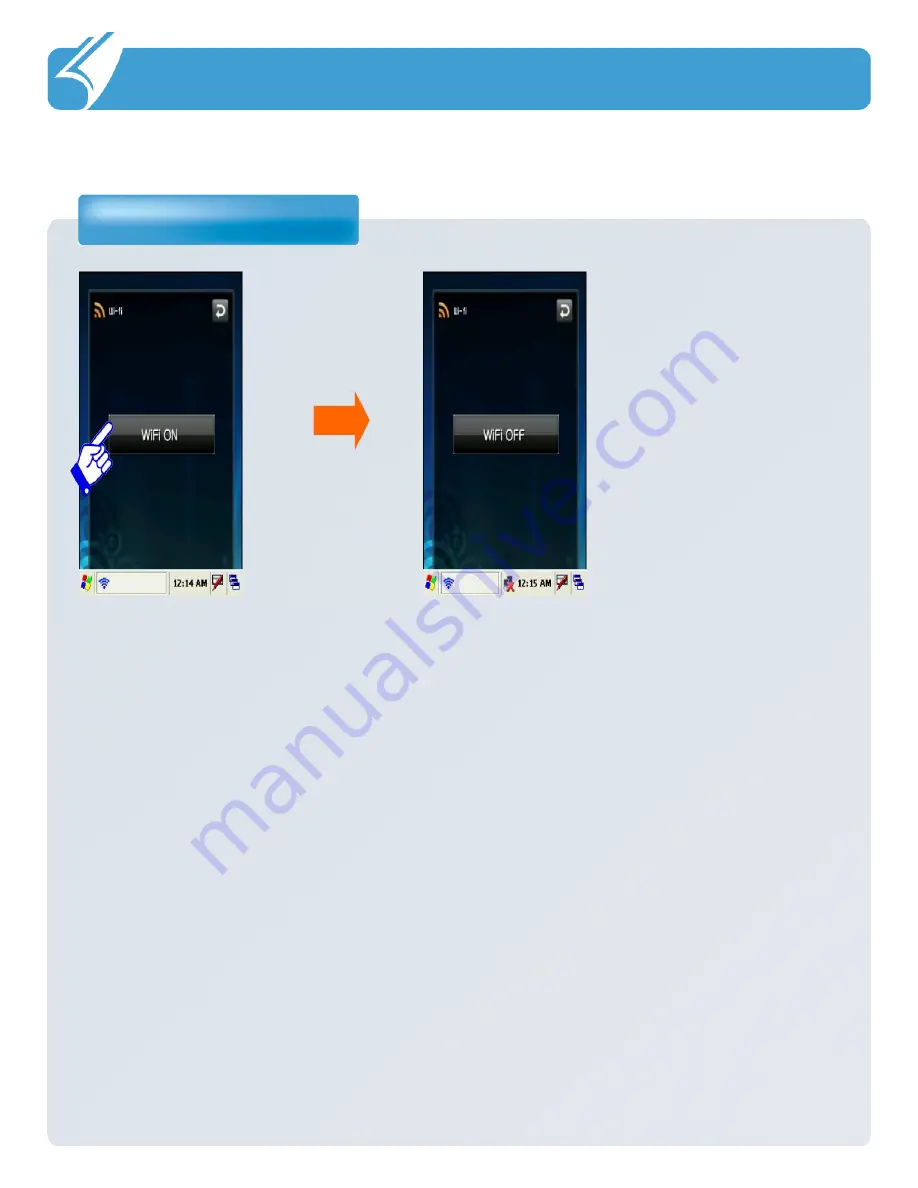
3.1 Wireless LAN

Wireless Manager

3. Functions

It can be controlled by
pressing on or off as 
shown in the figure above
after selecting ‘Start’


->

‘Program’


-> ‘WiFi’


from

the tool bar at the bottom
of Windows wallpaper.

WLAN on/off state is 
maintained even after
the system is rebooted.

Содержание DOTH-500

Страница 1: ...al or editorial errors or omissions 3 The screen and shape of the product in this manual may differ from that of the actual product 4 All the content of this manual is protected by Copyright Law 5 All...

Страница 2: ...hould specify contact information required to make inquiries or ask for technical support on the product manual or on the packaging or enclose a separate manual with contact information 5 DOTel Co Ltd...

Страница 3: ...n Layout and Physical Features 2 3 Connection to a PC 3 Additional Functions 3 1 Wireless LAN 3 2 Bluetooth 4 Problem Solving and Warranty 4 1 Problem Solving 4 2 Contacting Customer Support 4 3 Produ...

Страница 4: ...ime may hurt your eyesight We recommend you to back up important data in this product often The seller and manufacturer do not take any responsibility for data loss even during service or repair of th...

Страница 5: ...change or product damage Store in a cool dry place In following cases warranty service will not be provided and repairs may be impossible If the product has been disassembled or remodeled by the user...

Страница 6: ...the product especially if those paints or stickers contain metal ingredients It may cause buttons not to operate or reception problems Do not use any power adaptor with this product except the one pro...

Страница 7: ...ponents 2 Before using Notice Notice The specification and components of this product may change According to the situation of the manufacturer Device Micro USB Cable Cradle Touch Film Stylus Pen Two...

Страница 8: ...h used to mount or remove the battery Battery Standard capacity battery Power key Switching the product on off by pressing and holding this key Reset key Used to the product to reboot Battery Charge i...

Страница 9: ...Function Function Key1 Function Key2 Function Key3 To turn on off the product pressing and holding the power key for three seconds To turn on off the LCD while the device is on pressing the power key...

Страница 10: ...ery Charging time About 3 hours Standby time About 500 hours Notice Notice The Charging time is calculated based on using the proper charging cradle Charge talk and standby time may depending on user...

Страница 11: ...t 3 Check the disk capacity which can be used for installation and change the installation location by pressing Change or press Next if you want to install it in the default Location 4 In order to con...

Страница 12: ...cute Installation by pressing install 5 Installation of ActiveSync will be performed It may take several minutes depending on the environment of the user PC 6 Once installation of ActiveSync has been...

Страница 13: ...er a device is connected and press Next 9 10 Generic USB Serial is found Select Install at listed or specific location and press Next Press Next after finding the driver file by pressing Browse 11 12...

Страница 14: ...connect with a PC To install Active Sync 2 Before Using 14 Once the installation of the driver has been completed Press Finish 15 Installation of ActiveSync has been completed and synchronization wil...

Страница 15: ...Functions It can be controlled by pressing on or off as shown in the figure above after selecting Start Program WiFi from the tool bar at the bottom of Windows wallpaper WLAN on off state is maintain...

Страница 16: ...g Bluetooth On button When Bluetooth function is not being used the function should be turned off by pressing Bluetooth Off button In order to extend the battery life Place the Bluetooth device within...

Страница 17: ...ection is successfully achieved If a failure window pops up the steps should be taken again from the step 1 in order Caution Please refer to the manual of the Bluetooth device to be connected with thi...

Страница 18: ...inform that the connection is made and connection status will be displayed in the status blank of the list In case connection has not been made start from the step 1 again In order to disconnect the d...

Страница 19: ...to delete a device once connected press Delete button after selecting the item to be deleted A device currently connected cannot be deleted Delete the list after disconnecting the device Reference Eve...

Страница 20: ...aker 1 Check if the volume of the product is not set at 0 Screen is dark 1 Enter into Setup and adjust the lighting Problem solving 1 Check followings first when a problem occurs while using the produ...

Страница 21: ...ugh the case 2 If the product is used for a long period of time or the adapter is connected for long you may feel warmth from the case please use the product at ease as there is no problem with the pr...

Страница 22: ...1 Be sure to check the content of Problem solving in the previous pages before asking for repair 2 Do not forget to backup important data contained in the product in advance Data may be deleted during...

Страница 23: ...h as fire earthquake or flood or d if the product has been repaired by persons other than the designated service staff of DOTel Co Ltd or in a non designated service location Individual matters not sp...

Страница 24: ...failure has occurred more than 3times due to same defect Free repair Repair at a cost When failure has occurred more than 4times due to same defect Replace Repair at a cost Not repair able If repair i...

Страница 25: ...Classification Content WLAN Frequency used 802 11b g 2412 2462 MHz Modulation BPSK QPSK CCK 16 QAM 64 QAM Bluetooth Frequency used 2402 2480 MHz Modulation GFSK...

Страница 26: ...Warranty Classification Content C P U ARM 11 800MHz O S Windows CE5 0 R A M 128MB R O M 256MB DISPLAY TFT LCD MODULE 5 01INCH 262K COLOR with Touch screen panel INTERFACE USB 2 0 Micro USB BATTERY St...

Отзывы: