background image

Technical Information

- 39 -

2.2.33. Air cleaner

Air cleaner is mounted on the engine to purify the air for combustion.

The intervals at which the air cleaner requires servicing depend on the specific operating conditions 

encountered. Clogged air filters may cause black smoke and reduce power.

A check should be made from time to time to see that the fastening elements securing the air cleaner 

to the intake manifold seal the connection tightly. Any ingress of unfiltered air is liable to cause a high 

rate of cylinder and piston wear.

2.2.34. Electrical equipment

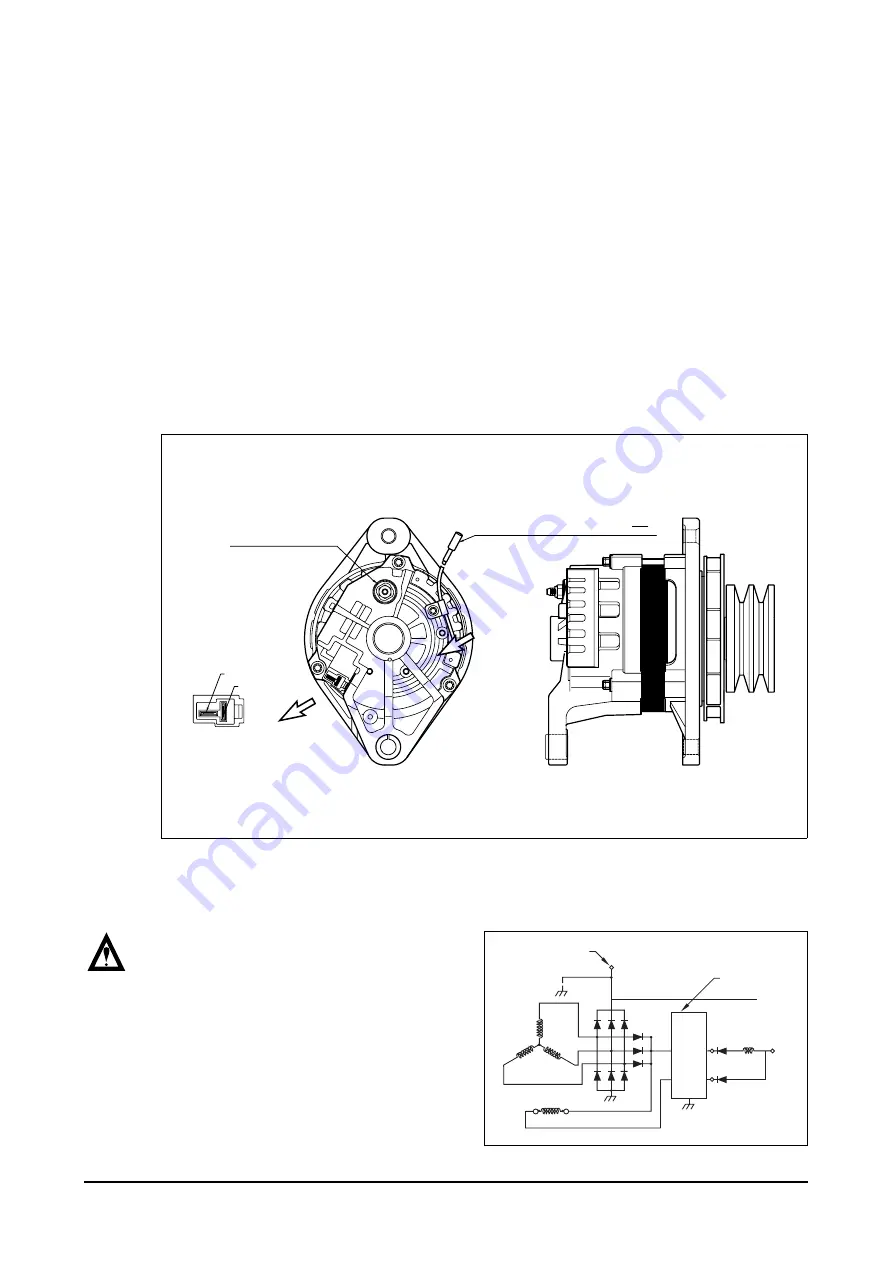
1) Alternator

The alternator is fitted with integral silicon rectifiers. A transistorized regulator mounted on the

alternator body interior limits the alternator voltage. The alternator should not be operated except

with the regulator and battery connected in circuit to avoid damage to the rectifier and regulator.

The alternator is maintenance-free, nevertheless, it must be protected against dust and, above all,

against moisture and water.

Operate the alternator according to
the instructions given in the chapter
“Commissioning and operation”.

EA8O3006

P-TAB : KET GP 890545
TACHOMETER CHARGE INDICATOR
ALDO SYSTEM FREQUENCY = 

M6  x  1.0 THREAD
BATTERY TERMINAL

RPM

10

"L"  Terminal

"R"  Terminal

CONNECTOR  HOUSING
      KET MG  620042
TERMINAL
      KET ST  740254

To B

EA8O3007

Regulator

RL = 150~250 OHM

Содержание P158LE -III

Страница 1: ...Operation Maintenance Manual GENERATOR DIESEL ENGINE P158LE 1 2 S III P180LE 1 S II P222LE 1 S II POWER UNIT DIESEL ENGINE PU158TI PU180TI PU222TI 65 99897 8076C ...

Страница 2: ...aintenance should be observed Readers are desired to know for your reference that those kinds of maintenance matters are explained here in detail by means of figures and diagrams In this manual the following symbols are used to indicate the type of service operations to be performed Removal Adjustment Installation Cleaning Disassembly Pay close attention Important Reassembly Tighten to specified t...

Страница 3: ... 3 2 Inspection 62 3 3 Engine Reassembly 81 3 4 Breaking In 98 4 Commissioning and Operation 4 1 Preparations 99 4 2 Starting 99 4 3 Running in 100 4 4 During operation 100 4 5 Shutting down 100 4 6 Maintenance and Care 101 5 Maintenance of Major Components 5 1 Fuel Injection System 105 5 2 Cooling System 126 5 3 Lubricating System 129 5 4 Turbo Charger 131 5 5 Installation 140 5 6 Air Cleaner 143...

Страница 4: ...on z Before putting the engine into operation for the first time read the operating instructions carefully and familiarize yourself with the critical points If you are unsure ask your DHI representative z For reasons of safety we recommend you attach a notice to the door of the engine room prohibiting the access of unauthorized persons and that you draw the attention of the operating personal to t...

Страница 5: ...t can cause injury z Fuel is inflammable Do not smoke or use naked lights in its vicinity The tank must be filled only when the engine is switched off z When using compressed air e g for cleaning the radiator wear goggles z Keep service products anti freeze only in containers which can not be confused with drinks containers z Comply with the manufacturer s instructions when handling batteries CAUT...

Страница 6: ...g on the dipstick Do not exceed the maximum permissible tilt of the engine Serious damage to the engine may result if these instructions are not adhered to z Always ensure that the testing and monitoring equipment for battery charge oil pressure coolant temperature function satisfactorily z Comply with instructions for operation of the alternator See Commissioning and operation z Do not let the ra...

Страница 7: ... chance of cable damage and burning due to short circuiting 2 Use covers for preventing the components from damage or pollution 3 Engine oil and anti freeze solution must be handled with reasonable care as they cause paint damage 4 The use of proper tools and special tools where specified is important to efficient and reliable service operation 5 Use genuine DOOSAN parts necessarily 6 Used cotter ...

Страница 8: ...P158LE S III 961 P180LE 1 1 175 P180LE S II 1 188 P222LE 1 1 575 P222LE S II 1 591 Fuel injection order 1 5 7 2 6 3 4 8 1 6 5 10 2 7 3 8 4 9 1 12 5 8 3 10 6 7 2 11 4 9 Injection pump type Bosch in line P type Governor type Electrical type Injection nozzle type Multi hole type Fuel injection pressure kg cm2 285 Compression pressure kg cm2 28 at 200 rpm Intake and exhaust valve clearance at cold mm ...

Страница 9: ... 7 2 6 3 4 8 1 6 5 10 2 7 3 8 4 9 1 12 5 8 3 10 6 7 2 11 4 9 Injection pump type Bosch in line P type Governor type Mechanical type Injection nozzle type Multi hole type Fuel injection pressure kg cm2 285 Compression pressure kg cm2 28 at 200 rpm Intake and exhaust valve clearance at cold mm 0 3 0 4 Intake valve Open at 24 B T D C Close at 36 A B D C Exhaust valve Open at 63 B B D C Close at 27 A ...

Страница 10: ... P180LE 1 EASOB QB 50 HZ 1 500 rpm 16 548 PS 403 kW 601 PS 442 kW 60 HZ 1 800 rpm 16 617 PS 454 kW 677 PS 498 kW P180LE EASOA QA 50 HZ 1 500 rpm 16 602 PS 443 kW 674 PS 496 kW 60 HZ 1 800 rpm 16 676 PS 497 kW 734 PS 540 kW P180LE EASOC 60 HZ 1 800 rpm 18 695 PS 511 kW 764 PS 562 kW P180LE S EASOE F QE 50 HZ 1 500 rpm 16 615 PS 452 kW 674 PS 496 kW 60 HZ 1 800 rpm 16 705 PS 519 kW 771 PS 567 kW P18...

Страница 11: ...ance ISO 3046 DIN 6270B Output max 397 kW 540 PS 2 100 rpm Torque max 2 117 N m 216 kg m 1 500 rpm 100 125 150 175 200 225 250 Torque kg m Engine Speed rpm 100 150 200 250 300 350 400 450 500 550 600 Power PS EH5OM001 900 1 000 1 000 1 200 1 300 1 400 1 500 1 600 1 700 1 800 1 900 2 000 2 100 2 200 ...

Страница 12: ...IN 6270B Output max 478 kW 650 PS 2 100 rpm Torque max 2 303 N m 235 kg m 1 500 rpm 125 150 175 200 225 250 275 Torque kg m Engine Speed rpm 200 250 300 350 400 450 500 550 600 650 700 Power PS EH5OM002 900 1 000 1 000 1 200 1 300 1 400 1 500 1 600 1 700 1 800 1 900 2 000 2 100 2 200 ...

Страница 13: ...270B Output max 588 kW 800 PS 2 100 rpm Torque max 3 205 N m 327 kg m 1 500 rpm 200 225 250 275 300 325 350 Torque kg m 900 1 000 1 000 1 200 1 300 1 400 1 500 1 600 1 700 1 800 1 900 2 000 2 100 2 200 Engine Speed rpm 250 400 350 300 450 500 550 600 650 700 750 800 850 Power PS EH5OM003 ...

Страница 14: ...n damper 2 Combustion camper 12 Oil spray nozzle 3 Valve 13 Oil pan 4 Tappet 14 Oil suction pipe 5 Cam shaft 15 Oil pump relief valve 6 Turbocharger 16 Flywheel housing 7 Piston pin 17 Flywheel 8 Thermostat 18 Oil seal 9 Cooling fan 19 Crank shaft 10 Crank shaft pulley 9 8 7 1 2 3 4 5 6 12 13 14 15 16 17 18 19 11 10 EA6O1004 ...

Страница 15: ...ross 1 Cylinder head 8 Cylinder block 2 Cylinder head cover 9 Oil filter 3 Push rod 10 Oil cooler 4 Injection pump 11 Connecting rod 5 Intake manifold 12 Exhaust manifold 6 Injection pipe 13 Cylinder liner 7 Oil filler cap 14 Starter 1 2 8 9 10 12 13 14 11 3 4 5 6 7 EA6O1005 ...

Страница 16: ...urbocharger to inter cooler 3 Air pipe 10 Idle pulley Intercooler to intake manifold 11 Injection pump 4 Fuel filter 12 Fly wheel housing 5 Breather 13 Cylinder head 6 Turbo charger 14 Oil filter 7 Air pipe 15 Cylinder head cover Air cleaner to turbocharger 16 Oil filler cap 8 Mounting bracket 1 2 3 4 5 6 7 8 9 10 15 14 13 12 11 16 EH5OM004 ...

Страница 17: ...cooler 3 Air pipe 10 Starter Intercooler to intake manifold 11 Idle pulley 4 Fuel filter 12 Injection pump 5 Breather 13 Fly wheel housing 6 Turbo charger 14 Cylinder head 7 Air pipe 15 Oil filter Air cleaner to turbocharger 16 Oil filler cap 8 Mounting bracket 17 Cylinder head cover 1 2 3 4 5 6 7 8 9 10 15 14 13 12 11 16 17 EH5OM005 ...

Страница 18: ...er to inter cooler 3 Air pipe 10 Idle pulley Intercooler to intake manifold 11 Injection pump 4 Fuel filter 12 Fly wheel housing 5 Breather 13 Cylinder head 6 Turbo charger 14 Oil filter 7 Air pipe 15 Oil filler cap Air cleaner to turbocharger 16 Cylinder head cover 8 Starter 1 2 3 4 5 6 7 8 9 10 15 14 13 12 11 16 EH5OM006 ...

Страница 19: ...12 Oil cooler 19 Fuel filter 4 Turbocharger 13 Alternator 20 Air pipe 5 Oil drain valve 14 Exhaust elbow Turbocharger to inter cooler 6 Oil pan 15 Air pipe 21 Idle pulley 7 Starter Air cleaner to turbocharger 22 Engine mounting bracket 8 Flywheel housing 16 Oil filter 23 Water pump 9 Exhaust manifold 17 Cooling water outlet EA6O1001 15 1 14 9 10 18 17 23 16 22 12 11 16 13 19 16 20 22 21 2 3 4 ...

Страница 20: ...il cooler 19 Fuel filter 4 Turbocharger 13 Alternator 20 Air pipe 5 Oil drain valve 14 Exhaust elbow Turbocharger to inter cooler 6 Oil pan 15 Air pipe 21 Idle pulley 7 Starter Air cleaner to turbocharger 22 Engine mounting bracket 8 Flywheel housing 16 Oil filter 23 Water pump 9 Exhaust manifold 17 Cooling water outlet 1 2 3 5 9 10 11 12 16 13 18 17 19 20 21 22 23 16 22 6 7 8 4 15 14 16 EA6O1002 ...

Страница 21: ...Oil cooler 19 Fuel filter 4 Turbocharger 13 Alternator 20 Air pipe 5 Oil drain valve 14 Exhaust elbow Turbocharger to inter cooler 6 Oil pan 15 Air pipe 21 Idle pulley 7 Starter Air cleaner to turbocharger 22 Engine mounting bracket 8 Flywheel housing 16 Oil filter 23 Water pump 9 Exhaust manifold 17 Cooling water outlet 22 21 1 2 3 5 6 7 8 9 10 18 17 19 20 11 12 13 23 16 22 4 15 16 14 EA6O1003 ...

Страница 22: ...ring parts They are also referred to as engine model and serial number because of their location z Engine serial No example 1 P158LE EAZOA 8 00001 Serial No Production Year 2008 Engine Model Suffix z Engine serial No example 2 P180LE EASOA 8 00001 Serial No Production Year 2008 Engine Model Suffix z Engine serial No example 3 P222LE EAYOA 8 00001 Serial No Production Year 2008 Engine Model Suffix ...

Страница 23: ... V type liquid cooled 8 10 12 cylinder four stroke Diesel engines with direct injection 2 2 1 Oil gallery cooling type piston z Oil gallery cooling is used for the piston of the engine z When thermal loading is high piston cooling by means of an oil gallery in the crown is normally necessary to prevent crown cracking and ring sticking The design of the gallery the design and location of the oil sp...

Страница 24: ...n crankshaft and flywheel are provided to seal the crankcase penetrations z The connecting rods are die forged diagonally split and can be removed through the top of the cylinders together with the pistons Crankshaft and connecting rods run in steel backed lead bronze ready to fit type bearings 2 2 4 Engine timing z Camshaft oil pump and injection pump are driven by a gear train arranged at the fl...

Страница 25: ... end bearings and camshaft bearings as well as to the small end bearings and the rocker arms 1 Oil suction pipes 10 Ports for big end bearing lubrication 2 Oil pumps 11 Small end bearing lubrication 3 Oil relief valves 12 Camshaft bearing lubrication 4 Oil cooler 13 Rocker arm lubrication 5 Oil filter 14 Spray nozzle 6 Bypass valve 15 Injection pump lubrication 7 Main oil galleries 16 Oil drain pl...

Страница 26: ...n the agreed extent of delivery and the design of the engine the lube oil circuit can be equipped with oil pressure monitors advance warning and cut off function which shut the engine down in the event of a sudden loss of pressure 1 Oil cooler An oil cooler is provided between the oil filter and the crankcase This cooler is of the flat tube type with turbulence inserts and operated by the coolant ...

Страница 27: ...in screw fit injections in the cylinder heads Excessive fuel delivered and leak fuel from the injectors flow through the return pipe back to the tank 1 Fuel tank 5 Fuel pipe connector 2 Strainer 6 Injection pump 3 Fuel Filter 7 Injector 4 Fuel filter assembly 8 Fuel pressure relief valve 4a Fuel water drain plug 9 Fuel return pipe 4b Air bleeding plug for fuel filter 10 Fuel feed pump 4 5 4b 4a 7 ...

Страница 28: ...emperature to prevent clogging of fuel fitters by crystals General Fuel Classification ASTM Test No 1 ASTM 1 D No 2 ASTM 2 D DIN 51601 Gravity API D 287 40 44 33 37 0 815 0 855 Flash Point Min F C D 93 100 38 125 52 131 55 Viscosity Kinematic cST 100 F 40 C D 445 1 3 2 4 1 9 4 1 1 8 10 Cloud Point F D 2500 See NOTE 1 See NOTE 1 See NOTE 1 Sulfur Content wt Max D 129 0 5 0 5 0 15 Carbon Residue on ...

Страница 29: ... empty e g when fitting a new pump filling and bleeding it is by actuating the manual primer z Fuel lift pump The fuel lift pump is operated by the injection pump camshaft via the roller tappet z Strainer After every 200 hours of operation the fuel strainer connected upstream of the fuel lift pump should be cleaned 2 2 10 Fuel filter z After every 1 200 hour of operation drain the water and sedime...

Страница 30: ... as specified by the filter manufacturer NOTE Mechanical over tightening of the filter can distort the thread or damage the filter element seal 2 2 12 Injector maintenance The injectors are designed to spray the fuel delivered by the injection pump directly into the spherical combustion chamber in the piston crown The injector consists of the nozzle and the nozzle holder A copper gasket fitted to ...

Страница 31: ...referably by chucking the needle in a lathe at the pintle end z Clean the spray holes of nozzles by chucking a cleaning needle of suitable diameter in the collect If the carbon deposits in the spray holes cannot be removed by rotating and pressing have the needle project only slightly from the collect and drive out the carbon by lightly tapping on the tool z Before reassembly thoroughly wash nozzl...

Страница 32: ...ures not only the failed part but also the injection line has to be replaced 2 2 15 Fan belt z Use a fan belt of specified dimensions and replace if damaged frayed or deteriorated z Check the fan belt for belt tension If belt tension is lower than the specified limit adjust the tension by relocating the alternator and idle pulley specified deflection 10 15 mm when pressed down with thumb 2 2 16 En...

Страница 33: ...shaft draws in fresh air and delivers it at a higher pressure to the cylinders The turbo charger is air cooled Lubrication of the main bearing is by oil under Pressure from the engine lubricating system 1 Compressor casing A Air inlet 2 Turbine casing B Gas outlet 3 Compressor wheel C Gas inlet 4 Impeller D Oil supply 5 Turbine E Oil return C 5 3 2 B E 4 1 A D EA6O3004 ...

Страница 34: ...ke air filter element are worn or polluted Cleaning of intercooler fins Every 600 hours 2 2 19 Cooling system The engine has a liquid cooling system The water pump is a maintenance free impeller pump driven by V belts from the crankshaft pulley Depending on the agreed extent of delivery and the design of the engine the coolant circuit can be equipped with temperature monitors which in the event of...

Страница 35: ...nt must be added at the filler neck only Do not put cold coolant into an engine which is warm from operation If no hot water 80 C is available add normal warm water very slowly as the engine runs until the coolant level is correct Ensure that the ratio of water to antifreeze is correct Find the cause of the loss of coolant and have it eliminated WARNING If the cap with the working valves is opened...

Страница 36: ...r z Regarding the cooling water that is to be used for engine the soft water not the hard water must be used z The engine cooling water can be used diluting it with antifreezing solution 40 and the additive for rust prevention DCA4 3 5 z The density of above solution and additive must be inspected every 500 hours to maintain it properly NOTE The proper density control of antifreezing solution and ...

Страница 37: ... paper NOTE However it should not elapse longer than 75 sec and if it did the hue would change 4 Make the numerical value by comparing the test paper which hue has changed with the color list of label on storage bottle 5 By comparing the hue changed into yellowish green or so with the green color indication of test paper storage bottle confirm the density Then the density indication must be in the...

Страница 38: ...eplace it z By the definite interval the elements must be cleaned and replaced 2 2 25 Valve clearance adjust procedure z After letting the 1 cylinder s piston come at the compression top dead center by turning the crankshaft adjust the valve clearances z Loosen the lock nuts of rocker arm adjusting screws and push the feeler gauge of specified value between a rocker arm and a valve stem and adjust...

Страница 39: ...g valves on cylinder Intake Exhaust valve 6 3 4 8 1 5 7 2 Valve overlapping on cylinder Intake Exhaust valve 1 6 5 10 2 7 3 8 4 9 Adjusting valves on cylinder Intake Exhaust valve 7 3 8 4 9 1 6 5 10 2 Valve overlapping on cylinder Intake Exhaust valve 1 12 5 8 3 10 6 7 2 11 4 9 Adjusting valves on cylinder Intake Exhaust valve 6 7 2 11 4 9 1 12 5 8 3 10 7 8 9 10 11 12 1 2 3 4 5 6 12 11 10 9 8 7 6 ...

Страница 40: ... gauge there Condition Water temperature 20 C Engine rotation 200 rpm 2 2 27 Injection nozzle z Install a nozzle on the nozzle tester z If the inspected injection pressure is less than the specified value 285 kg cm2 adjust using the adjusting shims z Check the atomizing state and replace it if abnormal Standard value 28 kg cm2 over Limit value 24 kg cm2 Difference between each cylinder Within 10 E...

Страница 41: ...air by operating the manual pump of fuel supply pump until bubble will disappear 2 2 31 Fuel supply pump Every time of engine oil replacement the fuel strainer installed at the fuel supply pump should be removed and cleaned 2 2 32 Supercharger The supercharger needs not arty special equipment Every time of engine replacement a leakage or clogging of oil pipes should be inspected Air cleaner should...

Страница 42: ...or The alternator is fitted with integral silicon rectifiers A transistorized regulator mounted on the alternator body interior limits the alternator voltage The alternator should not be operated except with the regulator and battery connected in circuit to avoid damage to the rectifier and regulator The alternator is maintenance free nevertheless it must be protected against dust and above all ag...

Страница 43: ... should be applied again Always protect starter motor against moisture WARNING Always disconnect the battery earth cable before starting work on theelectrical system Connect up the earth cable last as there is of otherwise a rise of short circuits 2 2 35 Starting motor z In case of engine maintenance clean pinion and ring gear thoroughly putting in the fuel and coat them with grease Also In case o...

Страница 44: ... low Repair Replace Inspect of other parts Check valve clearance Normal Adjust Check cylinder head gasket Replace Normal Engine disassembly valve assembly piston cylinder liner etc Fuel Inspect amount of fuel None Replenish Inspect fuel injection No injection Continuous operation after air removal Inspect injection timing Inspect injection nozzle injection pressure injection state etc Repair Repla...

Страница 45: ...changer Repair Replace Repair Replace Repair Replace Repair Replace Replenish Replace Replace Damage Check cooling water pump Engine disassembly Fuel unit Inspect fuel quality Poor Clean and replace with specilied fuel Inspect cooling water leakage Exteranl Internal Retighten Replace Engine disassembly Operating state 1 Overload 2 Radiator core clogged 3 Continuous over run Fuel excessive supply C...

Страница 46: ...just Replace Check injection timing Adjustment Disassemble engine or injection pump Inspect injection pipe Check Turbocharger Repair Replace Disassemble injection pump or engine Others Inspect air cleaner Clean Relpace Inspect engine control rod link cable etc Adjust Adjust Inspect cylinder head gasket for damage Engine disassembly valve assembly Check valve clearance Installation improper Check f...

Страница 47: ...ount Normal Normal Normal Normal Check cooling temperature Inspect oil quality Check oil relief valve Retighten Replace Disassemble engine Too high Refer to engine overhea Water fuel mixed in oil Disassemble engine or injection pump Improper Replace with recommended oil Too low Use recommended oil replenish ...

Страница 48: ...ssed pressure Disassemble injection pump Inspect head gasket Disassemble engine valve assembly piston cylinder liner etc Adjust Replace Adjust Adjust Check valve clearance Replace Causes according to Use Conditions 1 Overload 2 Govemor s Arbitrary Adjustment 3 Full Speed Operation for Long time 4 Sudden Speed Change from Low to High Speed Oil leakage Retighten Replace Repair Replace Cylinder liner...

Страница 49: ...rnal Internal Retighten Replace Check compressed pressure Engine disassembly piston cylinder liner Disassemble cylinderhead valve stem seal Inspect air cleaner Clean Replace 7 Engine Knocking Inspect combustion of fuel oil carbon residue exhaust gas Unconfirmed Inspect compressed pressure Inspect injection pump Adjust Check fuel quality Use specified fuel Too low Check valve clearance and cylinder...

Страница 50: ...connections Repair Replace Generator Check fan belt tension damage Normal Normal Electrolytic liquid s standard Replenish Battery room damage Replace Battery self discharge Charging Battery over charging Inspect generator Voltage regulator Check charged stated Discharging Disassemble generator Voltage regulator Abnormal Adjust Replace ...

Страница 51: ...pump s function lowered Repair or replace z Fuel pipe system clogged Repair z Air suction amount insufficient Clean or replace air cleaner z Supercharger poor Repair or replace 2 Output insufficient when in acceleration z Compression pressure insufficient Disassemble engine z Injection timing incorrect Adjust z Fuel injection amount insufficient Adjust injection pump z Injection pump timer s funct...

Страница 52: ...rind crankshaft z Oil supply insufficiency as clogging at oil passage progresses Clean oil passage 3 Piston piston pin piston ring z Piston clearance increase as the wear of piston and piston ring progresses Replace piston piston ring z Wear of piston or piston pin Replace z Piston stuck Replace piston z Piston insertion poor Replace piston z Piston ring damaged Replace piston 4 Others z Wear of c...

Страница 53: ...sposition improper Correct position z Piston skirt part damaged or abnormal wear Replace piston z Oil ring s oil return hole clogged Replace piston ring z Oil ring s contact poor Replace piston ring 2 Oil level lowered z Looseness of valve stem guide Replace in set z Wear of valve stem seal Replace seal z Cylinder head gasket s leak Replace gasket 3 Oil leak z Looseness of connection parts Replace...

Страница 54: ...cartridge z 1st Intake Exhaust System Check the leakage for intercooler hoses clamp Clean and change the air cleaner element clean z Clean the inter cooler air fins Clean the turbo charger Every 2 000 hrs Fuel System Check the leakage fuel line Clean the fuel strainer of fuel feed pump Remove sediment from fuel tank Drain the water in separator Replace the fuel filter element z Check fuel Injectio...

Страница 55: ...sassembly must be kept not to collide each other z In disassembling torn parts should be laid in disassembled order 3 1 1 Oil level gauge z Take out the oil level gauge 3 1 2 Engine oil z Remove an oil drain cock from the oil pan and let engine oil discharge into the prepared vessel 3 1 3 Cooling water z Remove the cooling water drain plug from the cylinder block and oil cooler various pipes etc a...

Страница 56: ...xing bolts for crankshaft pulley in reverse order of assembling and disassemble the crankshaft pulley and vibration damper 3 1 8 Oil filter assembly z Disassemble the oil filter cartridge with filter wrench by means of a filter wrench z Do not use again the cartridge removed after use z Remove the oil filter head fixing bolts and disassemble the filter head EA6O6014 EFM2004I EFM2005I EFM2006I ...

Страница 57: ...ing water pump 3 1 10 Starting motor z Remove the starting motor fixing nuts and disassemble the starting motor 3 1 11 Fuel filter z Disassemble the fuel hose for the fuel supply and suction z Remove the fuel filter fixing bolts and disassemble the filter 3 1 12 Injection pipe z Disassemble various fuel pipe and hose z Disassemble the injection pipe from the nozzle holder and fuel injection pump E...

Страница 58: ...s and disassemble the oil cooler housing from the cylinder block 3 1 14 Turbo charger z Loosen the hose clamp for connecting the intake stake and tear down the air intake stake z Loosen the clamp for connecting the air intake manifold z Remove the hollow screws of pipes for turbocharger lubrication and its discharge and tear the pipes down z Remove the turbocharger fixing nuts and separate the tur...

Страница 59: ... down 3 1 16 Exhaust manifold z Remove the exhaust manifold fixing bolts and tear the manifold from the cylinder head 3 1 17 Intake manifold z Remove the manifold fixing bolts and tear the manifold down from the cylinder head 3 1 18 Flywheel housing cover z Separate the side cover z Disassemble the flywheel housing cover EA6M2001 EPM2012I EPM2013I EFM2018I ...

Страница 60: ...e fuel Injection pump 3 1 20 Cylinder head cover z Remove the fixing bolts and tear the cylinder head cover down 3 1 21 Nozzle holder z By means of a special tool loosen the nozzle holder assembly and take it out 3 1 22 Rocker arm z Remove the rocker arm bracket fixing bolts and take the rocker arm assembly out z Pull out the push rod EFM2019I EFM2020I EFM2021I EFM2022I ...

Страница 61: ...he cylinder head face and cylinder block face NOTE Be careful not to damage the cylinder head face where its gasket contacts 3 1 24 Oil pan z Remove the oil pan fixing bolts and separate the pan z Remove the oil pan gasket and scrap it 3 1 25 Oil pump z Remove the oil suction pipe fixing bolts and tear them down z Remove the oil relief valve fixing bolts and take them out z Remove the oil pump fix...

Страница 62: ...on remove the piston NOTE Be careful for the removed pistons not to collide each other or with the other parts At the storage of pistons maintain them in the order of cylinders In order for connecting rod caps not to mix one another temporarily assemble them to the corresponding connecting rods 3 1 27 Front oil seal holder z Remove the oil seal holder fixing bolts and tear down z Remove the oil se...

Страница 63: ... oil seal from the flywheel housing 3 1 30 Crankshaft z Remove the bolts from bearing caps z Remove the main bearing cap fixing bolts in the order of assembling Remove them in the same way of the cylinder head bolts z Maintain the removed bearing caps in the order of cylinders z Temporarily install the bolts at the both side of crankshaft and lift the shaft with a rope NOTE Do not mingle with the ...

Страница 64: ...e the camshaft being careful not to damage the camshaft and its bearings 3 1 32 Oil spray nozzle z Remove the oil injection nozzle fixing bolts and tear down the oil injection nozzles 3 1 33 Cylinder liner z By means of a special tool Extractor pull out the liner from the cylinder block EFM2059I EFM2030I ...

Страница 65: ...ks or air leaks Hydraulic test Stop up each outlet port of water and oil passages in the cylinder block apply air pressure of about 5 kg cm2 against the inlet ports then immerse the cylinder block in water for about 1 minute to check any leaks Water temperature 70 C 3 2 2 Cylinder liner measurement z Assemble the cylinder liner at the cylinder block and measure inner diameter at upper middle lower...

Страница 66: ...he cotter pin pressing the valve spring by means of a special tool z Take out the valve stem seal z Pull out the intake and exhaust valves z Remove the valve guides from the combustion room side of cylinder head by means of a special tool 2 Inspection and measurement of cylinder head a Inspection of cracks and damage z Eliminate the carbon residue and gasket piece from the cylinder head lower face...

Страница 67: ...imit replace the cylinder head Lower face warp and height 3 Inspection and measurement of valve and valve guide a Valve z After cleaning the valves with clean diesel oil measure the valve stem s outside diameter at upper middle and lower to determine the wears and when the wear limit is more than 0 15mm replace the valves Warpage Standard Limit 0 05 mm or less 0 2 mm Thickness t reference 113 9 11...

Страница 68: ...e guide has already been replaced measure the center with valve seat if it deviates or not and if abnormal it must be corrected Simultaneously be processed when in guide reamer process c Valve seat z Inspect the damage and wear of valve seat and if necessary replace z Valve seat thickness and angle Assemble the valves at the cylinder head and using the measuring instrument from the lower face meas...

Страница 69: ...dry ices for about 1 hour or so and then press it into the cylinder head by means of a special tool z After coating the grinding powder paste on valve head contacting face of valve seat and after executing a sufficient lapping operation with the rotating and grinding motion of valve wipe off the grinding agent thoroughly Standard Limit 0 65 0 95 mm 2 5 mm Intake Valve 30 Exhaust Valve 45 10 20 30 ...

Страница 70: ... the valve guides of cylinder head with a special tool Be careful for the valve stem seals not to be damaged z Install the valve spring washer to valve guide z After putting on the inside outside spring install the valve spring seat on them NOTE Install the valve spring seat with TOP painted in yellow side up z Pressing the spring down with a special tool assemble by inserting the valve cotter z A...

Страница 71: ... of rocker arm bracket with outside micrometer at the position that the rocker arm is installed and in case that it exceeds the limit value replace b Rocker arm z Inspect the rocker arm surface that contacts with the valve stem for any scratch step wear and correct the minor degree of wear with an oil stone or the fine grinding paper and replace if they are severe Standard Limit BushInner Dia 25 0...

Страница 72: ...g paper but if severe replace them z Place the push rod on the surface plate and rolling it Inspect the curving degree with a clearance gauge and if abnormal replace it Run out d Rocker arm reassembling z Inspect the oil passages of rocker arm and rocker arm bracket for any clogs and reassemble them in the reverse order of disassembling after thorough cleaning Standard Limit Tappet clearance 0 035...

Страница 73: ...l check With inspecting the cam surface for any damage with naked eyes and correct any minor scratches by means of an oil stone grinding and if severe replace it z Cam lobe height Use a micrometer to measure the cam lobe height and journal diameter If the measured number is less than the specified limit the camshaft must replaced Limit 0 2 0 9 mm Items Standard Limit Cam lobe height C Intake 56 37...

Страница 74: ...e between camshaft journal and body z Camshaft bearing replacement Remover installer z Camshaft run out With placing the camshaft on the 2ea of V blocks and inspect the run out of the camshaft adjust or replace the severe one Standard Limit 70 077 70 061 mm 69 897 mm Standard Limit 0 060 0 120 mm 0 18 mm Standard 0 1 mm EA0M4063 Camshaft bearing Remover installer EA3M2039 EA0M4066 ...

Страница 75: ... crank pin at the direction and position of the figure shown and take the wear Crankshaft journal outside diameter Crankshaft pin outside diameter z In case that the lopsided wear is more than the limit value grind to the undersize and use the undersized bearing Kinds of bearings for undersize a Standard b 0 25 Inside diameter 0 25 mm less than standard c 0 50 Inside diameter 0 50 mm less than sta...

Страница 76: ...rankshaft rotating the crankshaft 2 Inspection on crankshaft bearing and connecting rod bearing Inspection z Inspect the crankshaft bearing and connecting rod bearing for any damages such as lopsided wear scratch etc and if abnormal replace it z Inspect the oil clearance between the crankshaft and bearing a How to utilize the cylinder gauge z Assemble the main bearing at the cylinder block and aft...

Страница 77: ...ion and then after tightening the bearing cap at the specified torque and again after tearing apart the bearing cap measure the flatten plastic gauge thickness by pick it up This is the oil clearance z With the same points the oil clearance of connecting rod also can be measured c End play z Assemble the crankshaft in the cylinder block z Install the dial gauge and measure the end play of cranksha...

Страница 78: ...iston for any wear crack and scratch and particularly inspect carefully at the ring grooves for any wear z With the outside micrometer measure the piston s outside diameter the measuring position is 71 5 mm from the piston lower end and the direction of measurement must be perpendicular to the piston pin direction z By comparing the measured value of the piston outside diameter with the cylinder l...

Страница 79: ...that is more severe 3 Piston ring and ring groove a Inspection z In case of piston ring s wear damage or engine overhaul replace piston rings b Gap clearance z Measure the piston ring cut part z Insert the piston ring at the cylinder liner s upper part perpendicularly z With a feeler gauge measure the gap clearance of piston ring z If the measured value exceeds the limit value replace it Piston ri...

Страница 80: ...pin s outside diameter and if the value is same as the use limit value or less replace it b Piston pin and connecting rod bush clearance z Inspect the clearance between the piston pin and the connecting rod bush if it is more than the use limit value replace either one that is more severe Division Specified value Limit value 2nd ring 0 050 0 082 mm 1 5 mm Oil ring 0 030 0 062 mm 1 5 mm Standard Li...

Страница 81: ...rod bigger hole and crank pin diameter using filler gauge z Assemble the connecting rod in the piston and then measure the clearance of these parts z If it is more than the use limit value replace the connecting rod 6 Piston reassembling z After heating the piston at the piston heater for about 5 min 120 150 C by aligning the piston pin hole with the pin hole of connecting rod s smaller end insert...

Страница 82: ... gauge into water and heating the water at the indirect method when the water temp reaches to 71 C the valve begin to open and fully open when it reaches to 85 C z Measure the valve opening temperature and the valve full opening temperature and inspect if the valve lift is more than 8 mm and if abnormal replace it 8 Injection nozzle z Set the nozzle assembly between the vise holder and disassemble...

Страница 83: ...ection pressure measuring tester z By manipulating the tester handle inspect the injection pressure and atomizing state Operating pressure z In case of low or high injection pressure adjust by adding or reducing the spring tension adjusting shims z In case that atomizing state is not good it should be replaced New nozzle holder 300 8 kg cm2 Used nozzle holder 285 8 kg cm2 EFM2056I EFM2057I ...

Страница 84: ...r looseness after preliminary re assembly z After completing the engine re assembly operation check if there is missing parts or shortage of parts z Keep your hands clean during the working 3 3 2 Cylinder block z Cover the floor of the workshop with wood plate or thick paper to prevent damage to the cylinder head and place the head face of the cylinder block towards downward 3 3 3 Cylinder liner z...

Страница 85: ...lock 3 3 6 Crankshaft z Put the wear ring into the heater to heat it up to 150 200 C level push it over the crankshaft by means of a jig z Assemble the main bearing to the cylinder block and coat it with engine oil Then assemble the bearing that has a hole to the cylinder block side and one that has no hole to the bearing cap and be careful not to change EFM2059I EAMD072S EA6M2009 Wear ring EFM206...

Страница 86: ... to the tightening order tighten them with 30 kg m and with rotating angle method 90 10 and tightening order is as follows Bearing cap bolt s Tightening Order 1 First step Coat the bolts with engine oil 2 Second step Screw down 1 2 threads 3 Third step Tighten with about 15 kg m by wrench 4 Fourth step Tighten with about 25 kg m by torque wrench 5 Fifth step Tighten with 30 kg m by torque wrench 6...

Страница 87: ... oil and assemble it carefully not to be deviated or damaged by means of special tool Mandrel for assembling z Attach the gasket on the surface of cylinder block where the flywheel housing is to be installed In order to prevent the gasket slip down coat a grease on the cylinder block surface z Temporarily assemble 2ea of guide bolts for installing the flywheel housing to the cylinder block z After...

Страница 88: ... heat expansion takes place then install it using a hammer z Do not allow the temperature of the ring gear to exceed 200 C 390 F z By means of mandrel press in the wear ring at the backward face z Install two guide bolts for installing the flywheel to the crankshaft z After letting the guide pin insert through the flywheel holes and engaging the fixing bolts by 2 3 threads temporarily tighten them...

Страница 89: ... fixing bolts 3 3 13 Piston z Line up the piston assembly in the order of cylinder number and fit the bearings to the connecting rods and bearing caps However take care not to swap between the connecting rods and bearing caps z Coat the pistons and connecting rod bearings sufficiently with clean engine oil z By means of a special tool insert the piston rings and adjust the angles between the ring ...

Страница 90: ...p Engage 2 3 threads by hands 3 Third step Tighten to about 7 kg m with wrench 4 Fourth step By means of torque wrench tighten to 10 kg m 5 Fifth step Finally assemble by means of rotation angle method 90 10 However according to above tightening order tighten them step by step Standard length of bolt and use limit from head seat to bolt tip z By moving the connecting rod bearing cap by hands make ...

Страница 91: ...n part with an urethane hammer When in assembling take care not to hurt the oil seal by the crankshaft NOTE Without coating the oil seal with oil or lubricant assemble it in the dry state z Tighten the fixing bolts in the zigzag method 3 3 15 Vibration damper z Assemble the vibration damper tightening firstly by the crankshaft pulley and the fixing bolts z Insert the crankshaft pulley assembly to ...

Страница 92: ...jecting at the junction parts of front oil seal holder and flywheel housing of cylinder block s lower face with a scraper In the process of gasket removal be careful for the gasket pieces not to get into the engine inside z Attach the gasket to the cylinder block z Install the oil pan and tighten the fixing bolts Then take care not to squeeze out the gasket z Install the guide tube and insert the ...

Страница 93: ... temporarily 1 2 threads by hands 3 Third step Tighten to about 8 kg m with a wrench 4 Fourth step Tighten to 15 kg m with a torque wrench 5 Fifth step Rotate 90 by rotation angle method Standard length of bolt and use limit from the head seat face to tip Take care for the foreign material not to get into the cylinder head suction passages 3 3 19 Nozzle z Put the new seal ring in nozzle hole of th...

Страница 94: ...rews using a spanner and push the filler gauge of specified value between rocker arm and valve stem z Tighten the adjusting screw using a driver until the inserted feeler gauge can be taken a slight resistance between the valve stem and the rocker arm Then tighten the lock nut simultaneously on not moving the adjusting screw z After checking the clearance once more if necessary re adjust it 3 3 22...

Страница 95: ... aligning the pointer on drive gear with injection pump pointer z Fit the injection pump in the appropriate position using a special tool Special tool no EF120 189 z After fixing the jig hole on the limit cap of the injection pump rotate the jig counterclockwise and align the jig pin to the machined corner of the cylinder block then assemble the injection pump z After completing the preparation fo...

Страница 96: ...lug screw assembled in case cover on the injection pump drive gear Some cases are needed to remove cover assembly And turn the crank pulley so that the mark on pointer provided on injection pump coincides with matching mark FB on the flange surface of the drive gear 2 Check the injection timing degree whether the V type edge of the flywheel housing sight hole coincides with the engine injection ti...

Страница 97: ...h the matching mark FB on the flange surface of the drive gear by turning the flange in the oblong holes of the drive gear 4 Tighten the bolt M8 to specified torque 2 2 kg m not to move the drive gear 5 After confirmation that fastening bolts are completely tightened check the start point injection timing degree of fuel delivery setting once more if not right repeat it again as same as upper way 3...

Страница 98: ...ts z Attach the gasket to the inlet flange and assemble by tightening the fixing bolts z Assemble both sides by the above method z Attach the gasket to the equalizing pipe that connects the intake manifolds of both sides and assemble both manifolds by tightening the fixing bolts 3 3 29 Exhaust manifold z Connect the exhaust manifold that is consists of two sets after inserting the exhaust gas ring...

Страница 99: ...mble the pipe with the fixing bolts z Attack a gasket on the oil discharge pipe and assemble the pipe by tightening the bolts z At the same method as above both sides are assembled 3 3 31 Intake stake z Connect rubber hoses between the intake stake and turbocharger and assemble by tightening clamps 3 3 32 Fuel injection pipe z Connect the fuel injection pipes to the fuel injection pump and the noz...

Страница 100: ...part of cylinder block by tightening the fixing bolts z Install the alternator supporting plate z Connect the crankshaft and the alternator and water pump pulleys with V belts by inserting them into the respective pulleys z Adjust the alternator support nut until the belt tension can be 10 mm 15 mm by pushing with thumb 3 3 35 Idle pulley z Install the idle pulley z Connect the water pump the cran...

Страница 101: ... range between the min and max marks on dipstick NOTE If you have a problem getting a good oil level reading on dipstick rotate dipstick 180 and re insert for check 2 Watch the oil pressure warning lamp If the lamp blinks it may be the oil pick up screen is not covered with oil Check oil dipstick Add oil to the oil pan if required Do not overfill If level is correct and the status still exists see...

Страница 102: ...en handling fuels lubricants and coolants z Use approved fuels lubricants and coolants only as otherwise the manufacturer s guarantee will be null and void 4 2 Starting z Insert key in starting lock z Moving control lever to Idle speed z Key switch rotate clockwise z Do not operate for longer than 10 seconds at a time z After ignition of the engine take off the hands in key switch z And adjust con...

Страница 103: ...e alternator observe the following instructions While the engine is running z Do not de energize the main battery switch z Do not disconnect the battery or pole terminals or the cables z If during operation the battery charge lamp suddenly lights up stop the engine immediately and remedy the fault in the electrical system z Do not short circuit the connections of the alternator with those of the r...

Страница 104: ... in damage to the engine z The oil level should be checked with the engine horizontal and only after it has been shut down for about 5 minutes 4 6 2 Oil drainage z With the engine at operating temperature remove the oil drain valve on the oil sump and the oil cartridge bowl and allow the old oil to drain off completely Use a vessel of sufficient size to ensure that the oil does not overflow Refit ...

Страница 105: ...on symbol on the container 4 6 3 Refilling with oil z Refill with fresh engine oil at the oil filler neck z After refilling with oil rotate the engine with the starter and move the shut down lever to stop at the same time until the oil pressure warning light goes out and the oil pressure gauge shows a pressure z Then start the engine and allow it to run at medium speed for a few minutes Check oil ...

Страница 106: ...oroughly clean all other parts in cleaning fluid Use new gaskets for re assembly 1 Oil filter Change over type 2 Element 3 Oil drain plug 4 Selector cock z During continuous operation the selector lever that both filter halves are in operation z Observe positions of selector level CAUTION Do not leave selector lever in any intermediate position because this would be liable to interfere with oil su...

Страница 107: ...ts remove filter bowls z Renew filter cartridges Thoroughly clean all other parts in cleaning fluid do not allow cleaning fluid to enter the oil circuit NOTE To prevent the seal from twisting hold the filter bowl firmly when tightening the tensioning screw z Every time an oil change is made the two oil filter cartridges should be renewed CAUTION Use oil filters are classed as dangerous waste and m...

Страница 108: ...SWP connector 1 Mg610320 11 Front cover 1 T3 2 13 Shaft 1 15 Return spring guide Ass y 1 16 Oil seal 1 SC 0283 E0 17 Allen screw 8 M5 0 8 L12 23 Manual stop device Ass y 1 30 Stop plate 1 T3 2 52 Return shaft Ass y 1 54 Stop level 1 62 Lead wire LG 16AWG 63 Corrugate tube Dia 10 L250 10 EC2OM316 48 5 1 909 68 2 677 89 3 504 102 4 016 36 1 417 63 2 480 85 0 197 102 4 016 28 1 102 36 1 417 154 5 6 0...

Страница 109: ...arting fuel speed ramping and two performance adjustments gain and stability All adjustments are accessible from the front cover The primary features of the DWC 2000 Series speed control unit are the engine STARTING FUEL and SPEED RAMPING adjustments The use of these features will minimize engine exhaust smoke experienced prior to attain engine operating speed The speed control unit also includes ...

Страница 110: ...ensitivity is increased with clockwise rotation of the gain adjustment The gain adjustment has a non linear range of 33 1 The stability adjustment when advanced clockwise increases the time rate of response of the governor system to match the various time constants of a wide variety of engines The speed control unit is a PID device the D derivative portion can be varied when required See Instabili...

Страница 111: ...ion resistant z Power input Supply 24 VDC battery system transient and reverse voltage protected Polarity negative ground case isolated Power consumption 50 mA continuous plus actuator current Maximum controllable actuator current at 25 C Inductive Load 10 A continuous Magnetic speed sensor signal 1 120 V RMS z Reliability Vibration 1G 20 100 Hz Testing 100 functionally tested z Physical Dimension...

Страница 112: ...eed ACTUATOR Magnetic Pick up BATTERY OPTIONAL ACTUATOR CABLE SHIELDING TO MEET CE DIRECTIVE ADD JUMPER FOR 12V BATTERY OR ACTUATOR CURRENTS ABOVE 5A AUX 10V POWER FUSE 15A MAX SPEED TRIM CONTROL 5K CLOSE FOR IDLE CLOSE FOR DROOP Run Crank Reset Starting Fuel Speed Ramping Run Crank Speed Gain Stability Idle Droop Test ON OFF ON Autuator Pic up Battery Idle Speed Trim Droop OFF GHANA CONTROL MADE ...

Страница 113: ...recommended in series with terminal F the positive battery input terminal z The magnetic speed sensor leads must be twisted and or shielded for their entire length If shielded cables are used connect all the shields to terminal D only The shield should be insulated to insure no other part of the shield comes in contact with engine ground otherwise stray speed signals may be introduced to the speed...

Страница 114: ...no load the following governor performance adjustment can be made 1 At no load turn the gain control CW until instability results Then back off slightly CCW 1 8 turn beyond the point where stability returns 2 Turn the stability control CW until instability results Then back off slightly CCW 1 8 turn beyond the point where stability returns Excellent performance should result from these adjustments...

Страница 115: ...g from idle speed to rated speed z Idle speed setting If the IDLE speed setting was not adjusted as detailed in Starting Fuel Adjustment section then place the optional external selector switch in the IDLE position The idle speed set point is increased by clockwise rotation of the IDLE adjustment control When the engine is at idle speed the speed control unit applies droop to the governor system t...

Страница 116: ...tilized to provide power to DWC 2000 governor system accessories Up to 20ma of current can be drawn from this supply Ground reference is Terminal G Caution a short circuit on this terminal can damage the speed control unit z Wide range remote variable speed operation Simple and effective remote variable speed can be obtained with the DWC 2000 Series control unit A single remote speed adjustment po...

Страница 117: ...m troubleshooting z System Inoperative If the engine governing system does not function the fault may be determined by performing the voltage tests described in steps 1 2 3 and 4 and refer to meter polarity Should normal values be indicated as a result of following the trouble shooting steps the fault may be with the actuator or the wiring to the actuator See the actuator publication for testing d...

Страница 118: ...n errorneous speed signal Check speed sensor data Manually hold the engine at the desired running speed Measure the DC voltage between terminals A F on the speed control unit 1 If the voltage reading is 4 0 to 6 0 VDC a SPEED adjustment set above desired speed b Defective speed control unit 2 If the voltage reading is above 6 0 VDC a Actuator or linkage binding 3 If the voltage reading is below 4 ...

Страница 119: ...ystem The PERIODIC type can be further classified as fast or slow instability Fast instability is a 3 Hz or faster irregularity of the speed and is usually a jitter Slow periodic instability is below 3 Hz can be very slow and is sometimes violent If fast instability occurs this is typically the governor responding to engine firings Raising the engine speed increases the frequency of instability an...

Страница 120: ...102 6070 0 433 171 169 4 Injection pipe 65 10301 6053A 65 10301 6054A 5 Injection order 1 5 7 2 6 3 4 8 A Test condition for injection pump Nozzle holder ass y 1 688 901 105 Opening pressure 208 5 1 5 bar Injection pipe ID OD L 3 0 8 0 600 mm Test oil ISO4113 Temperature 40 5 C B Engine standard parts Nozzle holder ass y 65 10101 7051 Nozzle 4 0 40 285 kg cm2 Injection pipe ID OD L 65 10301 6053 6...

Страница 121: ...70 0 433 171 169 4 Injection pipe 65 10301 6055B 65 10301 6056B 5 Injection order 1 6 5 10 2 7 3 8 4 9 A Test condition for injection pump Nozzle holder ass y 1 688 901 105 Opening pressure 208 5 1 5 bar Injection pipe ID OD L 3 0 8 0 600 mm Test oil ISO4113 Temperature 40 5 C B Engine standard parts Nozzle holder ass y 65 10101 7051 Nozzle 4 0 40 285 kg cm2 Injection pipe ID OD L 65 10301 6055 65...

Страница 122: ... 0 433 171 169 4 Injection pipe 65 10301 6113 65 10301 6114A 5 Injection order 1 12 5 8 3 10 6 7 2 11 4 9 A Test condition for injection pump Nozzle holder ass y 1 688 901 105 Opening pressure 208 5 1 5 bar Injection pipe ID OD L 3 0 8 0 600 mm Test oil ISO4113 Temperature 40 5 C B Engine standard parts Nozzle holder ass y 65 10101 7051 Nozzle 5 0 26 285 kg cm2 Injection pipe ID OD L 65 10301 6057...

Страница 123: ... Refer to 3 Rack Diagram Check Point Rack position mm Pump Speed rpm Injection Q ty on RIG mm3 1 000st Press mmHg A Test condition for inj Pump B Engine standard parts V1 12 00 0 05 1 050 266 0 3 0 Max power 1 500 V2 12 00 0 10 800 266 0 3 0 1 500 VS 8 96 0 20 500 159 8 1 0 0 LQ 6 15 0 20 350 53 7 15 0 Only 2 3 4 8 0 A3 7 10 0 50 1 150 109 4 15 0 Only 2 3 4 8 0 ST with Cap 100 127 5 10 0 Only 2 3 ...

Страница 124: ...ram 7 Boost compensator pressure EH5OM007 0 2 4 6 8 10 12 14 0 200 400 600 800 1000 1200 1400 A3 VS LQ V2 V1 Engine speed rpm Rack position mm 4 6 8 10 12 14 0 200 400 600 800 1000 1200 1400 Boost pressure mmHg P1 P4 P3 P2 EH5OM008 Rack position mm ...

Страница 125: ...ach point Refer to 3 Rack Diagram Check Point Rack position mm Pump Speed rpm Injection Q ty on RIG mm3 1 000st Press mmHg A Test condition for inj Pump B Engine standard parts V1 11 55 0 05 1 050 243 0 3 0 Max power 1 500 V2 11 55 0 10 800 240 4 3 0 1 500 VS 8 96 0 20 500 159 8 1 0 0 LQ 6 15 0 20 350 53 7 15 0 Only 2 3 4 8 0 A3 7 10 0 50 1 150 109 4 15 0 Only 2 3 4 8 0 ST with Cap 100 127 5 10 0 ...

Страница 126: ...k diagram 7 Boost compensator pressure EH5OM009 Engine speed rpm Rack position mm 0 2 4 6 8 10 12 0 200 400 600 800 1000 1200 1400 V2 V1 VS LQ A3 Boost pressure mmHg EH5OM010 Rack position mm 4 6 8 10 12 0 200 400 600 800 1000 1200 P3 P1 P2 P4 ...

Страница 127: ...t each point Refer to 3 Rack Diagram Check Point Rack position mm Pump Speed rpm Injection Q ty on RIG mm3 1 000st Press mmHg A Test condition for inj Pump B Engine standard parts V1 12 00 0 05 1 050 266 0 3 0 Max power 1 500 V2 12 00 0 10 800 266 0 3 0 1 500 VS 8 96 0 20 500 159 8 1 0 0 LQ 6 15 0 20 350 53 7 15 0 Only 2 3 4 8 0 A3 7 10 0 50 1 150 109 4 15 0 Only 2 3 4 8 0 ST with Cap 100 127 5 10...

Страница 128: ...ram 7 Boost compensator pressure EH5OM011 Engine speed rpm Rack position mm 0 2 4 6 8 10 12 14 0 200 400 600 800 1000 1200 1400 A3 VS LQ V2 V1 EH5OM012 Boost pressure mmHg Rack position mm 4 6 8 10 12 14 0 200 400 600 800 1000 1200 1400 P1 P4 P3 P2 ...

Страница 129: ...n chamber heat goes on to the thermostat through the water pipe and circulates to the water pump if water temperature is lower than the valve opening temperature on the thermostat while circulating to the radiator at water temperature higher than the valve opening temperature At the radiator the heat absorbed in the coolant is radiated to cool down and the coolant recirculates to the water pump z ...

Страница 130: ... radiator NOTE There are 2 kinds of thermostats according to surrounding and operating conditions One is named by 71 C type and the other is 79 C z Inspecting 1 Check the wax pallet and spring for damage 2 Put the thermostat in a container of water then heat the water slowly and check temperature with a thermometer If the valve lift is 0 1 mm starting to open at temperature of 71 C and 8 mm or mor...

Страница 131: ...n belt z Fan belt fouled with oil z Replace fan belt z Thermostat inoperative z Replace thermostat z Water pump defective z Repair or replace z Restrictions in water passages due to deposit of scales z Clean radiator and water passages z Injection timing incorrect z Adjust injection timing correctly z Restriction in radiator core z Clean exterior of radiator z Gases leaking into water jacket due t...

Страница 132: ... Item Specifications Item Specifications Lubricating system Forced pressure circulation Oil filter type Full flow Oil pump type Gear type Bypass for filter element Relief valve opening pressure 8 5 10 kg cm2 Valve opening pressure 2 1 0 3 kg cm2 Adjusting valve for spray nozzle Bypass for entire oil filter Opening pressure 1 6 1 9 kg cm2 Valve opening pressure 4 5 0 2 kg cm2 EC8OM006 By pass valve...

Страница 133: ...r worn z Replace cylinder liner z Piston rings sticking z Replace pistons and or piston rings z Valve guide oil seals or valve guides or valve stem worn z Replace 2 Oil pressure too low z Poor oil z Use suggested oil z Relief valve sticking z Replace z Restrictions in oil pump strainer z Clean strainer z Oil pump gear worn z Replace z Oil pump feed pipe cracked z Replace z Oil pump defective z Cor...

Страница 134: ...antity m3 sec 0 26 0 32 0 40 Compression Efficiency 75 5 75 0 77 5 Compression Ratio 3 00 2 80 2 90 Generator Engine PU158TI PU180TI PU222TI Turbocharger Model Allied Signal T04E Allied Signal T45 Allied Signal TV51 Rated Revolution rpm 111 800 92 200 82 000 Intake Air Quantity m3 sec 0 26 0 32 0 40 Compression Efficiency 75 5 75 0 77 5 Compression Ratio 3 00 2 80 2 90 1 Impeller casing A Air inle...

Страница 135: ...rust bush 16 Thrust bearing 3 Oil shut off 17 Journal bearing 4 Fixing nut 18 Screw 5 Seal ring 19 Screw 6 Seal ring 21 Heat dissipator 7 Seal ring 22 Compressor housing 8 Compressor wing wheel 23 Clamp 9 Turbine housing 24 Bolt 10 Bolt 27 Liquid gasket 11 Clamp 30 Loctite 13 Bearing housing 31 Liquid anti burn agents 14 Retainer ring 22 23 24 15 19 14 18 16 17 13 21 11 10 27 30 31 7 4 8 6 2 5 9 1...

Страница 136: ... order not to influence a bad effect at bearing part there are the seal ring and heat dissipator 2 Compressor It is connected to the same shaft with the turbine to make a revolving assembly and receive the revolving force of turbine and sends air to the suction manifold by suctioning and compressing it This is called as the compressor 3 Bearing z Thrust bearing force is applied to the turbine whee...

Страница 137: ...they are liable to cause overheating of the engine When operating in highly dust or oil laden atmospheres cleaning of the air impeller may be necessary from time to time To do this remove compressor casing Caution Do not skew it and clean in non acid solvent if necessary using a plastic scraper If the air compressor should be badly fouled it is recommended that the wheel be allowed to soak in a ve...

Страница 138: ...rting 1 Perform idling operation for about 5 min immediately after engine starting 1 Sudden load at time soon after engine starting and at the state when turbocharger did not yet reach to smooth revolution if abrupt load is applied to engine some parts where oil did still not reach may cause a burn to be stuck 2 Various inspections must insure that there are no leakage of oil gas and air 2 If ther...

Страница 139: ...nd turbocharger etc for the super charging effect will be lowered the installed states of various parts must be paid with careful attention Since the parts that reach to high temperature during operation such as the turbine room use the anti heat nuts a care must be paid not to mix with the general nuts and at the same time bolt stuck preventing paint should be coated on the nut for the designated...

Страница 140: ...he turbocharger 2 End play inspecting points of rotor Disassemble the turbocharger from the engine and should inspect the end plays in axial and circumference direction In case of disassembling the turbocharger the oil inlet and outlet should necessarily be sealed with a tape a Axial direction end play z Wear limit 0 20 mm b Rotor s circumference direction end play z Wear limit 0 65 mm c In case t...

Страница 141: ...ft with hand lubricate journal and thrust bearing z Clean the pipe and oil outlet pipe between engine and oil inlet and confirm if there is any pipe damage or foreign material z In order for oil not to leak from various connections assemble securely b Air intake system z Confirm if there is any foreign material inside the air intake system z Assemble securely the air intake duct and air cleaner so...

Страница 142: ...ir 2 White smoke excessive 1 Oil leaks into turbine and compressor Overhaul and repair or replace 2 Seal ring s abnormal wear or damage Overhaul and repair or replace 3 Output lowered 1 Gas leak from various parts of exhaust system Inspect and repair 2 Air cleaner s elements clogged Replace or clean 3 Turbocharger s pollution or damage Overhaul and repair or replace 4 Air leaks from discharge part...

Страница 143: ...of flywheel housing flange The surface error should not exceed 0 2 mm 2 Measuring bore of flywheel Housing Attach the gauge as above so that the gauge stem may contact the flywheel housing bore as the right figure Measure the eccentrics of flywheel housing bore by rotating the flywheel The eccentrics should not exceed 0 2 mm 3 Measuring deformation of flywheel installing surface Fix the dial gauge...

Страница 144: ...center perfectly and accurately requires only few minutes it is able to prevent unnecessary mechanical trouble at the future 1 Bed rail At the installation of Generator set s bed rail use steel If the bed rail is strong enough the center alignment of engine with Generator gets worse so that the excessive vibration may occur 2 Supporting As in the engine installation the supporting brackets are use...

Страница 145: ...ld be checked after 1 2 months 5 5 3 Installing fuel system Oil purifier should be installed between fuel tank and engine For tank is always surrounded with humidity water part often Infiltrates into fuel and then engine to result in the nozzle stuck and engine efficiency drop etc z Example of fuel system installation The position of fuel tank should be high than the engine fuel pump but when it i...

Страница 146: ...egister Where the filter is installed horizontally watch for top mark on cleaner bowl 5 6 2 Changing filter element CAUTION Do not allow dirt to get into the clean air end z On removing the hexagon nut take out the dirty cartridge and renew or clean z Wipe the cleaner housing with a damp cloth in particular the sealing surface for the element NOTE Unless the maximum number of cleanings up to 5 x h...

Страница 147: ...e The cartridge must be dry before it is reinstalled Never use steam sprayers petrol gasoline alkalis or hot liquids etc to clean the filter elements z Knocking out dirt by hand In emergencies when no compressed air or cleaning agent is available it is possible to clean the filter cartridge provisionally by hitting the end disk of the cartridge with the ball of one s thumb Under no circumstances s...

Страница 148: ...cylinder head bolts to be retightened must not be loosened first but simply tightened by a further 90 1 4 revolution from their actual position 2 Tightening cylinder head bolts after a repair by authorized specialist personnel engine cold Before inserting the cylinder head bolts oil them with engine oil on the thread not to the bore and coat the contact face of the bolt head with Optimoly White T ...

Страница 149: ...ot be loosened first but simply tightened by a further 90 1 4 revolution from their actual position Attach the sticker First retightening of cylinder head bolts Remove any other stickers which may already be attached After the first 400 hours of operation after a repair tighten cylinder head bolts 1 to 4 in the order shown in above figure 1 Retightening cylinder head bolts on new engines again by ...

Страница 150: ...cise check of the V belt tension is possible only by using a V belt tension tester 4 Measuring tension Lower indicator arm 1 into the scale z Apply tester to belt at a point midway between two pulleys so that edge of contact surface 2 is flush with the V belt z Slowly depress pad 3 until the spring can be heard to disengage This will cause the indicator to move upwards If pressure is maintained af...

Страница 151: ...tension pulley inwards by turning adjusting bolt 3 z Remove fixing bolts z Remove lock nut z Adjust nut until V belts have correct tensions z Retighten lock nut and fixing bolts To replace the V belts loosen lock nut and swing alternator inwards Type Drive belt width Tensioning forces on the tester new installation When servicing after long running time Installation After 10 min running time M 9 5...

Страница 152: ...029 Oil seal insert Assembly RR 2 EF 120 183 Valve stern oil seal installer 3 EI 00308 0084 Nozzle holder extractor 4 EU 2 0532 Compression gauge adapter 5 EI 03004 0225 Nozzle plug socket 6 EF 120 189 Injection pump alignment 7 EF 120 031 Piston sleeve 8 EF 120 028 Liner assembly ...

Страница 153: ...ton ring plier 10 60 99901 0027 Feeler gauge 11 T7610001E Snap ring plier 12 EF 123 065 Valve cotter extractor 13 EF 120 069 F W H Pin installer 14 E1 05508 0815 CRS Wear ring installer 15 EF 120 032 Can gear sub jig 16 EF 120 030 Oil seal insert assembly FR 2 3 4 1 ...

Страница 154: ...ylinder head Cylinder head cover Fuel injection nozzle holder Fuel injection pipe M15 2 M8 M28 M14 1 5 12 9 8 8 CK60 8 kg m 15 kg m angle 90 angle 90 2 2 7 0 5 2 5 Cam shaft timer Rocker arm bracket Lock nut adjusting screw M10 M10 M12 1 10 9 10 9 8 8 9 6 5 5 Oil pump cover Oil pump Oil cooler Oil pan Oil pan plug M8 M8 M12 M8 M26 1 5 8 8 8 8 10 9 8 8 2 2 2 2 5 2 2 8 Exhaust manifold Intake manifo...

Страница 155: ... 0 30 0 45 0 4 0 55 0 47 0 77 0 85 0 9 1 25 0 5 M7 0 43 0 46 0 7 0 63 0 83 0 78 1 2 1 3 1 4 1 95 2 35 M8 0 7 0 75 1 1 1 1 4 1 25 1 9 2 1 2 2 3 1 3 8 M8 1 0 73 0 8 1 2 1 1 1 5 1 34 2 1 2 3 2 4 3 35 4 1 M10 1 35 1 4 2 2 1 9 2 7 2 35 3 7 4 2 4 4 6 2 7 4 M10 1 1 5 1 6 2 5 2 1 3 1 2 8 4 3 4 9 5 7 8 4 M12 2 4 2 5 3 7 3 3 4 7 4 2 6 3 7 2 7 5 10 5 12 5 M12 1 5 2 55 2 7 4 3 5 5 4 6 6 8 7 7 8 11 2 13 4 M14 ...

Страница 156: ...2 144 457 153 65 153 75 10 03 10 05 0 014 0 099 0 043 0 108 0 150 0 500 127 990 128 010 0 01 0 015 0 04 0 08 145 8 g6 144 5 f6 153 8 128 0 01 from top up to 168 mm from bottom up to 85 mm measure at 4 place Piston Outside diameter of piston Inside diameter of piston pin Max allowable weight per engine 1st ring groove width 2nd ring groove width Oil ring home width 127 739 127 757 46 003 46 009 50 ...

Страница 157: ... 0 005 0 02 35 5 C8 32 8 0 3 50 6 H7 95H6 reference to con rod side face Crank shaft Bearing housing diameter Maximum shaking Main bearing journal diameter Standard Undersize 0 10 Undersize 0 25 Undersize 0 50 Undersize 0 75 Undersize 1 00 Thrust bearing journal width Standard Undersize 1 2 Undersize 3 4 Con rod bearing journal diameter Standard Undersize 0 10 Undersize 0 25 Undersize 0 50 Undersi...

Страница 158: ...r head height Cylinder head seal surface roughness Valve projecting amount Exhaust valve Stem diameter Radius direction clearance Seat angle Head diameter H thickness of valve head Valve seat part diameter of head Outside diameter of valve seat Intake valve Stem diameter Radius direction clearance Seat angle Head diameter H thickness of valve head Valve seat part diameter of head Outside dia of va...

Страница 159: ...120 0 20 0 90 0 118 0 242 0 102 0 338 0 3 0 4 when assembled 20 H7 70 e7 Engine lubricating system Oil pressure at idling Oil pressure at rated speed operation Oil temperature Instantaneous allowable temperature Bypass valve opening pressure Pressure regulating valve of oil pump Spray nozzle Operating pressure Crossing pressure Tip diameter Backlash crankshaft gear oil pump drive gear Oil pump hou...

Страница 160: ...Appendix 157 1 P158LE Generator engine assembly EH5OM013 ...

Страница 161: ...Appendix 158 2 P180LE Generator engine assembly EH5OM014 ...

Страница 162: ...Appendix 159 3 P222LE Generator engine assembly EH5OM015 ...

Страница 163: ...Appendix 160 4 PU158TI Power unit engine assembly EH5OM016 ...

Страница 164: ...Appendix 161 5 PU180TI Power unit engine assembly EH5OM017 ...

Страница 165: ...Appendix 162 6 PU222TI Power unit engine assembly EH5OM018 ...

Отзывы: