Torit PowerCore, CPV-1 to CPV-12
22
Damper Only (CPV-1)
Side Mount
1. Attach the damper to the fan exhaust outlet using the
hardware supplied.
2. Loosen the wing nut on the damper and adjust from
30 to 50% closed.
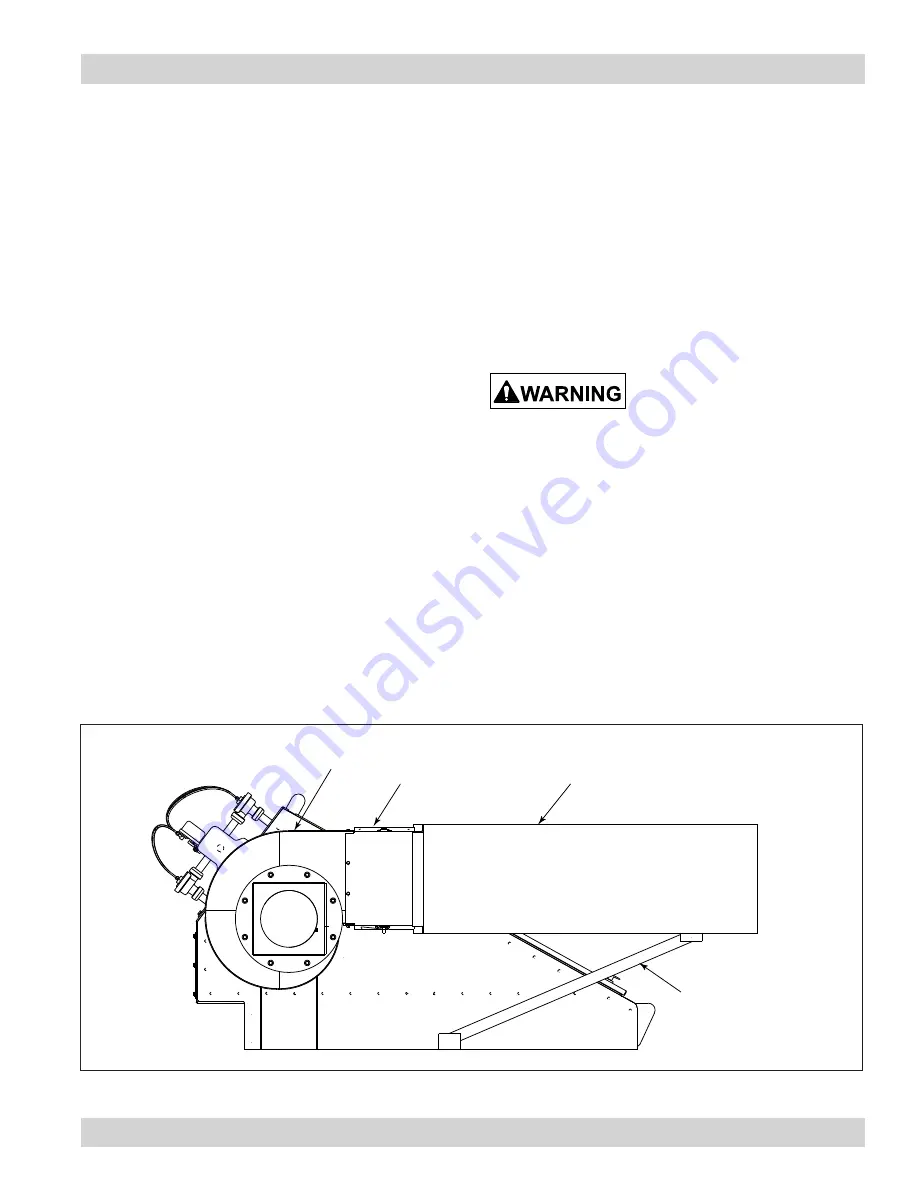
Damper and Silencer, TBI
Side Mount
1. Install the power pack as described in the previous
section.
2. Attach the damper to the fan exhaust outlet using the
hardware supplied.
3. Attach the flange to the damper using the bolts,
washers, and hex nuts supplied.
4. Apply sealant to the flange and attach silencer to
flange. Tighten all hardware.
5. Loosely assemble the silencer’s support brackets.
a. Align the support bracket to the underside of the
silencer, flush with the cabinet wall and mark the
drill locations.
b. Drill pilot holes with a 0.339-in bit.
c. Secure brackets using 3/8-in thread-forming
bolts.
6. Loosen the wing nut on the damper and adjust from
30 to 50% closed.
Cold Climate Kit
Electrical service or
maintenance work during
installation must be performed by a qualified
electrician and comply with all applicable
national and local codes.
Turn power off and lock out electrical
power sources before performing service or
maintenance work.
A cold climate kit provides heat to the pulse valves to
prevent cold weather freeze up. The basic kit, for use in
applications that have a moderate amount of moisture
in the compressed-air supply, consists of a small
heating element and thermostat installed in the solenoid
enclosure. The basic kit is factory-installed and supplied
with the appropriate solenoid wiring instructions.
damper
exhaust silencer
power pack
support bracket
Side Mount Silencer and Damper Installation
Содержание PowerCore CPV-1
Страница 29: ...Torit PowerCore CPV 1 to CPV 12 26 Service Notes Date Service Performed Notes...
Страница 30: ...27 Donaldson Company Inc Service Notes Date Service Performed Notes...
Страница 31: ......


