background image

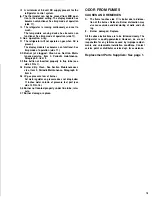
if. A minimum of 9.6 volt DC supply present for the

refrlgerator control system.

lg. The thermostat can not be moved from MID posi-

tion to the desired setting. The display module has

became nonfunctional. See limp mode of operation

(side 11).

1 h. The refrigerator is running continuously and cool to

much.

The temperature sensing device has became non

functional. See limp mode of operation (side 11).

2. Gas operation only.

2.1 The refrigerator will not operate on gas when AC is

present.

The display module has became non functional. See

limp mode of operation (side 11).

2.2 Burner jet clogged. Clean see Section Main-

tenance/service, item 2. Periodic maintenance,

Paragraph E. item 9.

2.3 flue baffle not inserted properly in flue tube (see

side 3 FIG. 1).

2.4 Burner dirty. Clean. See Section Maintenance/ser-

vice, item 2. Periodic Maintenance, Paragraph E.

item 8.

2.5 LP gas pressure low at burner.

Set main regulator so pressure does not drop below

11 inches water column at pressure test port (see

side 13 FIG. 16).

2.6 Burner not located properly under flue tube, relo-

cate.

2.7 Burner damage, replace.

ODOR FROM FUMES

CAUSES AND REMEDIES

A. The flame touches side 

of

 the

 boiler due to disloca-

tion of the burner. Relocate. Burner dislocation may

also cause smoke and discoloring of walls and ceil-

ing.

B. Burner damaged. Replace.

All the above instructions are to be followed closely. The

refrigerator is quality-guaranteed. However, we are not

responsible for any failures caused by improper adjust-

ments and unfavorable installation conditions. Contact

service point or distributor service dept. for assistance.

Replacement Parts Suppliers: See page 1.


15

Содержание Silhouette S1521

Страница 1: ...installation adjustment alteration service or maintenance can cause injury or property damage Refer to this manual For assistance or additional information consult a qualified installer service agenc...

Страница 2: ...AUTO Mode Indicator Lamp E CHECK Indicator Lamp GAS Mode Only F Temperature indicator Lamps PROTECTION PLATE FIG 2 F LEGEND 3 WAY AMES Model 1 Main Power Button ON OFF 2 DC Mode Selector Button 3 AUT...

Страница 3: ...on An opening toward the out side at floor level in the refrigerator compartment must be provided for ventilation of heavier than air fuel gases The lower vent of the recommended kiis is provided with...

Страница 4: ...alled must be sealed Make sure that there is a complete seal between the front frame of the refrigerator and the top sides and bottom of the enclosure A length of sealing strip is applied to the rear...

Страница 5: ...ondenser and absorber tubes see FIG 6 must receive a continual supply of cooler air in order to main tain proper refrigerator cooling A recommended 0 clearance between the back of the refrigerator and...

Страница 6: ...3 Bend the panel gently so that the free side of the panel can be slipped into the corresponding groove of the door frame 4 Slide the panel down into the groove of the bottom frame 5 Between the upper...

Страница 7: ...be leveled only so it is comfortable to live in no noticeable sloping of floor or walls When the vehicle is moving the leveling is not critical as the rolling and pitching movment of the vehicle will...

Страница 8: ...TO SHUT OFF THE REFRIGERATOR The refrigerator may be shut off while in any mode of operation by pressing the main power ON OFF button to the UP OFF position This shuts off all DC power to the refriger...

Страница 9: ...mode indicator lamp A will be illuminated All other mode lamps will be off The DC mode overrides all other operating modes If one of the other operating modes is desired the DC selector button 2 must...

Страница 10: ...thermostat is set at its highest position It is a good idea to do this a few hours before the an ticipated need for ice but be sure to move back to nor mal setting usually about mid setting when the...

Страница 11: ...and the 12 volt wires 2 Remove the power module cover See FIG 1 3 Snap the fuse out of the fuse holder 4 Fit a new fuse in to the fuse holder 5 Replace the power module cover 1 2 A MAINTENANCE SERVICE...

Страница 12: ...th a brush Blow out bumerwith compressed air Before removing burner jet clean burner area of soot and scale that fell out of flue tube Remove the burner jet Soak the jet in wood alcohol and blow it ou...

Страница 13: ...flue tube see side 3 FIG 1 2 4 Burner dirty Clean See Section Maintenance ser vice item 2 Periodic Maintenance Paragraph E item 8 2 5 LP gas pressure low at burner Set main regulator so pressure does...

Страница 14: ......

Отзывы: