37
EN
Frigo DC
Installation of stationary cooling (optional)
10.2
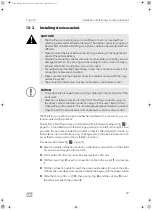
Installing device socket
!
A
The MiniPlug connection plug can either be installed with a nut and ring or sur-
face-mounted with a bracket.
Normally the MiniPlug contact is installed with the lid hinge overhead (fig.
page 15). An installation with the lid hinge pointing to the left or the right is also
possible. It is possible to install the contact so that it is tilted slightly forwards, so
that water can run out of the housing. The keyway must then be produced in such
a way that it corresponds to the installation position.
➤
Select a suitable installation position on the driver’s side which is in their field
of vision when they get in the vehicle.
➤
Drill a hole of Ø 24 mm and make a keyway that is Ø 3 mm.
➤
Pull the cover ring (
2
) over the connection cable to the socket (
1
) and secure
it.
➤
Pull the connection cable through the previously made drill hole on the vehi-
cle from the outside and secure the socket in the keyway that has been made.
➤
Slide the O-ring (30 x 3.2) (
3
), the spacing ring (
4
) and the nut ring (
5
) over
the cable and attach the socket (
1
).
CAUTION!
•
The MiniPlug connection plug is to be fitted so that it is protected from
splashing water and mechanical damage. The device connector plug must
be attached so that the MiniPlug connection cable can be inserted without
difficulty.
•
Never connect the black earth wire with ring cable lug to the negative ter-
minal of the vehicle battery.
•
Handle the connection cables with care. Lay the cables so that they are not
damaged by warm, hot, moving and sharp objects such as turbo chargers,
exhaust manifolds, cooling fans, doors or bonnets.
•
Ensure that the protective cover always covers the connection contacts if no
connection cables are connected.
•
Make sure that only the original connection cables are used with the origi-
nal device socket.
•
The connection cable must only be connected to one Schuko socket.
NOTICE!
•
Only attach the black earth wire with ring cable lug to the metal parts of the
bodywork.
•
Select an installation location for the 230 V MiniPlug connection plug on
the driver’s side so that the connection plug is in the user’s field of vision
when getting in the vehicle. This can help prevent the vehicle being moved
when the 230 V power cable is still connected to a 230 V power socket.
Frigo_DC-I-West.book Seite 37 Mittwoch, 24. Juni 2020 11:27 11
Содержание Frigo DC 2500
Страница 7: ...Frigo DC 6 9 P 1 2 3 4 76 35 56 3 28 0 Frigo_DC I West book Seite 6 Mittwoch 24 Juni 2020 11 27 11...
Страница 9: ...Frigo DC 8 A C D E F G B d Frigo_DC I West book Seite 8 Mittwoch 24 Juni 2020 11 27 11...
Страница 12: ...11 Frigo DC h 80 mm i Frigo_DC I West book Seite 11 Mittwoch 24 Juni 2020 11 27 11...
Страница 13: ...Frigo DC 12 2 1 j 2 3 1 4 k Frigo_DC I West book Seite 12 Mittwoch 24 Juni 2020 11 27 11...
Страница 14: ...13 Frigo DC Frigo DC 3500 Frigo DC 2500 l m Frigo_DC I West book Seite 13 Mittwoch 24 Juni 2020 11 27 11...
Страница 15: ...Frigo DC 14 A B n 2 3 1 o Frigo_DC I West book Seite 14 Mittwoch 24 Juni 2020 11 27 11...

