background image

6

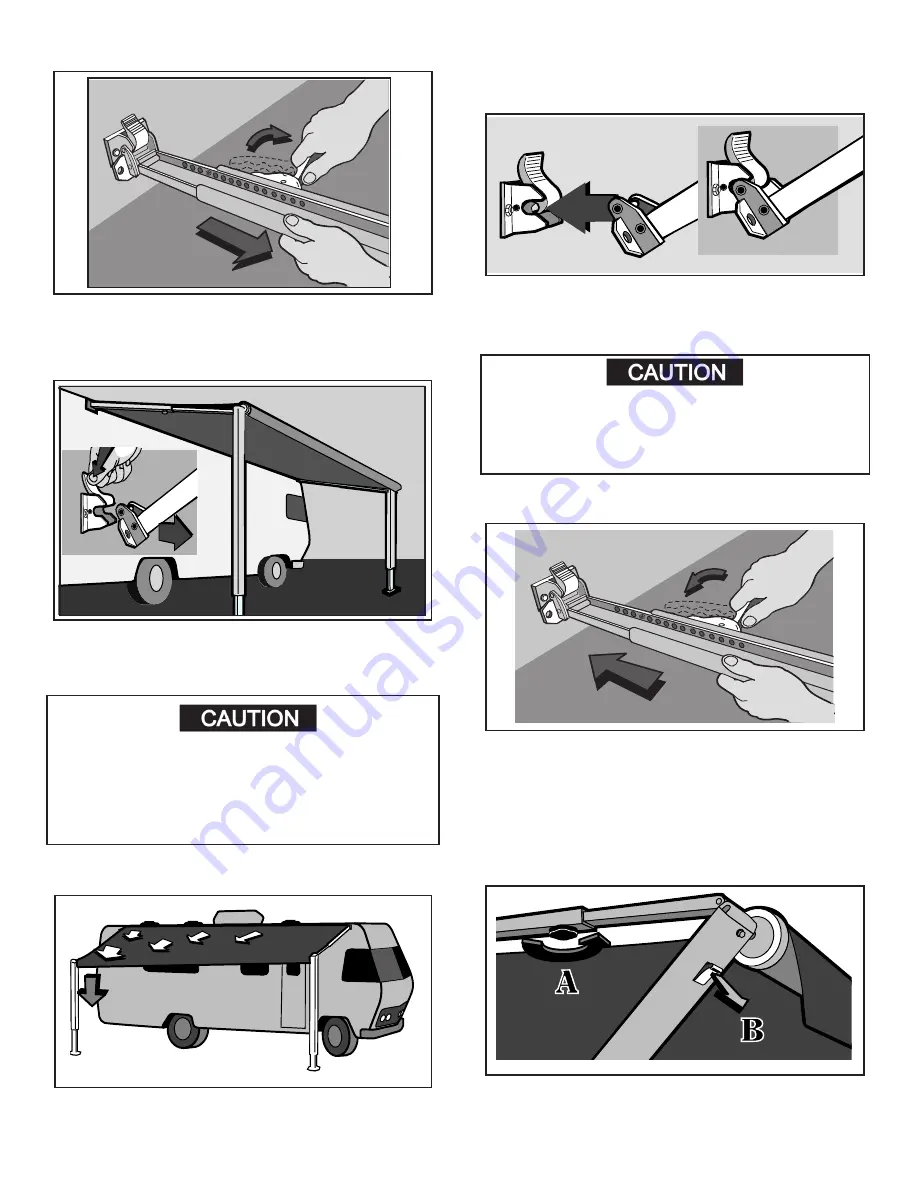
5. Height Adjustment

Pull  up  on  the  lift  handle  and  raise  to  desired  height. 
Swing  handle  down  to  lock  button  in  hole.  Repeat  for 
other side.

6. Carport Position

Lower  arm  to  shortest  position.  Press  the  release  lever  
and pull the arm away to a vertical position. Adjust height. 
Drive stakes through holes in patio foot into the ground. 
Repeat for other side.

Whenever  heavy  or  prolonged  rain  or  wind 
is  anticipated,  or  you  will  leave  the  awning 
unattended,  it  is  best  to  close  the  awning. 
Damage as a result of weather is not covered 
by warranty.

7. Rain Position

During light rain,  lower end opposite from door to shed 
water and prevent pooling.

Pull  stakes  from  the  ground,  lower  arm  to  the  shortest 
position, swing arm toward the vehicle, and snap the patio 
foot into the bracket. Repeat for other side and proceed 
to next step.

Ensure that the lock is in the “roll-down” po-

sition prior to swinging arms toward vehicle. 
failure to do so can cause damage to the lock 
mechanism.

Raise the lift handle to release the lock button.  Lower main 
arm to the stop plug.  Swing the handle down to engage 
the lock button in a hole.  Repeat for other side.

1. from Patio Position

2. Lower Arms To Stop Bolts

3. Loosen knob and release slider

1.2 TO CLOSE 

Содержание A&E Systems Sunchaser

Страница 1: ...34 007 2007 Dometic Corporation LaGrange IN 46761 A E SUNCHASER 8500 9000 Patio Awnings USA SERVICE OFFICE Dometic Corporation 2320 Industrial Parkway Elkhart IN 46516 574 294 2511 CANADA Dometic Dist...

Страница 2: ...e or reduce the risk of accidents and injuries Recognize Safety Information This is the safety alert symbol When you see this symbol in this manual be alert to the potential for personal injury Follow...

Страница 3: ...rm Assembly 8 2 5 Top Mounting Bracket 9 2 6 Bottom Mounting Bracket 9 2 7 Stop Plug 10 2 8 Rafters 10 Section 3 Fabric Roller Tube Assembly FRTA 3 1 Fabric 10 3 1 1 Position 10 3 1 2 Tek Screws 10 3...

Страница 4: ...Sidewall 3 1 4 4 2 11 17 5 Fabric does not hang well Tek Screws Tube Deflection Sidewall Out of square Stitches Seams 3 1 2 3 3 4 2 3 1 3 3 1 5 3 1 4 10 17 17 11 11 11 6 Must lift arm s to open awnin...

Страница 5: ...an cause damage to the lock mechanism 3 Extend FRTA Hook the rod in loop and pull all the way out 3 4 Extend and Secure Rafters Slide one rafter arm up until it snaps into place Pull down and out on t...

Страница 6: ...r is not covered by warranty 7 Rain Position During light rain lower end opposite from door to shed water and prevent pooling Pull stakes from the ground lower arm to the shortest position swing arm t...

Страница 7: ...is mixture then roll it up and let stand for five minutes Rolling up the awning will apply the mixture to the underside of the fabric Unroll the awning and hose off the top and bot tom with clean wate...

Страница 8: ...the new lift handle assembly Hardware Components Top Mounting Bracket Main Rafter Knob With Nut Secondary Rafter Slider Main Support Arm Slider Catch Travel Lock Lift Lock Handle Adjustable Arm Botto...

Страница 9: ...s Top Mounting Bracket should mount on the A E hardware going back to late 1980 All brack ets have slotted holes for the mounting screws allowing them to be adjusted side to side for proper alignment...

Страница 10: ...The 8300 and 8500 is a vinyl nylon reenforced fabric Abrasion and harsh weather are vinyl s worst enemies To avoid abrasion you will need to keep your awning fabric clean Use a mixture of 1 4 cup dish...

Страница 11: ...ould be sealed with seam sealer available at sporting goods stores This will stop the water from running down the inside of the roller tube For the woven acrylic fabric of the 9000 9500 Series aw ning...

Страница 12: ...g carefully out of the main sup port arm Slowly let the torsion spring unwind completely Repeat Steps 1 2 for the opposite end NOTE If the awning s right hand torsion assembly has been pinned the cott...

Страница 13: ...On newer units the guard is held to the fabric with a set screw at the ends of the channel remove the set screws and slide the guard off the fabric Note Some 9000 model awning secured the fabric to th...

Страница 14: ...proper location Models 8500 and 9000 19 25 have been manufac tured with both standard and heavy duty torsion springs Before reinstalling the torsion properly identify Standard or Heavy Duty the spring...

Страница 15: ...15 Current guards have a set screw in the channel Reinstall the set screw to keep fabric from shifting...

Страница 16: ...11 13 FT 6 12 14 FT 6 12 15 FT 7 13 16 FT 7 13 17 FT 9 15 18 FT 9 15 19 FT 10 16 20 FT 10 16 21 FT ABOVE 10 16 S TORSION WINDING FOR SMALL STABILIZER 8300 AWNING LENGTH TURNS UP TURNS OPEN 8 FT 8 14 9...

Страница 17: ...d off may be needed for proper operation and keep the roller tube from hitting the rail Part number 3109623 003 4 2 Sidewall Before condemning the fabric for sags or wrinkles the awning rail and sidew...

Страница 18: ...appliances and components found on RVs was something that I always had a desire to create I hope this resource makes your RV repairs easier as it has mine but please be careful and follow proper safe...

Отзывы: