l
Page 47
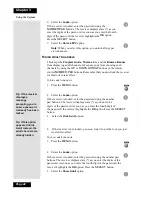
Testing the Phone Connection
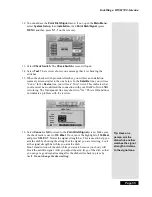
2.
Select the
System Setup
option.
3.
Select the
Alternate Audio
option.
4.
Select the language you want in the
Languages
list.
Note
:
Alternate
provides visually-impaired customers with a visual
description of the program.
5.
Select
Save
to save your language choice. The receiver displays the
System Setup
menu.
6.
Press
VIEW TV
to exit the
System Setup
menu.
T
ESTING
THE
P
HONE
C
ONNECTION
S
TARTING
A
T
EST
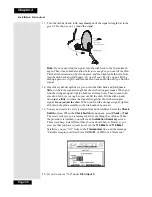
1.
Press the
MENU
button.
2.
Select the
System Setup
option.
3.
Select the
Diagnostics
option.
T
ELEPHONE
C
ONNECTION
T
EST
This test checks that the receiver telephone connection is correct. Select the
Connection
option to begin the test. The receiver displays a message
asking you to wait until the test is done.
•
If the telephone connection is correct, the receiver displays a
Phone
Connection OK
message.
•
Select the
Dial Out
option so the receiver can make a toll-free call to the
Customer Service Center. Press the
SELECT
button to start the call.
When the call is done, select the
Cancel
option to exit the test menu.
•
If the telephone line is not connected properly, the receiver displays a
failure message. Check the telephone connection and then repeat the
test.
Note
: If you have the receiver connected to a DSL (Digital Subscriber
Line) phone line, it may cause this test to fail. If so, you will need to
install a DSL filter between the receiver and the phone jack on the wall.
Tip: Before you do
the telephone test,
make sure that an
active telephone
line is connected
to the Telephone
Jack on the
receiver back
panel.
Tip: You can get a
DSL filter from
your Internet
Service Provider
or a local
electronics parts
store.
Содержание DP111
Страница 21: ...Page 16 Chapter 2 Parts of the System Notes...
Страница 75: ...Page 70 Chapter 4 Installation Instructions Notes...
Страница 104: ...Page 99 Index Notes...
Страница 105: ...Index Page 100 Notes...


