MacElite Setup Guide
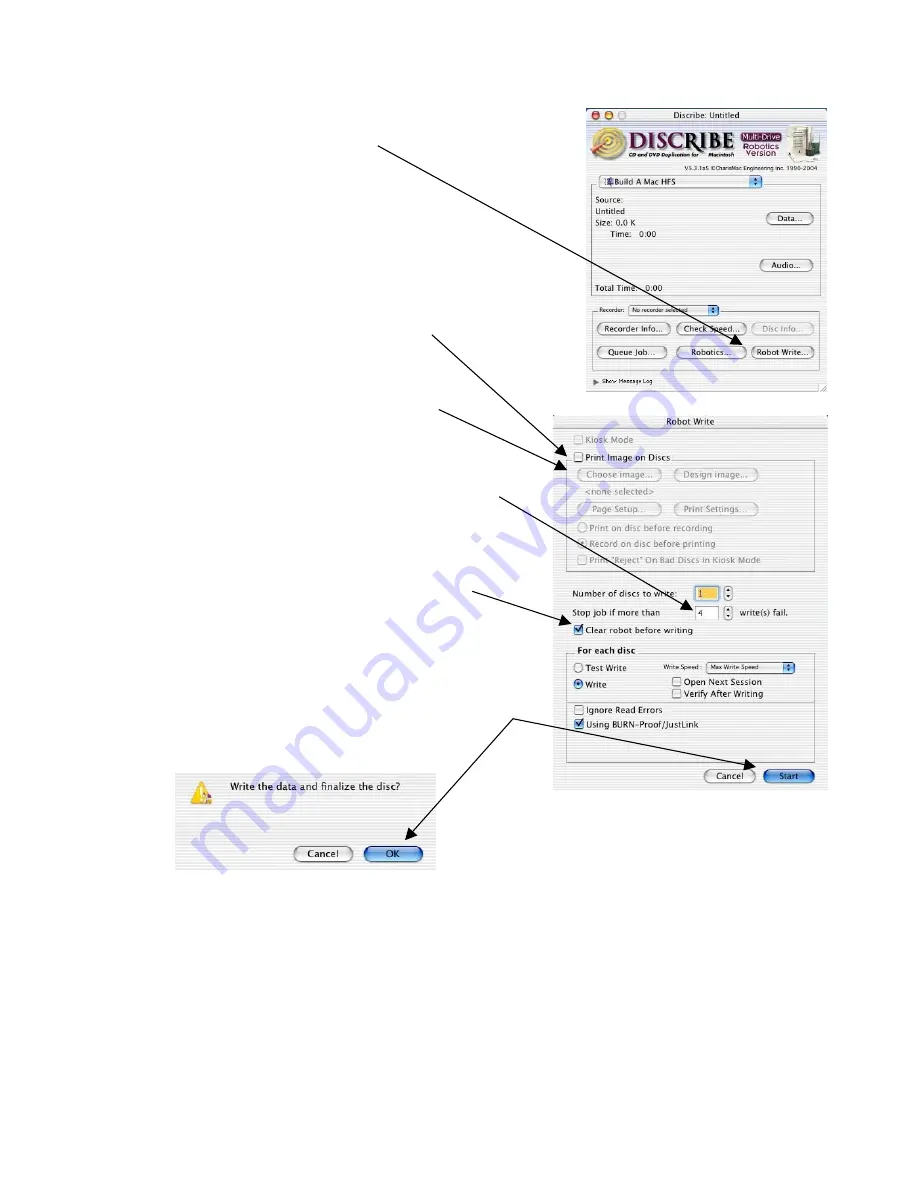
G. Click on the
Robotic Write
button.
The window shown to the lower right
will open.
H. If you have a bitmap image from Discus
to print on your CD, please follow steps
1-2 below. If you don't wish to print, skip to
step I below. For help designing your label in
Discus, please see
Using Discus to Design
CD/DVD Labels
in Step 9.
1. Place a check mark by the box labeled
Print Image on Discs
.
2. Click the button labeled
Choose image
.
Browse to your bitmap label and select it using
the
Choose
button.
I. Select the appropriate
Number of disks to write
.
J. Unchecking the “Clear robot before writing”
will stop the duplicator from physically checking
each drive for disks before the start of each job.
K. Ensure that you have enough blank media loaded in
the input spindle of the MacElite.
L. Click the
Start
button. Then click
OK
on the next
window that asks, “Write date and finalize disk?”
Sit back and enjoy as your new duplicator automatically produces the requested number of disks for
your project.
Please observe the operation and verify that everything works smoothly. If anything does not work,
back track and review your steps. If you cannot find the problem please call our toll free service line
and one of our technical support staff will gladly assist.
24


